Per Product Settings of Product Input Fields for WooCommerce Pro plugin will add Product Input Fields tab to each product’s Edit page. This setting is available on the Per Product settings page.
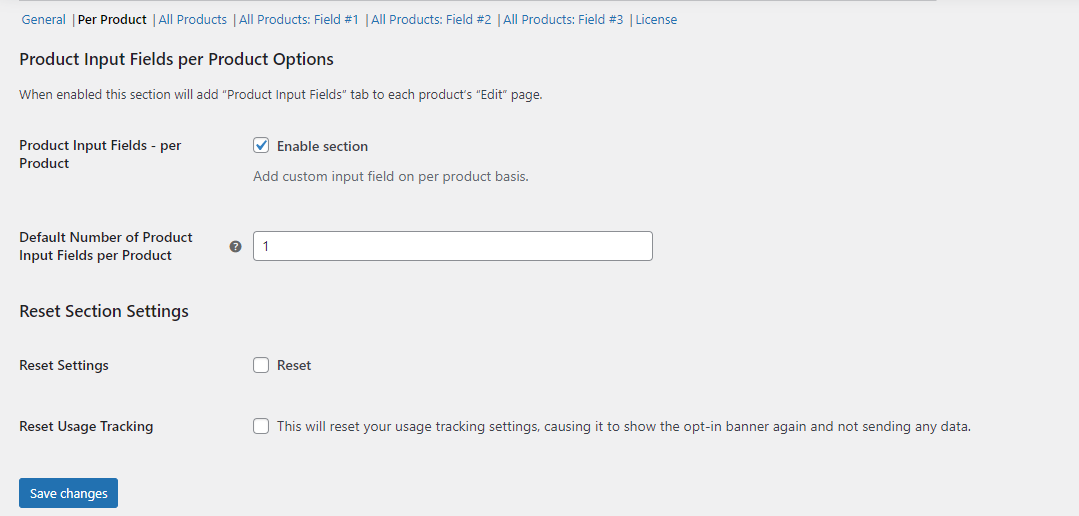
To go to the Per Product settings page, go to WooCommerce -> Settings -> Product Input fields -> Per Product link. Default Per Product page will appear as below:

Default Per Product page
This page consists of 2 sections:
- Product Input Fields per Product Options
- Reset Section Settings
Product Input Fields per Product Options
There are 2 settings under this option namely, Product Input Fields – per Product option and Default Number of Product Input Fields per Product option.
Product Input Fields – per Product
The Product Input Fields – per Product option allows you to enable Product Input Fields on each product’s Edit page. This option is enabled by default and you can add input fields for individual products.

Setting enabled
So when Enable section checkbox is ticked, a Product Input Fields Total Number meta box will be displayed on each product’s Edit page.

Product Input Fields Total Number meta box
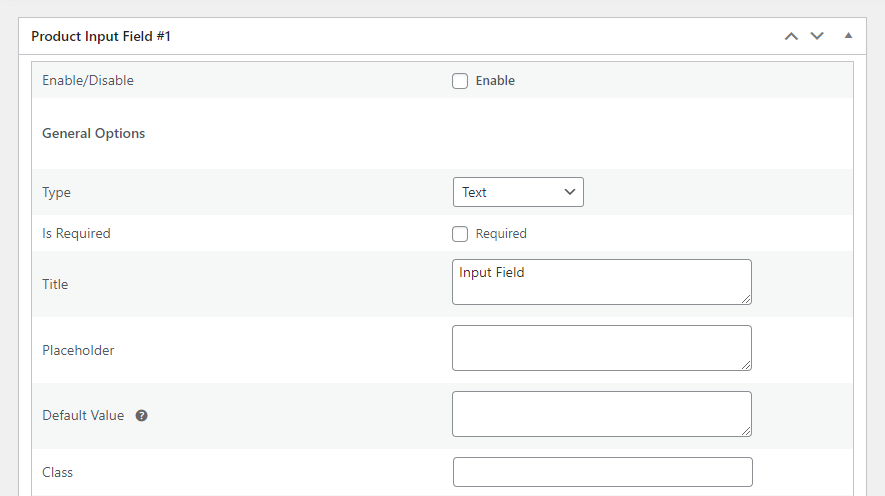
By default, Total Product Input Fields is set to 1 which means Product Input Field #1 will be added to the Edit page with all input field options. You can change this number to 2 if you want to display 2 Product Input Fields or any other number as per the requirements.


Product Input Field #1 options
These input field options will be explained in the All Products: Field #1 post in detail.
Default Number of Product Input Fields per Product
In the Default Number of Product Input Fields per Product setting, you can add the total number of Product Input Fields you want to display on each product’s Edit page. By default, this option is set to 1 which means Product Input Fields #1 will appear on the Edit page. You can change this number to any as per the business requirements.
You can also change the number of Product Input Fields per Product from the Product Input Fields Total Number meta box of the product’s Edit page. For instance, if you change the number to 2 in the meta box, Product Input Fields #1 and Product Input Fields #2 will appear on the product’s Edit page. It will display all input field options as shown in the above screenshot for both Product Input Fields.

The number changed to 2
Note – Whatever number is added to this setting will reflect the same number in the Product Input Fields Total Number metabox of the individual Edit product page.
Reset Section Settings
Reset Settings
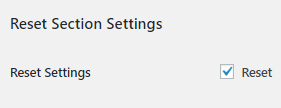
When you tick the Reset Settings checkbox, it will reset all settings on the Per Product page to their default values.

Reset Settings
This means that the Product Input Fields – per Product will be enabled. Along with it, the Default Number of Product Input Fields per Product option will be set to 1. It will have an impact on the front end as well.
For instance, say you have 2 input fields set for product Cake, Text to enter the message on the cake and File to add an image for customizing the cake. So if you reset this option, then the File input field will no longer be available on the product’s single page in the front end. Thus the customer will not have a provision to add an image for customizing the cake.
Reset Usage Tracking
When you tick the Reset Usage Tracking checkbox, it will reset your tracking settings.
![]()
Reset Usage Tracking
This means that this setting will stop sending us your plugin usage data. As a result, you will see an opt-in banner again on your site. If you wish to continue to send us your data you click on the ‘Allow’ option in the banner.