In this guide, we will walk through the process of adding a Date Field in WooCommerce Checkout Blocks page. This date field allows users to select their preferred delivery date on the checkout blocks page. In case, if you want to create a custom text field, you can refer to the detailed step-by-step explanation of our post titled ‘How to Add Custom Fields in WooCommerce Checkout Block‘.
To understand the workflow of the project, we will look into the outline of the processes involved. Before stepping into the node workflow, let’s create the plugin folder and the main plugin file containing the necessary details to create a plugin in WordPress as shown below.
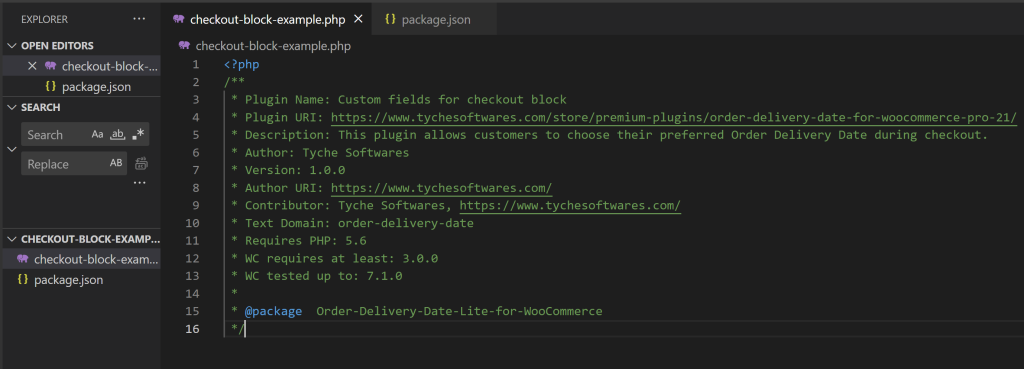
And the below image represents the entire plugin structure.
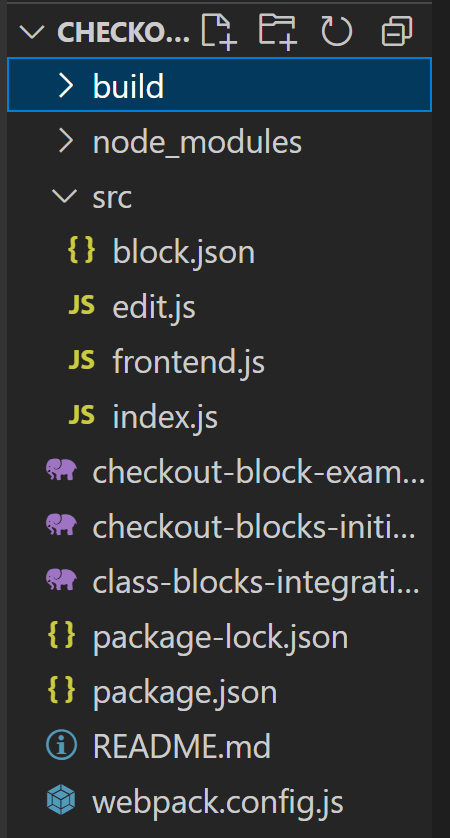
Outline steps to implement the workflow:
- Configure Node Workflow with package.json.
- Create a webpack.config.js file to bundle JavaScript files.
- Create a block.json File to define metadata for your custom block.
- Organize JavaScript Files in src Directory
- Register Scripts for Custom Block.
- Save Value to Database.
Configure Node Workflow with package.json
We are going to install all the dependencies required for the project. Follow the steps as given below.
- Open your terminal and Navigate to your plugin directory using the cd command.
- Run npm init command.
- Follow the prompts to enter basic information about your project like name, version, description, author name, etc.
- The package.json file will be created now with all the details that you entered in the terminal as shown here.
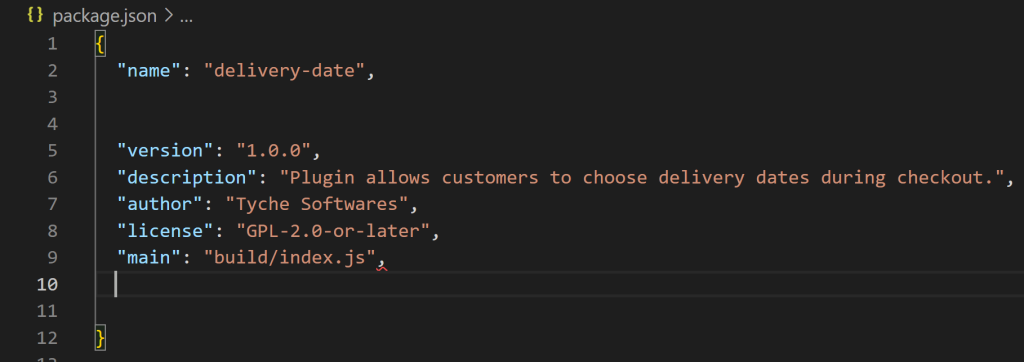
- And the below image represents the entire plugin structure. As a next step, you need to add the dependencies and the scripts required for the project. Add the dependencies and scripts from the below package.json file and run the command npm install. This command will bring the required packages from the npm registry and install them in a directory named node_modules in your project.
package.json
{
  "name": "delivery-date",
  "version": "1.0.0",
  "description": "Plugin allows customers to choose delivery dates during checkout.",
  "author": "Tyche Softwares",
  "license": "GPL-2.0-or-later",
  "main": "build/index.js",

  "devDependencies": {
      "@woocommerce/block-library": "^2.3.0",
      "@woocommerce/dependency-extraction-webpack-plugin": "^2.2.0",
      "@woocommerce/eslint-plugin": "^2.2.0",
      "@wordpress/blocks": "^12.6.0",
      "@wordpress/components": "^23.8.0",
      "@wordpress/scripts": "^26.0.0"
  }
  "scripts": {
    "build": "wp-scripts build",
    "format": "wp-scripts format",
    "lint:css": "wp-scripts lint-style",
    "lint:js": "wp-scripts lint-js",
    "packages-update": "wp-scripts packages-update",
    "plugin-zip": "wp-scripts plugin-zip",
    "start": "wp-scripts start"
}
}
Create a webpack.config.js file to bundle JavaScript files
Firstly, you need to create a file named webpack.config.js in the main directory of our plugin. This file will contain instructions for Webpack on how to bundle and process our plugin’s files. We will be importing default configurations, specifying entry points, and adding plugins such as dependency extraction plugin to make it available in our environment.
webpack.config.js
const path = require('path');
const defaultConfig = require('@wordpress/scripts/config/webpack.config');
const WooCommerceDependencyExtractionWebpackPlugin = require('@woocommerce/dependency-extraction-webpack-plugin');
const MiniCssExtractPlugin = require('mini-css-extract-plugin');

// Remove SASS rule from the default config so we can define our own.
const defaultRules = defaultConfig.module.rules.filter((rule) => {
	return String(rule.test) !== String(/\.(sc|sa)ss$/);
});

module.exports = {
	...defaultConfig,
	entry: {
		index: path.resolve(process.cwd(), 'src', 'index.js' ),
		'checkout-block-frontend':
			path.resolve(
				process.cwd(),
				'src',
				'frontend.js'
			),
	},
	module: {
		...defaultConfig.module,
		rules: [
			...defaultRules,
			{
				test: /\.(sc|sa)ss$/,
				exclude: /node_modules/,
				use: [
					MiniCssExtractPlugin.loader,
					{ loader: 'css-loader', options: { importLoaders: 1 } },
					{
						loader: 'sass-loader',
						options: {
							sassOptions: {
								includePaths: ['src/css'],
							},
							additionalData: (content, loaderContext) => {
								const { resourcePath, rootContext } =
									loaderContext;
								const relativePath = path.relative(
									rootContext,
									resourcePath
								);

								if (relativePath.startsWith('src/css/')) {
									return content;
								}

								// Add code here to prepend to all .scss/.sass files.
								//return '@import "_colors"; ' + content;
							},
						},
					},
				],
			},
		],
	},
	plugins: [
		...defaultConfig.plugins.filter(
			(plugin) =>
				plugin.constructor.name !== 'DependencyExtractionWebpackPlugin'
		),
		new WooCommerceDependencyExtractionWebpackPlugin(),
		new MiniCssExtractPlugin({
			filename: `[name].css`,
		}),
	],
};
Create a block.json File to define metadata of the date field
Create a file named block.json in the src directory of your plugin. This file contains the metadata details of our custom block and it is defined by the details such as the block’s name, version, title, category, parent block , attributes, text domain for translation, and the entry point for the block’s JavaScript file.
block.json
{
	"$schema": "https://schemas.wp.org/trunk/block.json",
	"apiVersion": 2,
	"name": "checkout-block-example/delivery-date",
	"version": "1.0.0",
	"title": "Delivery Date",
	"category": "woocommerce",
    "parent": [ "woocommerce/checkout-shipping-address-block" ],
	"attributes": {
		"lock": {
			"type": "object",
			"default": {
				"remove": true,
				"move": true
			}
		}
	},
	"textdomain": "checkout-block-example",
	"editorScript": "file:./build/index.js"
}
Create a src Folder to Organize Javscript Files
Here we will be creating a src folder that will contain all the javascript files. Create a file named ‘index.js’ that will act as an entry point for your Javascript code. Inside the “index.js” file, you’ll use the registerBlockType function to register your custom block in the block editor. This function is imported from the @wordpress/blocks package and is essential for defining the behavior and appearance of your block.
index.js
import { registerBlockType } from '@wordpress/blocks';
import { SVG } from '@wordpress/components';
import { __ } from '@wordpress/i18n';
import { Edit } from './edit';
import metadata from './block.json';

registerBlockType(metadata, {
    attributes: {
        deliveryDate: {
            type: 'string', // Adjust the type as necessary
            default: '', // Default value for the delivery date attribute
        },
        // Other attributes...
    },
    icon: {
        src: (
            <svg xmlns="http://www.w3.org/2000/svg" viewBox="0 0 24 24" fill="#000000">
  <path d="M0 0h24v24H0V0z" fill="none"/>
  <path d="M18 4h-1V2h-2v2H9V2H7v2H6c-1.1 0-1.99.9-1.99 2L4 20c0 1.1.89 2 1.99 2H18c1.1 0 2-.9 2-2V6c0-1.1-.9-2-2-2zm0 16H6V8h12v12zm-6-9h4v4h-4z"/>
</svg>

        ),
        foreground: '#874FB9', // Adjust the color as needed
    },
    edit: Edit,
});
Overall, the above code registers a custom block type in the WordPress block editor, defining its attributes, icon, and edit component.
Now, let’s create the edit component by creating a file called ‘edit.js’ and this component is displayed in the checkout block editor. The ValidatedTextInput component is used to create the input field using the prop type set to “date“. We have completed the backend part of creating the custom inner block for the date field. Let’s see the front-end part now.
edit.js
import { ValidatedTextInput } from '@woocommerce/blocks-checkout';
import React, { useEffect } from 'react';

import { useBlockProps, InspectorControls } from '@wordpress/block-editor';
import { PanelBody } from '@wordpress/components';
import { __ } from '@wordpress/i18n';

export const Edit = ({ attributes, setAttributes }) => {
    const blockProps = useBlockProps();

    return (
        <div {...blockProps}>
            <InspectorControls>
                <PanelBody title={__('Block options', 'delivery_date')}>
                    Options for the block go here.
                </PanelBody>
            </InspectorControls>
            <div className={'example-fields'}>
                <label htmlFor="">Choose your delivery date:</label>
                <ValidatedTextInput
                    id="delivery-date"
                    type="date"
                    required={false}
                    className={'orddd-datepicker'}
                     value={''}
                    style={{ width: '100%' }} // Apply inline styles to match the parent block's width
                    placeholder={''}
                />
            </div>
        </div>
    );
};
Creating the Date Field on the Checkout Blocks Frontend
We need to register the custom date field on the frontend allowing users to select a delivery date. The code given below registers the checkout block using the registerCheckoutBlock function from wc.blocksCheckout, passing the ‘options’ object containing metadata and the component. The function ‘OnDateChange’ updates the deliveryDate state variable whenever the user selects a date from the input field. The selected delivery date is then stored in the checkout extension data. Copy the below code and add it in a javascript file.
frontend.js
import { ValidatedTextInput } from '@woocommerce/blocks-checkout';
import metadata from './block.json';
import { __ } from '@wordpress/i18n';
import { useState, useCallback } from '@wordpress/element';

// Global import
const { registerCheckoutBlock } = wc.blocksCheckout;

const Block = ({ checkoutExtensionData }) => {
    const [deliveryDate, setDeliveryDate] = useState('');
    const { setExtensionData } = checkoutExtensionData;

    const onDateChange = useCallback(
        (date) => {
            setDeliveryDate(date);
            setExtensionData('checkout-block-example', 'delivery_date', date);
        },
        [setDeliveryDate, setExtensionData]
    );

    return (
        <div className={'example-fields'}>
            <label htmlFor="delivery-date">Choose your delivery date:</label>
            <input
                type="date"
                id="delivery-date"
                className={'orddd-datepicker'}
                placeholder={''}
                value={deliveryDate}
                onChange={(e) => onDateChange(e.target.value)}
                style={{ width: '100%' }}
            />
        </div>
    );
}

const options = {
    metadata,
    component: Block
};

registerCheckoutBlock(options);
To compile our JavaScript code into a format understandable by browsers, we will run the command npm run build. This command triggers wp-scripts build, as we configured in package.json file. And this command will generate a build folder with JavaScript files for production. Additionally, it creates index.asset.php and checkout-block-frontend.asset.php, containing dependencies imported into our code.
Now, we need to register the scripts so the custom date field is visible on the front end. To register our scripts we will create a class that sets up our blocks and register the scripts. These scripts are then added to both the checkout editor and the front end using specific functions like get_editor_script_handles() and get_script_handles(). Create a PHP file and add the below code to it.
class-blocks-integration.php
<?php
/**
 *
 */

use Automattic\WooCommerce\Blocks\Integrations\IntegrationInterface;

define( 'ORDD_BLOCK_VERSION', '1.0.0' );

class Blocks_Integration implements IntegrationInterface {

    /**
	 * The name of the integration.
	 *
	 * @return string
	 */
	public function get_name() {
		return 'date-field'; // Updated integration name
	}

	/**
	 * When called invokes any initialization/setup for the integration.
	 */
	public function initialize() {
		$this->register_block_frontend_scripts();
		$this->register_block_editor_scripts();
	}

	/**
	 * Returns an array of script handles to enqueue in the frontend context.
	 *
	 * @return string[]
	 */
	public function get_script_handles() {
		return array( 'checkout-block-frontend' ); // Updated script handle
	}

	/**
	 * Returns an array of script handles to enqueue in the editor context.
	 *
	 * @return string[]
	 */
	public function get_editor_script_handles() {
		return array( 'date-field-block-editor' ); // Updated script handle
	}

	/**
	 * An array of key, value pairs of data made available to the block on the client side.
	 *
	 * @return array
	 */
	public function get_script_data() {
		return array();
	}

	/**
	 * Register scripts for date field block editor.
	 *
	 * @return void
	 */
	public function register_block_editor_scripts() {
		$script_path       = '/build/index.js';
		$script_url        = plugins_url( 'checkout-block-example' . $script_path );
		$script_asset_path = plugins_url( 'checkout-block-example/build/index.asset.php' );
		$script_asset      = file_exists( $script_asset_path )
			? require $script_asset_path
			: array(
				'dependencies' => array(),
				'version'      => $this->get_file_version( $script_asset_path ),
			);

		wp_register_script(
			'date-field-block-editor', // Updated script handle
			$script_url,
			$script_asset['dependencies'],
			$script_asset['version'],
			true
		);
	}

	/**
	 * Register scripts for frontend block.
	 *
	 * @return void
	 */
	public function register_block_frontend_scripts() {
		$script_path       = '/build/checkout-block-frontend.js';
		$script_url        = plugins_url( '/checkout-block-example' . $script_path );
		$script_asset_path = WP_PLUGIN_DIR . '/checkout-block-example/build/checkout-block-frontend.asset.php';

		$script_asset = file_exists( $script_asset_path )
			? require $script_asset_path
			: array(
				'dependencies' => array(),
				'version'      => $this->get_file_version( $script_asset_path ),
			);

		wp_register_script(
			'checkout-block-frontend',
			$script_url,
			$script_asset['dependencies'],
			$script_asset['version'],
			true
		);
	}

	/**
	 * Get the file modified time as a cache buster if we're in dev mode.
	 *
	 * @param string $file Local path to the file.
	 * @return string The cache buster value to use for the given file.
	 */
	protected function get_file_version( $file ) {
		if ( defined( 'SCRIPT_DEBUG' ) && SCRIPT_DEBUG && file_exists( $file ) ) {
			return filemtime( $file );
		}
		return ORDD_BLOCK_VERSION;
	}

}
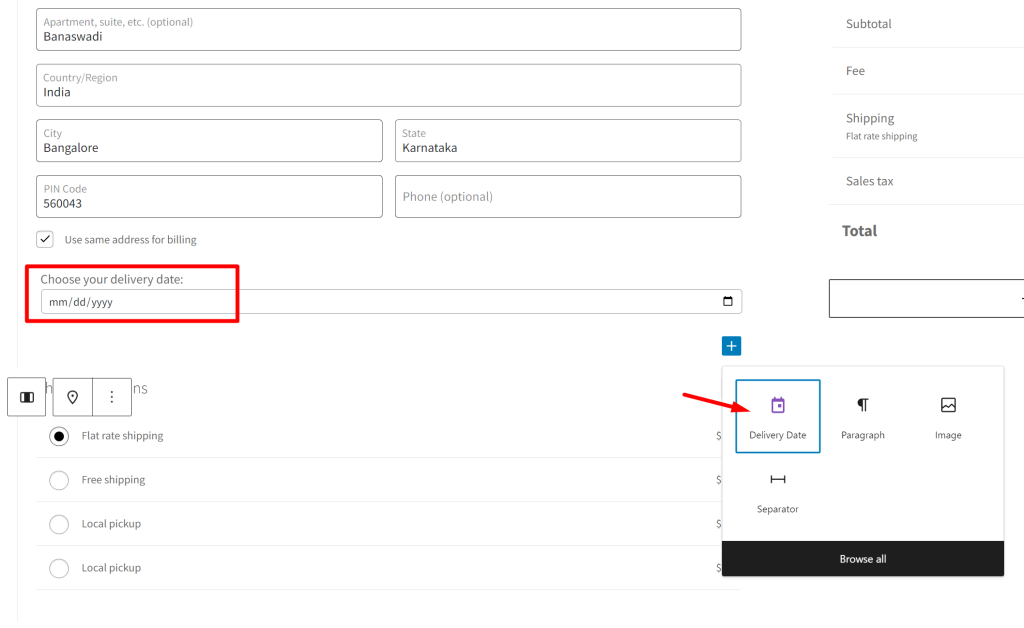
Now, we can see the output after executing the scripts in the terminal using the npm run build command. The Delivery Date field appears as an inner block of the parent block Shipping Address in the checkout block editor.
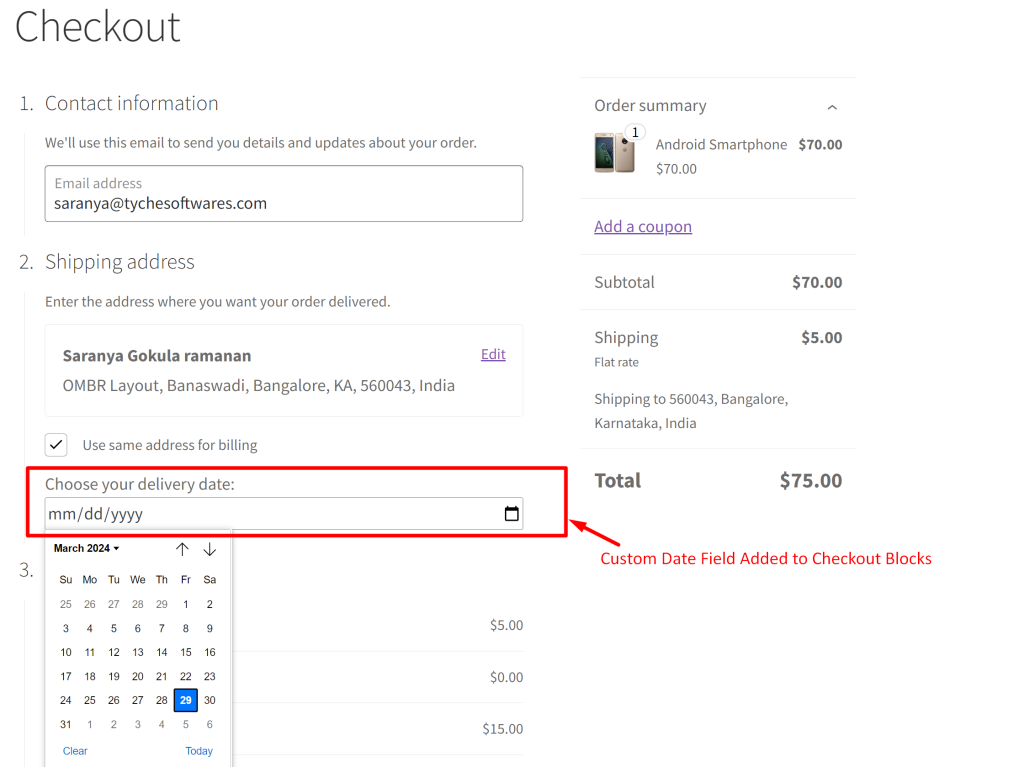
Let’s see the custom date field that appears on the frontend of the checkout page.
Now we need to save the value of the date field entered by the customer. For this, we are using the Extend schema that will register the functions schema_callback and data_callback which helps us to expose our data to the checkout API. The below file ‘checkout-blocks-initialize.php‘ code serves the purpose of storing data in different endpoints.
checkout-blocks-initialize.php
<?php

use Automattic\WooCommerce\StoreApi\StoreApi;
use Automattic\WooCommerce\StoreApi\Schemas\ExtendSchema;
use Automattic\WooCommerce\StoreApi\Schemas\V1\CheckoutSchema;


add_action(
    'woocommerce_blocks_loaded',
    function() {
        require_once 'class-blocks-integration.php';
        add_action(
            'woocommerce_blocks_checkout_block_registration',
            function( $integration_registry ) {
                $integration_registry->register( new Blocks_Integration() );
            }
        );

        if ( function_exists( 'woocommerce_store_api_register_endpoint_data' ) ) {
            woocommerce_store_api_register_endpoint_data(
                array(
                    'endpoint'        => CheckoutSchema::IDENTIFIER,
                    'namespace'       => 'checkout-block-example',
                    'data_callback'   => 'cb_data_callback',
                    'schema_callback' => 'cb_schema_callback',
                    'schema_type'     => ARRAY_A,
                )
            );
        }
    }
);

/**
 * Callback function to register endpoint data for blocks.
 *
 * @return array
 */
function cb_data_callback() {
    return array(
        'delivery_date' => '', // Initialize delivery date with empty value
    );
}

/**
 * Callback function to register schema for data.
 *
 * @return array
 */
function cb_schema_callback() {
    return array(
        'delivery_date' => array(
            'description' => __( 'Delivery Date', 'checkout-block-example' ),
            'type'        => array( 'string', 'null' ),
            'readonly'    => true,
        ),
    );
}
Now we need to make sure that the data selected by the customer is available on the specified endpoint. And this is done using the respective hooks which is executed when the place order button is clicked. The below code is added to our main plugin file.
checkout-block-example.php
<?php
/**
 * Plugin Name: Custom fields for checkout block
 * Plugin URI: https://www.tychesoftwares.com/store/premium-plugins/order-delivery-date-for-woocommerce-pro-21/
 * Description: This plugin allows customers to choose their preferred Order Delivery Date during checkout.
 * Author: Tyche Softwares
 * Version: 1.0.0
 * Author URI: https://www.tychesoftwares.com/
 * Contributor: Tyche Softwares, https://www.tychesoftwares.com/
 * Text Domain: order-delivery-date
 * Requires PHP: 5.6
 * WC requires at least: 3.0.0
 * WC tested up to: 7.1.0
 *
 * @package  Order-Delivery-Date-Lite-for-WooCommerce
 */


 require_once 'checkout-blocks-initialize.php';

class Checkout_Block_Example {

    public function __construct() {
        add_action( 'woocommerce_store_api_checkout_update_order_from_request', array( $this, 'orddd_update_block_order_meta_delivery_date' ), 10, 2 );
        add_action( 'woocommerce_admin_order_data_after_order_details', array( $this, 'display_delivery_date_on_admin_order_details' ) );
        add_action( 'woocommerce_order_details_after_order_table_items', array( $this, 'display_delivery_date_on_thankyou_page' ) );
    }

    public function orddd_update_block_order_meta_delivery_date( $order, $request ) {
        $data = isset( $request['extensions']['checkout-block-example'] ) ? $request['extensions']['checkout-block-example'] : array();

        // Update the order meta with the delivery date from the request
        if ( isset( $data['delivery_date'] ) ) {
            $order->update_meta_data( 'Delivery Date', $data['delivery_date'] );
            $order->save(); // Save the order to persist changes
        }
    }

    public function display_delivery_date_on_admin_order_details( $order ) {
        $delivery_date = $order->get_meta( 'Delivery Date', true );

        if ( $delivery_date ) {
            echo '<div class="delivery-date">';
            echo '<p><strong>' . esc_html__( 'Delivery Date:', 'checkout-block-example' ) . '</strong> ' . esc_html( $delivery_date ) . '</p>';
            echo '</div>';
        }
    }

    public function display_delivery_date_on_thankyou_page( $order_id ) {
        $order = wc_get_order( $order_id );
        $delivery_date = $order->get_meta( 'Delivery Date', true );

        if ( $delivery_date ) {
            echo '<p>' . esc_html__( 'Delivery Date:', 'checkout-block-example' ) . ' ' . esc_html( $delivery_date ) . '</p>';
        }
    }
}

$checkout_block_example = new Checkout_Block_Example();
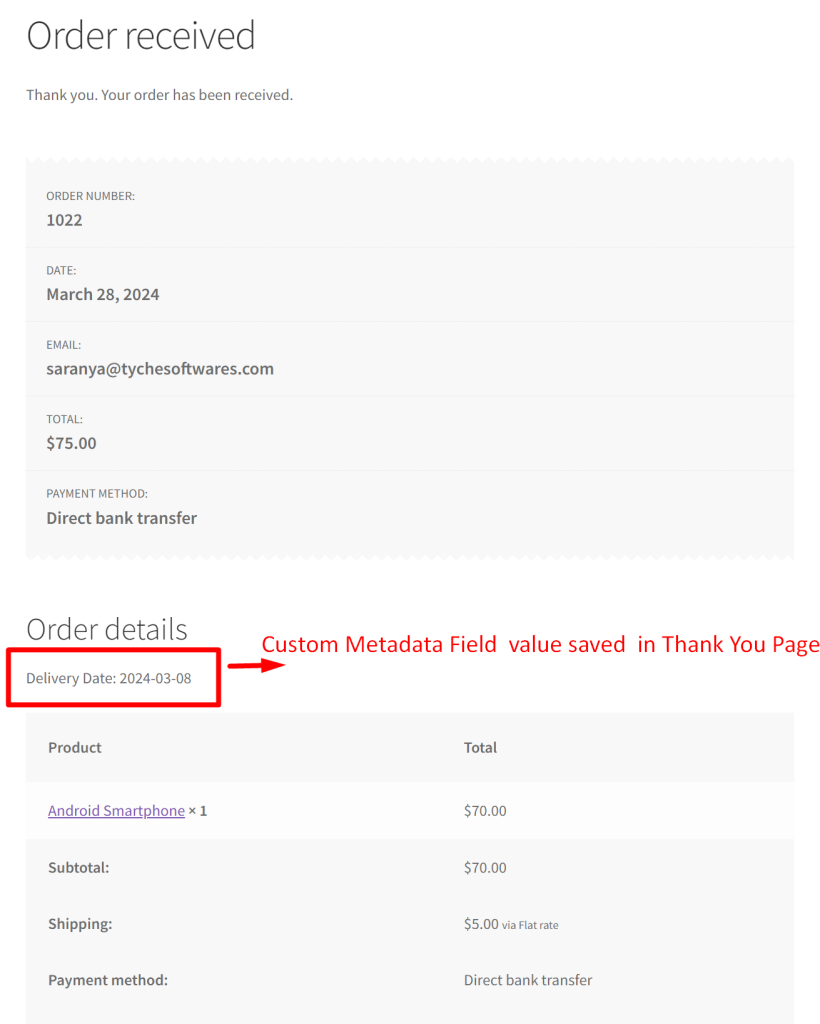
The metadata field value entered by the customer will be captured and saved on both the admin side and in the frontend of the the order received page.
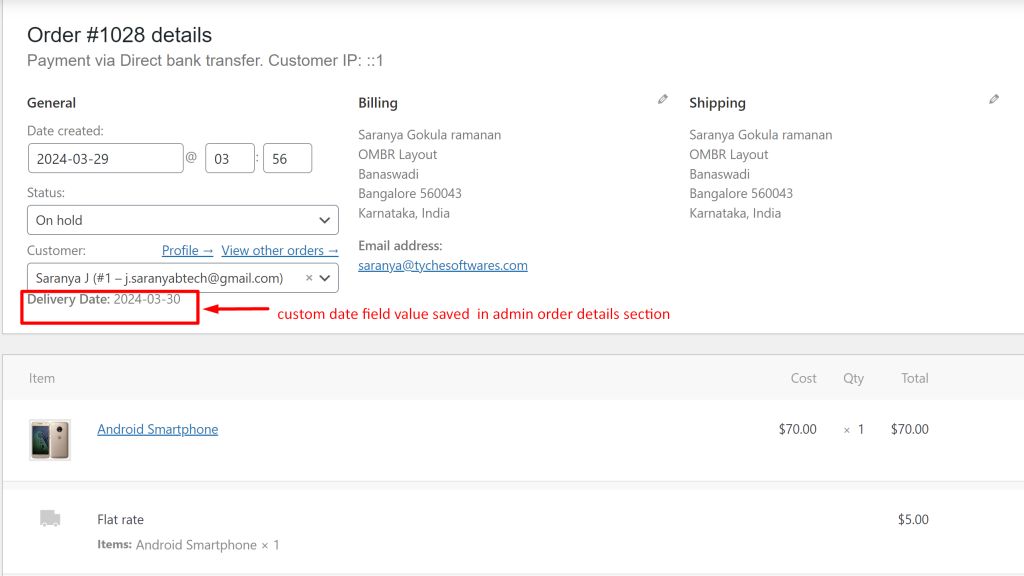
The custom metadata field value is also saved in the admin order details section as shown here.
I hope the above steps have guided you well to implement the custom datepicker field in the new WooCommerce Checkout blocks page. You can download the entire plugin code from here.
Note: Once downloaded make sure to name the Plugin name and the main PHP file to be the same to avoid naming conflicts.
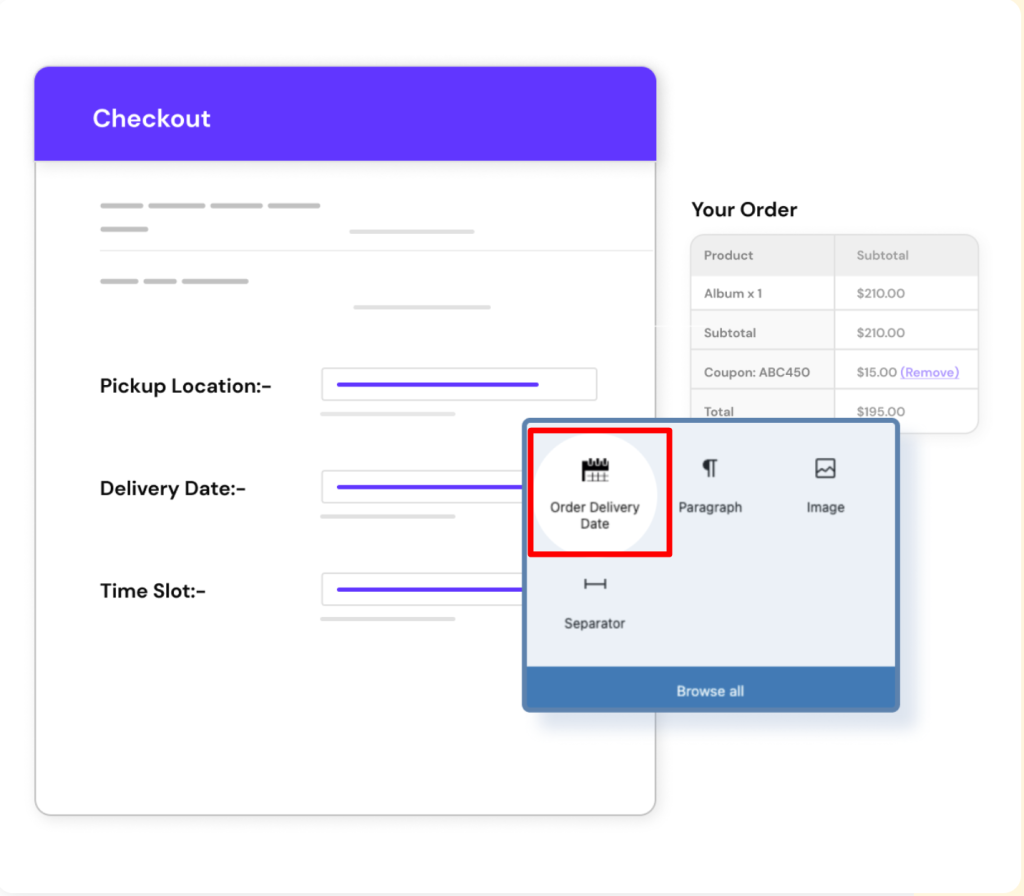
In addition to the date field, you can include many more custom fields on your checkout page such as Pickup Locations and Time Slot fields. This can be implemented from the Order Delivery Date Pro For WooCommerce Plugin, with just a click on the Order Delivery Date block as shown in the image given below.
