Icons play a major role in conveying visual aspects quickly at a glance. And as an admin of your online store, you may integrate these icons into your oder statuses for quick identification and also helps in status management.
This post will guide you to add the status icons to the default statuses provided in WooCommerce such as on-hold, completed, processing, etc. If you wish to create a custom WooCommerce order status or already have one, you may also set icons to them the same way but with little modifcations done to the code.
Note a couple of things:
- Download your preferred icons in PNG format or any other supported image format using fontawesome icons.
- Once it is downloaded, make sure to keep the images in the size of 40px* 40px lightweight images.
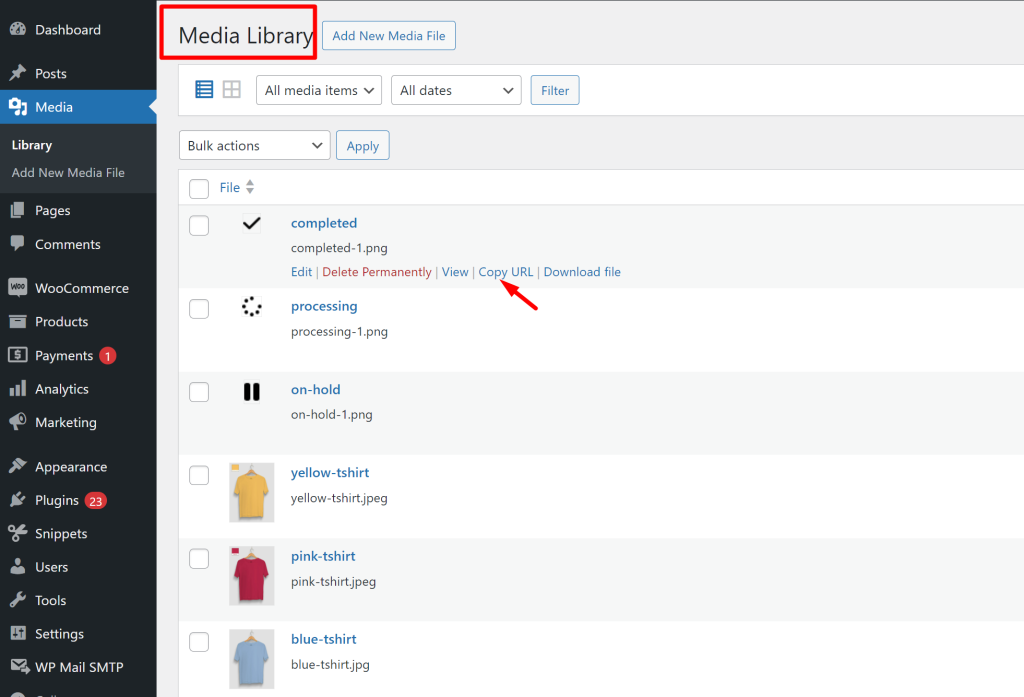
- Upload the icons to the media library of your site or any other location accessible via a URL as shown below.

- Copy the URLs of the uploaded icons and replace it in the provided code in these lines
content: url('icon-url');That’s it, the icons will now be visible in the status colum of orders page.
Solution: Add WooCommerce Status Icons
The code snippet will add icons to the default order statuses of WooCommerce as specified in the code.
function ts_add_order_status_icons() {
?>
<style type="text/css">
    /* icon for processing status */
    .column-order_status mark.status-processing:before {
        content: url('http://localhost/wpsite/wordpress/wp-content/uploads/2024/04/processing-1.png');
        display: inline-block;
        width: 20px; /* Adjust icon width */
        height: 20px; /* Adjust icon height */
        margin-right: 5px; /* Adjust icon spacing */
        vertical-align: middle; /* Align icon vertically in the middle */
    }

    /* icon for on-hold status */
    .column-order_status mark.status-on-hold:before {
        content: url('http://localhost/wpsite/wordpress/wp-content/uploads/2024/04/on-hold-1.png');
        display: inline-block;
        width: 20px; /* Adjust icon width */
        height: 20px; /* Adjust icon height */
        margin-right: 5px; /* Adjust icon spacing */
        vertical-align: middle; /* Align icon vertically in the middle */
    }

    /* icon for completed status */
    .column-order_status mark.status-completed:before {
        content: url('http://localhost/wpsite/wordpress/wp-content/uploads/2024/04/completed-1.png');
        display: inline-block;
        width: 20px; /* Adjust icon width */
        height: 20px; /* Adjust icon height */
        margin-right: 5px; /* Adjust icon spacing */
        vertical-align: middle; /* Align icon vertically in the middle */
    }
</style>
<?php
}

add_action('admin_head', 'ts_add_order_status_icons');
Output
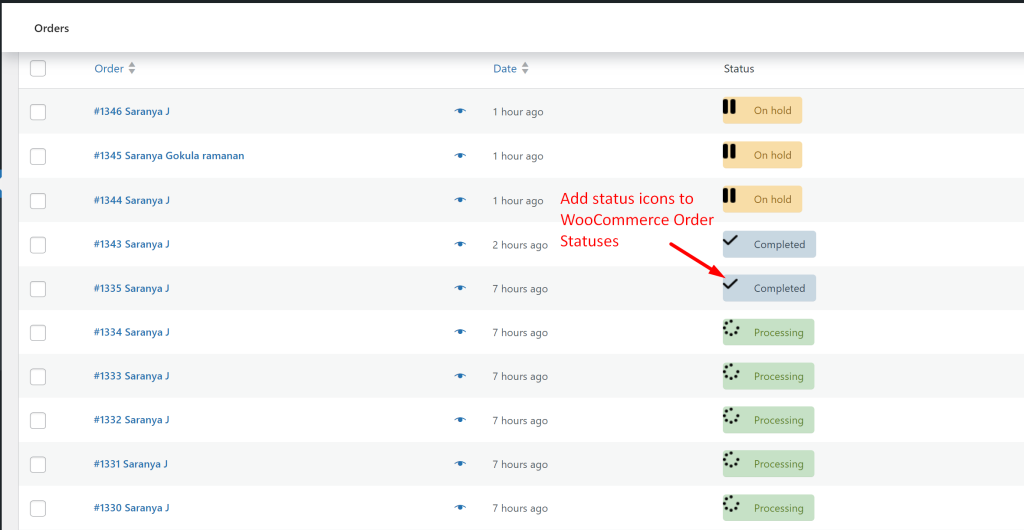
As we are using the admin_head action hook, ensuring that the CSS styles are applied to the admin area header. You can see in the image below that each icons are represented by a unique icon which is positioned alongside the order statuses present in the status column.

Similarly, you can do many more customization with order statuses as like to add a bogo buy one get one offer on order status change in WooCommerce.


