So far, we have seen that the WooCommerce Booking and Appointment Plugin is used to set up all sorts of businesses like hotel rooms, concert tickets, doctor’s appointment, massage parlors, coaching calls, consultings and so on.
The booking plugin can also be used to capture delivery dates on a per product basis. The plugin simply adds a calendar along with an optional time slot on the product page. The plugin also allows the flexibility to change the field labels to anything you want. Hence it makes it very easy to put it to use so you can take product delivery dates.
Delivery Date Capture: Admin Experience
The first step will be creating your deliverable product. You can do that from the Products -> Add Product link. On the same page, you would also find the Booking meta box that allows you to setup your appointment. Then you have to do some general booking settings.
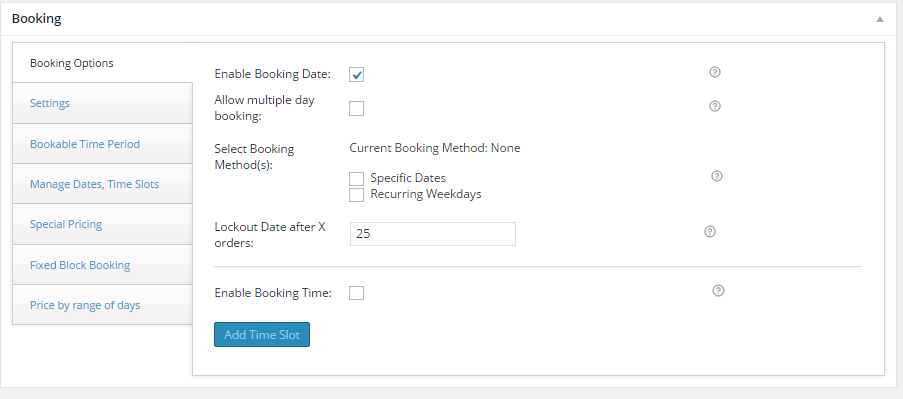
Under the “Booking options” tab, I have selected the Enable Booking Date. The Lockout time slot after X orders lets you give a number for maximum deliveries you can do on a particular day. I have set that value as “25”. You can change it as per your requirement.
A delivery system must allow you to specify how much time in advance you want the delivery date chosen. You might not want the customer to select a date such that you cannot make the delivery on time.
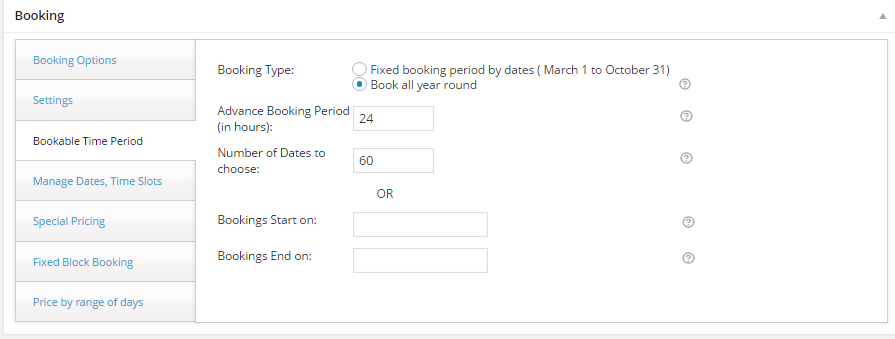
The WooCommerce Booking & Appointment plugin allows you to do that by specifying the number of hours in the Advance Booking Period field. It is present in the Bookable Time Period tab. I have set it to 24 hours. So if you are trying to get the delivery done on the same date as today, you won’t be able to do that. You will have earliest delivery of 24 hours from today, which would be tomorrow.
The Number of Dates to choose lets you determine the maximum number of days from today which you can select to make delivery available. In some cases, this could be a month (30 days) or even a year (365 days). I have set it to 60 days, which means the calendar will have dates for 2 months from today to choose from.
Since this is a “Simple Product”, there aren’t any specific settings under the product data section. You just have to enter the basic details like the Regular price and Sale price.

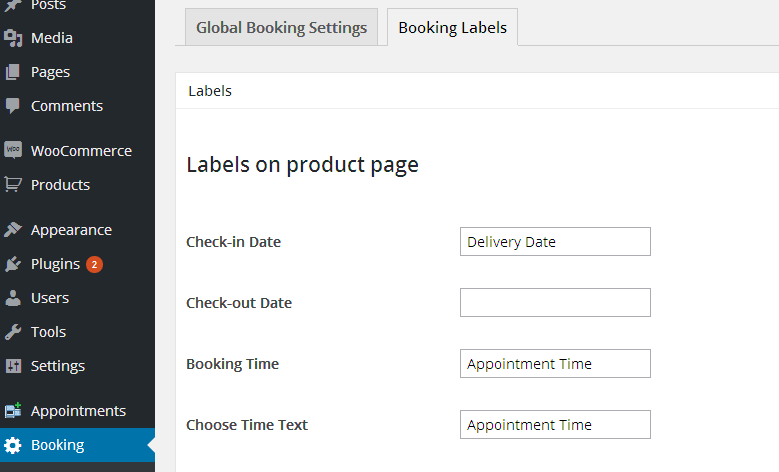
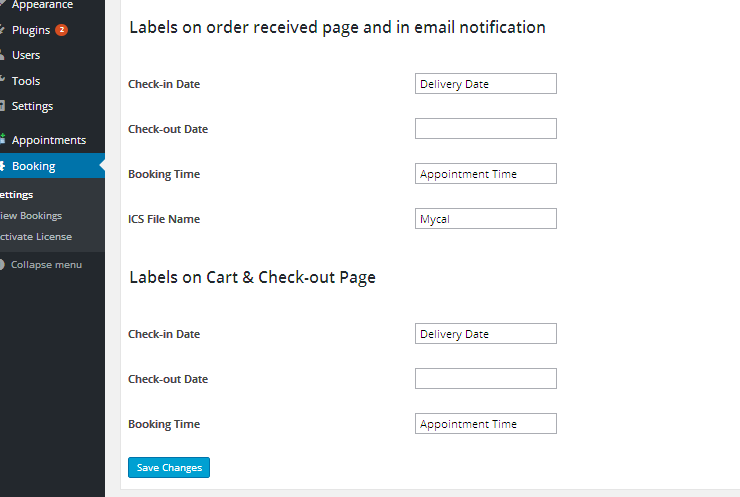
Since you are capturing the delivery dates, you definitely want to change the labels on the frontend accordingly. You can do that from Booking -> Settings -> Booking Labels. There are labels on product page, order received page, email notifications, cart and checkout page, so you have to make sure that you don’t miss out on any of these. Make changes wherever necessary and once that is done click on the “Save Changes” button.
This pretty much ends the settings required for the backend to work fine.
Delivery Date Capture: User Experience
Once all of the above settings are done, your frontend would look something similar to this
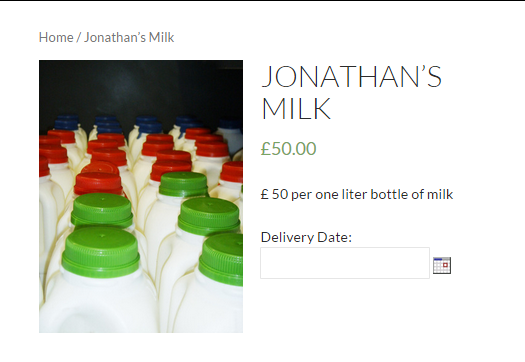
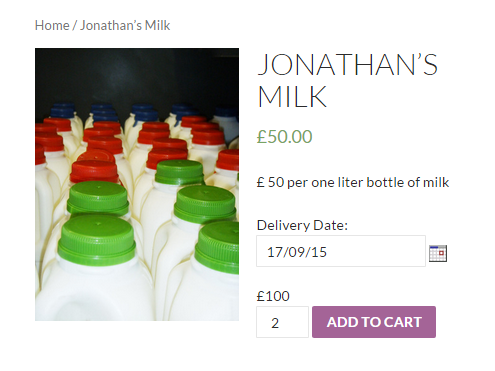
Once you select the delivery date, the “Add to Cart” button is visible. When you click on that button, the order is added to your cart and there is a button to “View your Cart”. On clicking that, you are redirected to the cart page which will show the delivery details
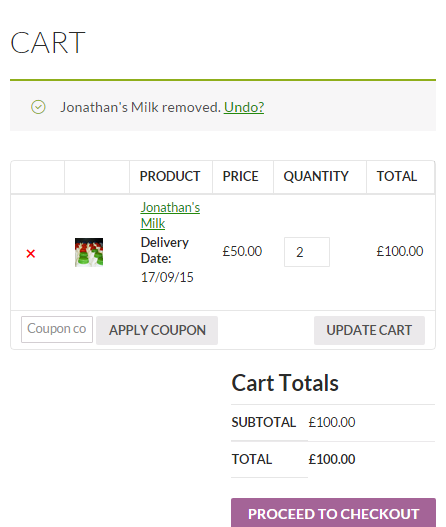
When on the cart page, unless you don’t want to update your cart, you can go to the checkout page by clicking on “Proceed to checkout” button.
The checkout page will show the product details and the total amount for your order. You can place your order if everything seems fine. Checkout page gives you a preview of the actual order. Please ensure you check everything and then click on the “Place Order” button.

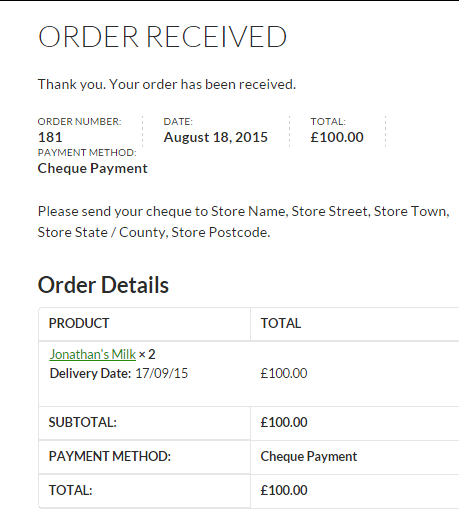
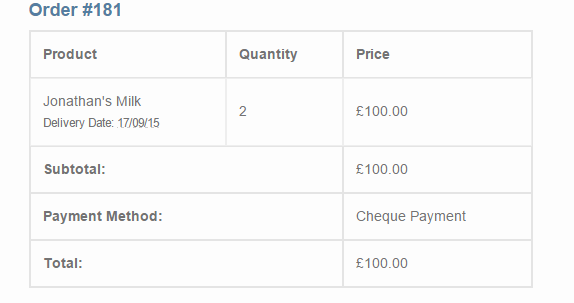
After placing your order, the delivery details are shown on the Thank You page. Email notifications are sent to the customer and the administrator with the details.
Conclusion:
This setup is similar to creating bookings for theme parks. The only thing that changes is the field labels. All the other things like specifying a minimum delivery time for your product, number of deliveries in advance, etc. can be done. Though this is not a ideal case where you want to use a “Booking” plugin for “Delivery dates”, but if the plugin meets all your requirements, then there is no harm in using it.
Delivery date is one of the most important parameter to be considered when you have an online business of items like food, flowers, cakes, etc.
It is also possible to use this setup with WooCommerce Variations. The above example was for Simple Products only.
Since there are no other settings to be done or anything to be added, it will take just 15 minutes to set the entire thing up if you are a first timer.
If you haven’t bought the plugin yet, you can purchase it from here.


