With Order Delivery Date Pro for WooCommerce Pro plugin v9.33.1, you can now enjoy Dokan Vendor services. Your Dokan dashboard for vendors will consist of the ability to create products, checking order details and so on with this integration.
Go to Order Delivery Date > Integrations > Vendor Settings as shown below. Enable the vendor settings.
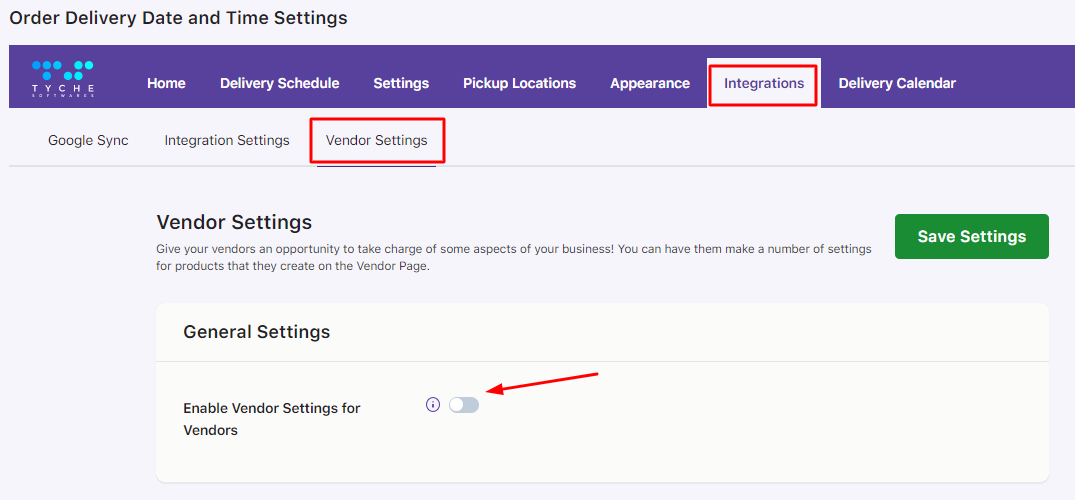
When enabled, it will allow vendors to create their individual settings for the deliveries.
This will open a set of settings for you as shown here:

These will be the Order delivery settings that will be available for your Vendors:
1. Delivery Calendar
2. Delivery Schedule
3. Send Reminder
4. Pickup Locations
5. Block Timeslot
6. Additional Settings
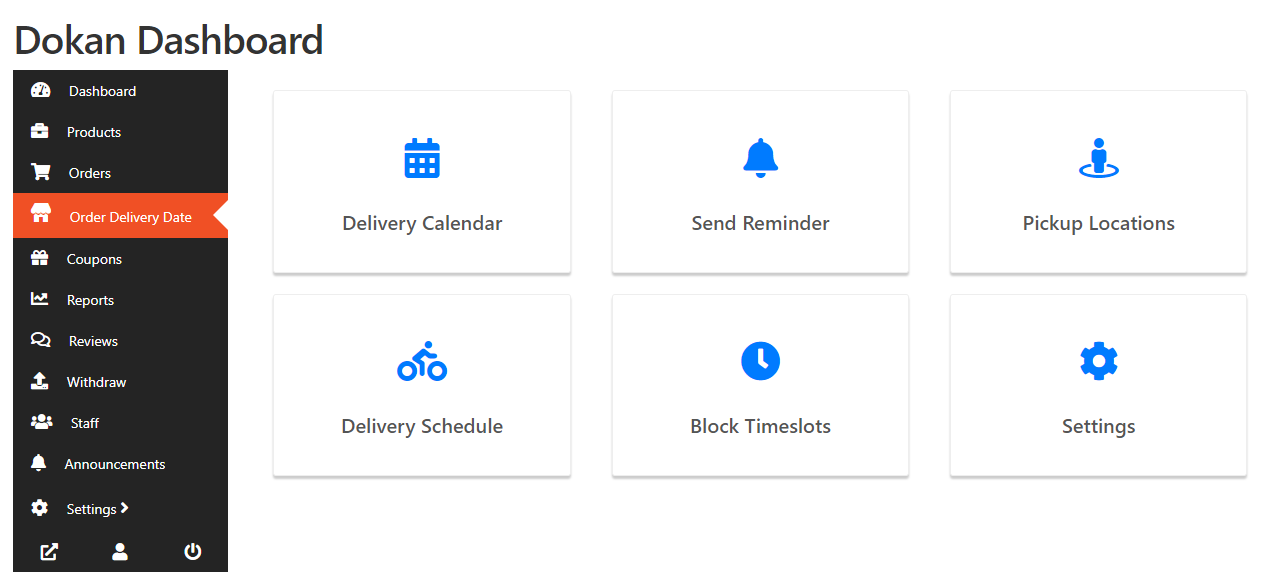
By default, they will be disabled. Once the settings have been enabled, sub-menu called Order Delivery Date in the Dokan dashboard menu will include all of these pages:
1. Delivery Calendar
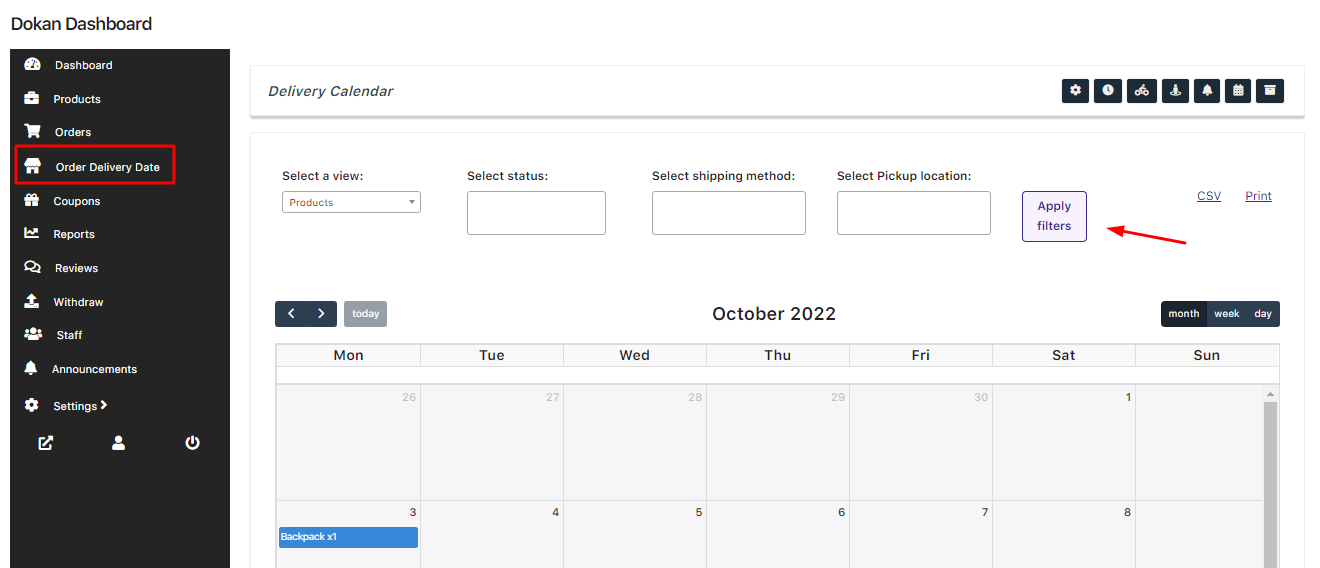
This setting will let your Vendors see their order deliveries in the calendar. Go to Order Delivery Date > Delivery Calendar.
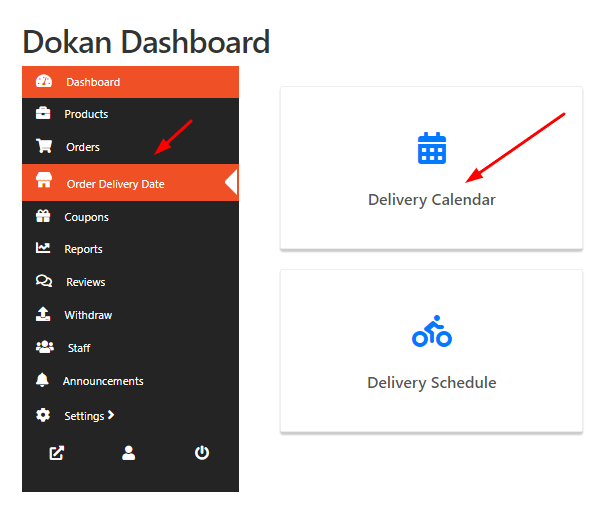
Vendors can use the different filters like View, Status, Shipping Method and Pickup Location to sort out which deliveries you wish to view in the calendar. They can even change the view from Week, Month and Day.
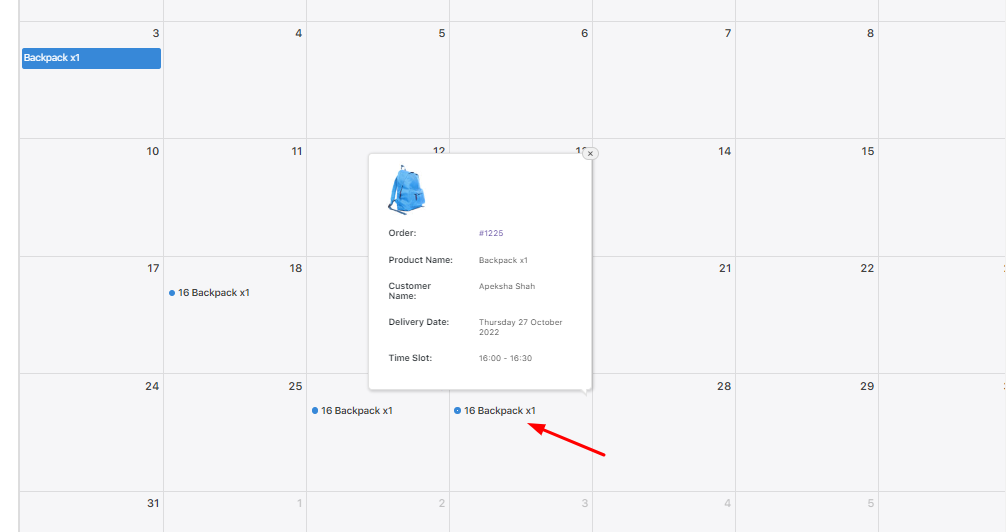
Your Vendor will see the deliveries and details in the calendar once they click on a particular delivery:
2. Delivery Schedule
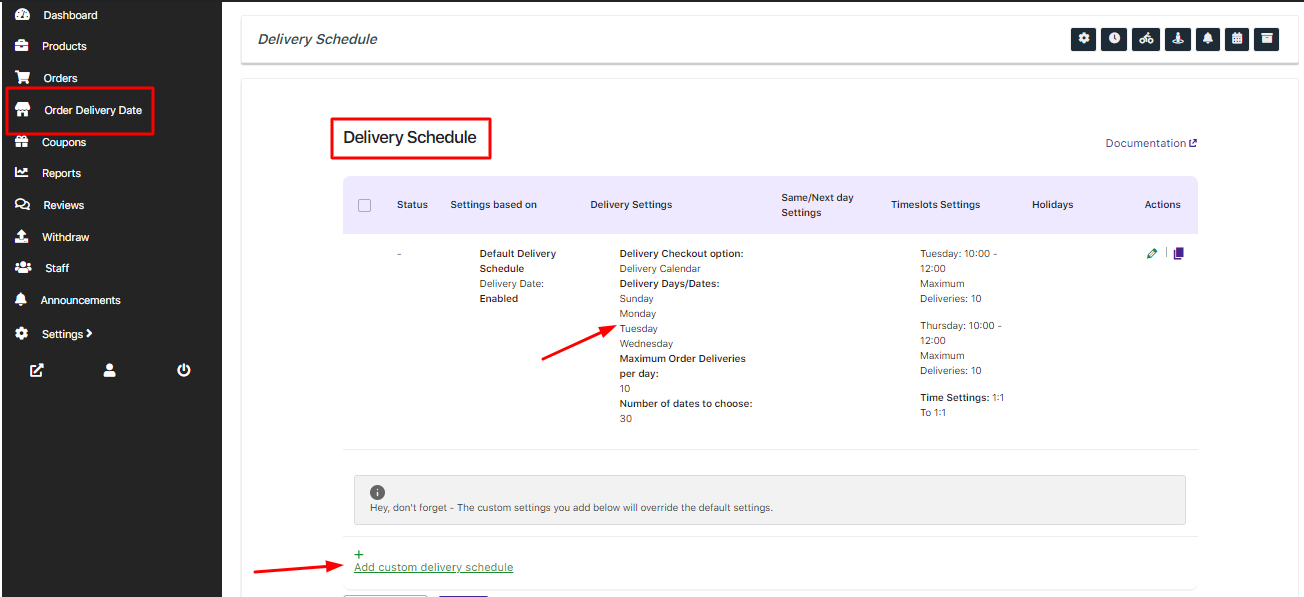
When this will be enabled, your Vendors will be able to create a delivery schedule for their deliverable products. Simply click the Delivery Schedule tab:

This will open the Delivery Schedule Page. You can made changes to your default delivery schedule by clicking the Edit option OR you can choose to create your custom delivery schedule as shown here:
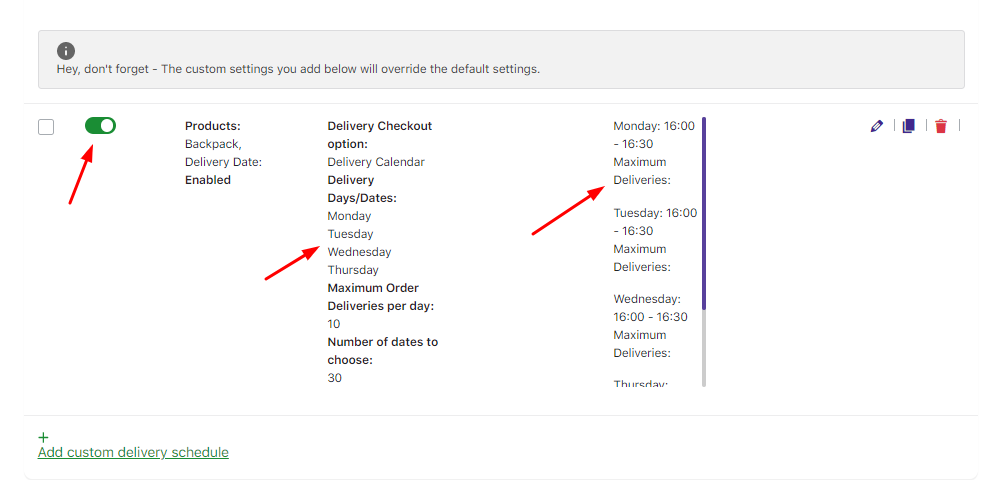
For instance, you can create a custom schedule for your Product ‘Backpack’ with delivery days Monday, Tuesday, Wednesday and Thursday with timeslots of 16:00 to 16:30 for these days:
When a customer adds the product Backpack from your Vendor’s store, they will see these delivery days and time slots on the Checkout Page as shown here:
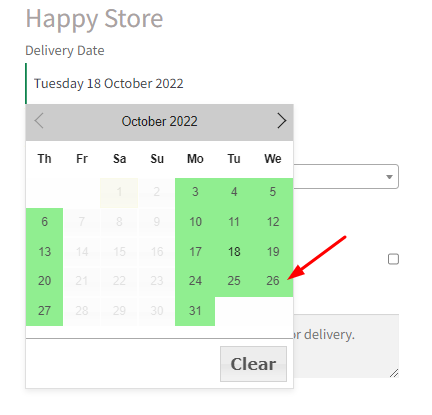
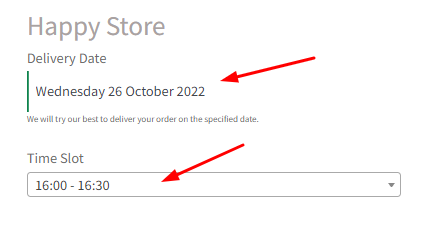
Once the customer has placed an order, the Order Details Page will appear like this:
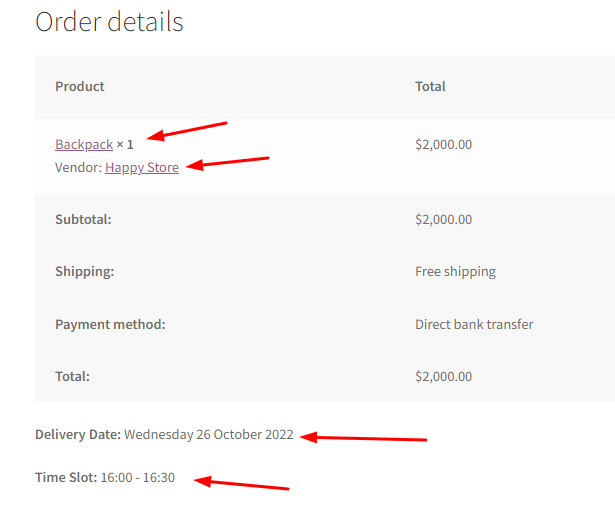
These details will also be displayed on the Orders Page:

3. Send Reminder
With this setting, your vendors can send automatic and manual reminder emails. Go to Order Delivery Date > Send Reminder as shown here:
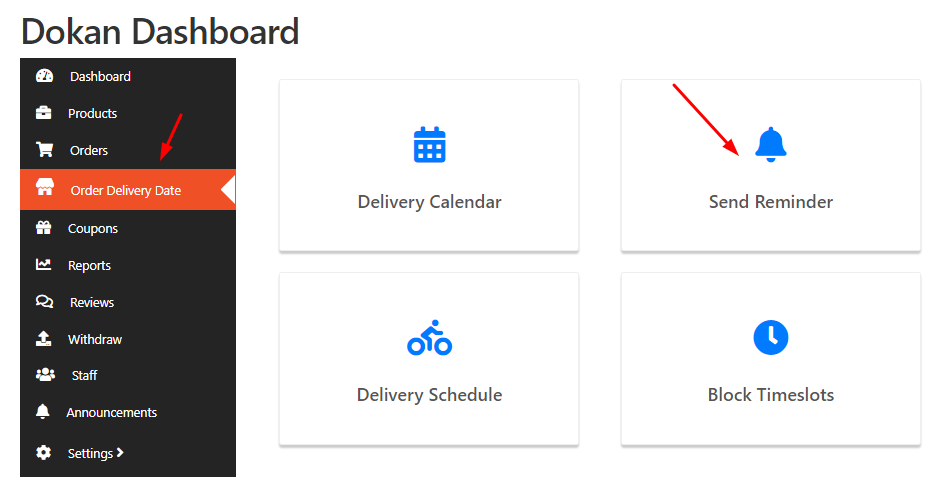
If your Vendors wish to send Automatic Reminders, fill in the details found in the section as shown here:
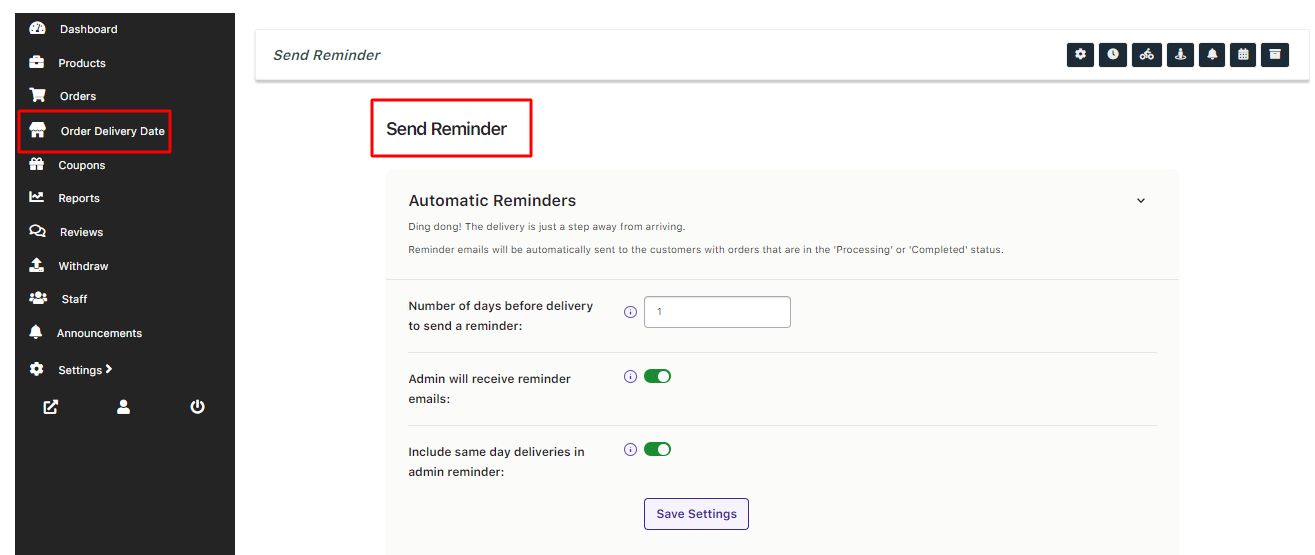
If Vendors need to send Manual Reminder emails they can select the Order Ids, enter the Subject, edit the Message of the email and then click on ‘Send Reminder’ button. If they wish to save the template as a draft, they can click on the ‘Save Drafts’ button.
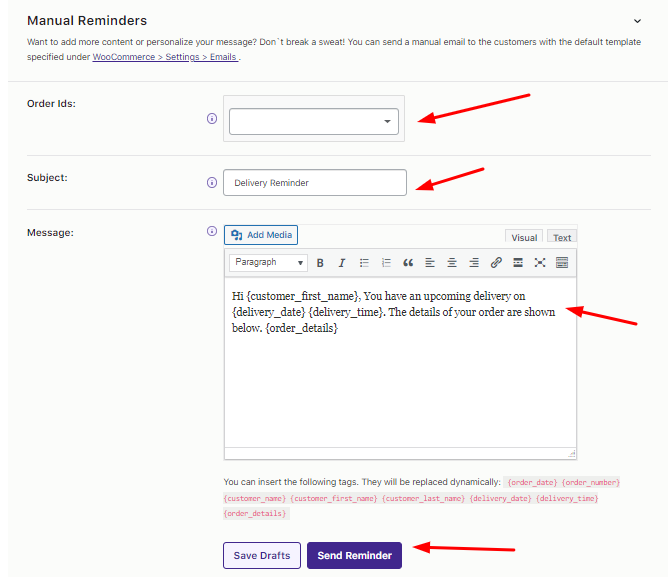
Please note that the order status of the order needs to be Processing, Pending, or Complete. For instance, you have wish to send a reminder to #1810 as shown here:
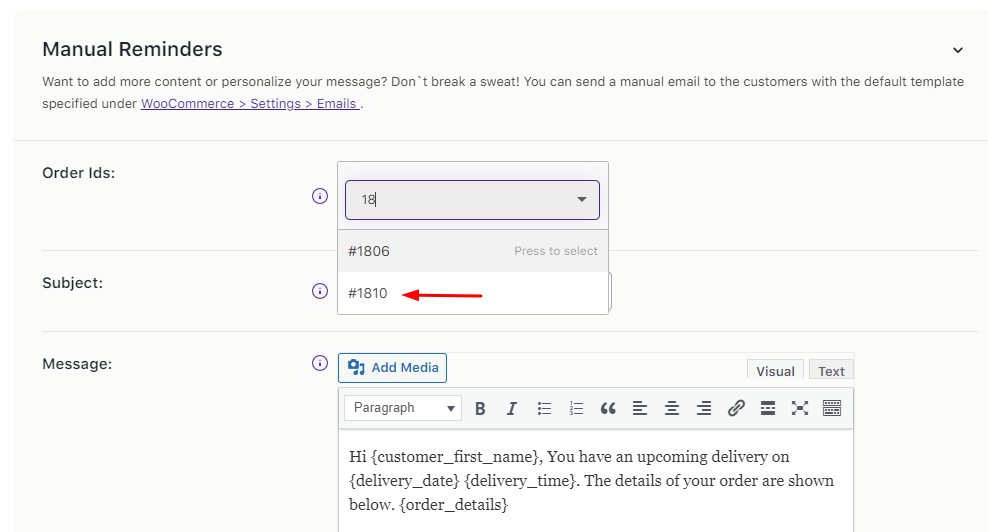

Select the order ID and click the Send Reminder button.
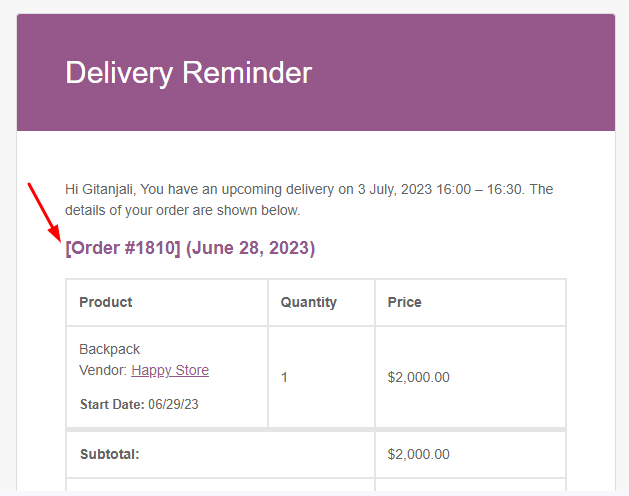
Here’s how the email will be received by your Vendor’s clients:
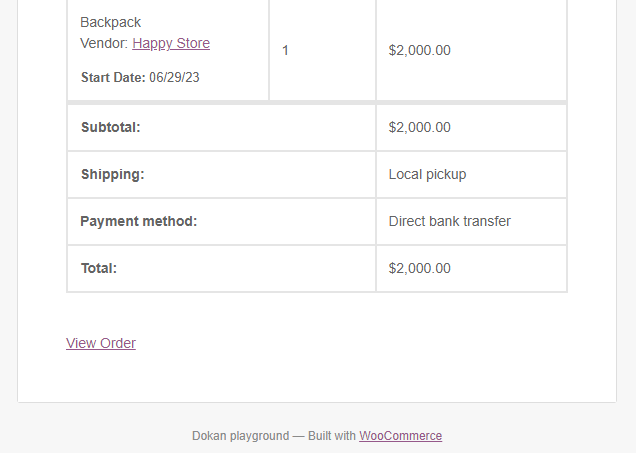
4. Pickup Locations
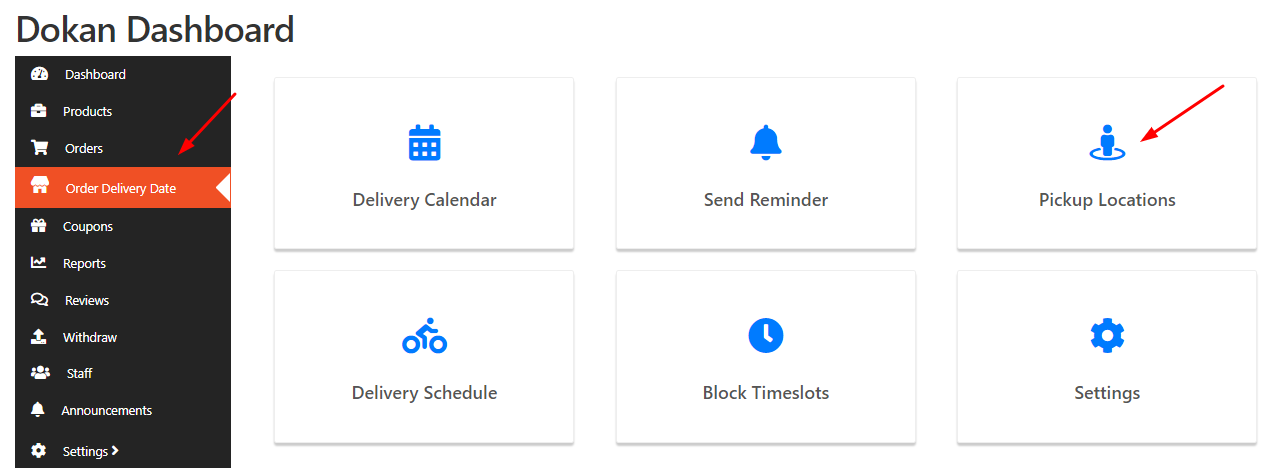
This setting will allow your Vendors to set Pickup Locations which their customers can choose. Go to Order Delivery Date > Pickup Locations as shown here:
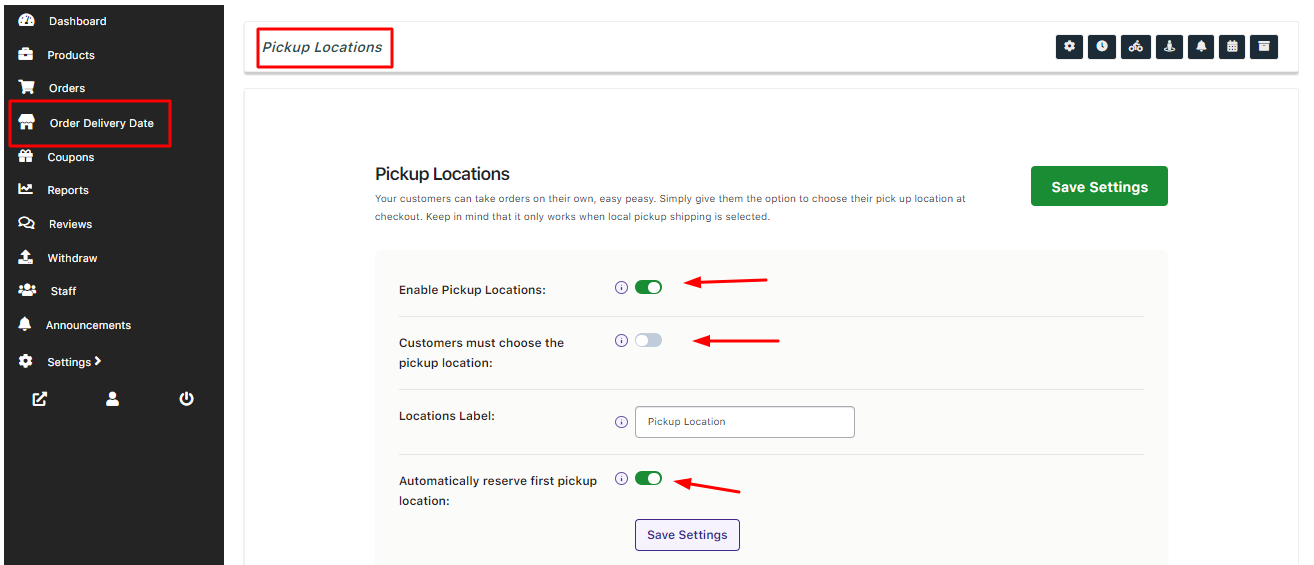
Enable the setting but switching the toggle on. Your vendors can choose to configure settings such as making it mandatory to choose a pickup location, adding a pickup location label and automatically selecting the first pickup location on the Checkout Page for the customer.
Once they scroll down, they’ll be able to add different details about the Pickup Location. Your vendors can choose to edit, disable or delete the Pickup locations too as shown here:

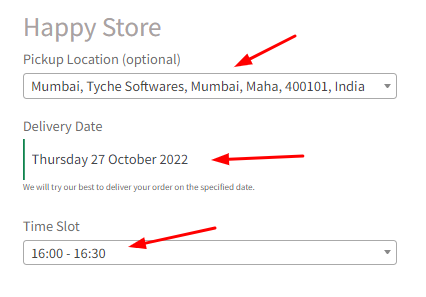
Once the customer chooses a product, they will get the option the choose a Pickup Location if they decide to go with Pickup Location shipping method.
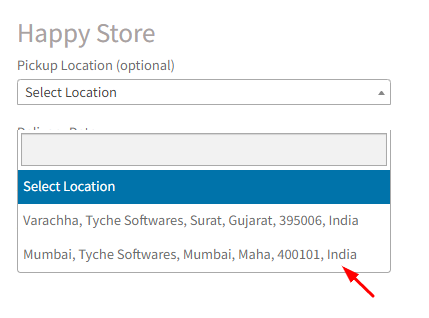
After choosing a Pickup Location, customers can select their delivery date and time and place the order:
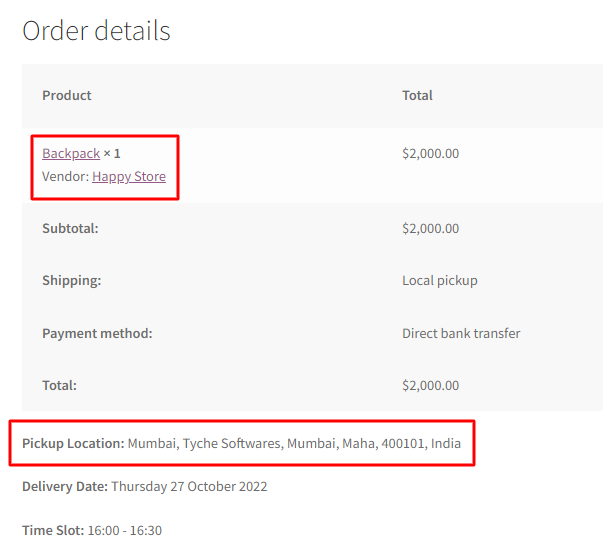
The Order details page will also include the Pickup locations in it:
5. Block Timeslot
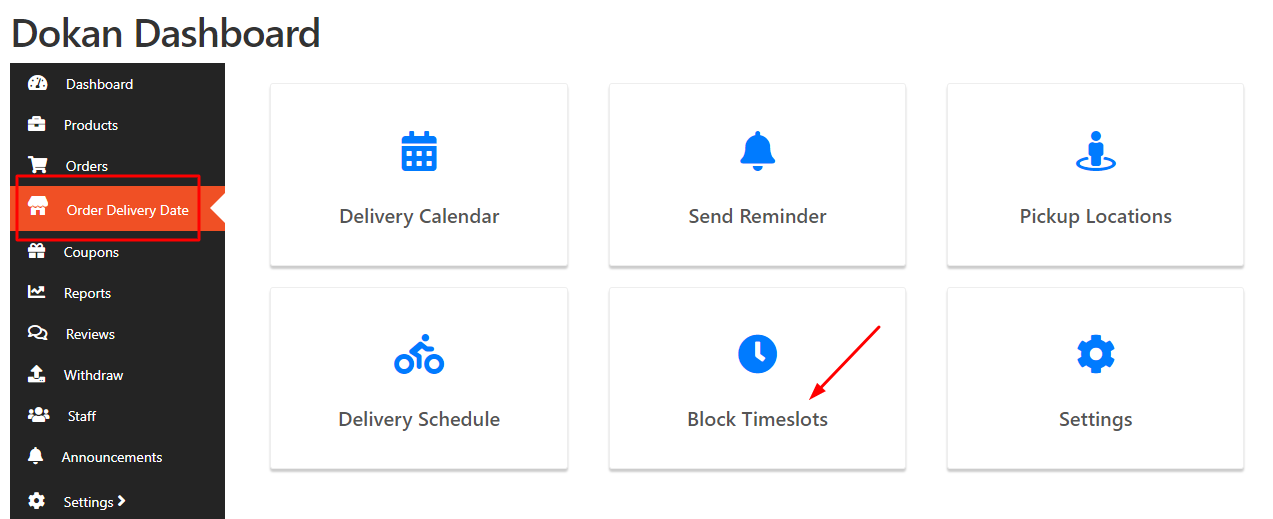
With this setting, your vendors can block a timeslot for specific dates or weekdays. Go to Order Delivery Date > Block Timeslots
It will take you to the following page:
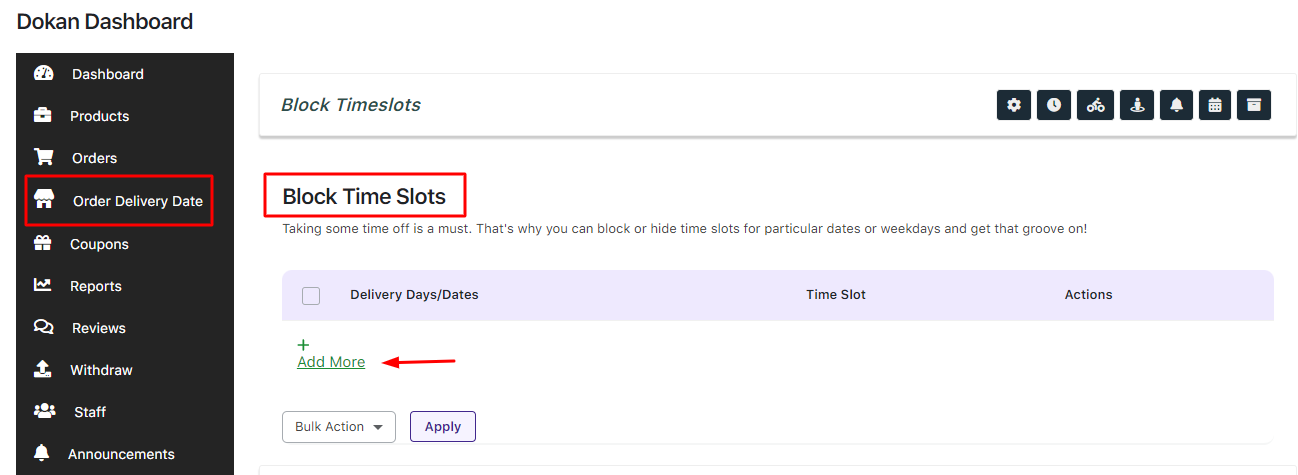
If you want to hide time slots temporarily for a Date then choose it as the option. For instance, you have delivery timeslots set but you cannot deliver on 15th October 2022, then you enter this date and select the timeslot you wish to hide:
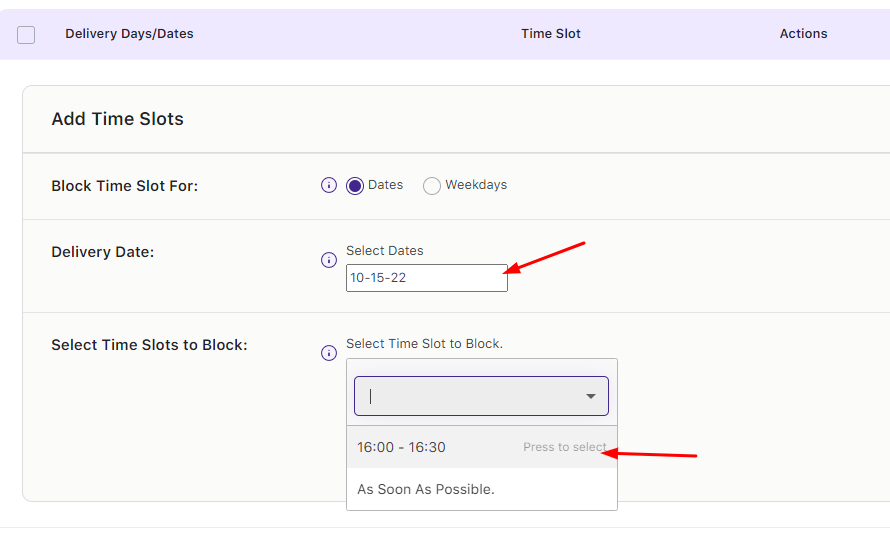
Click on Save Settings. Your Vendor see the blocked timeslot in a table. They can even unblock it later if they wish to.

Similarly, if your Vendor needs to block a timeslot for a weekday, then they can choose the Weekdays option, select the weekday and timeslot as shown here:
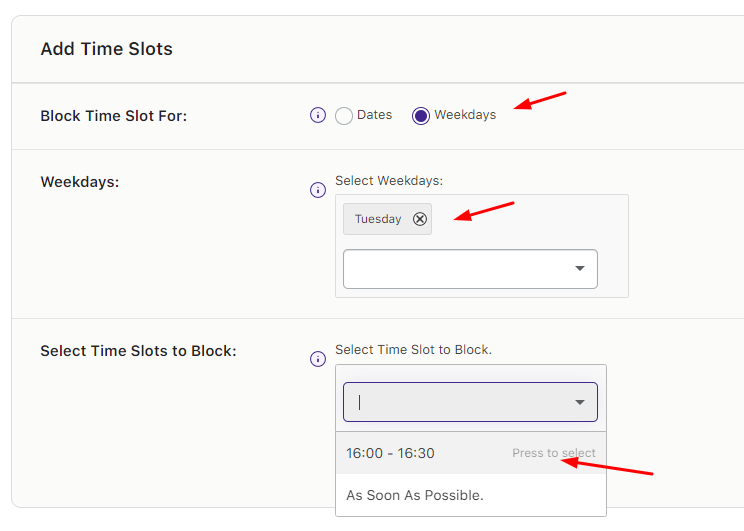
Both these will be added to the table as shown below:
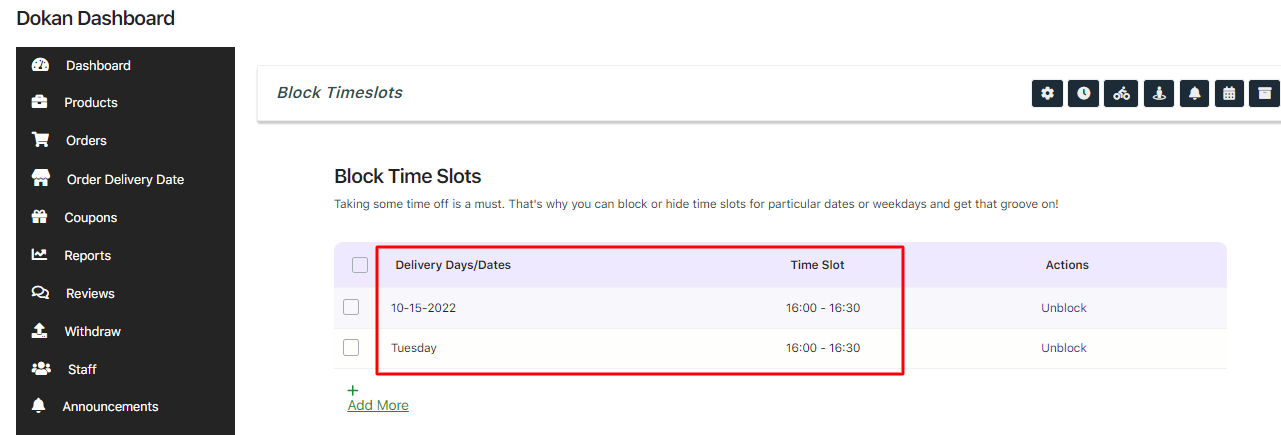
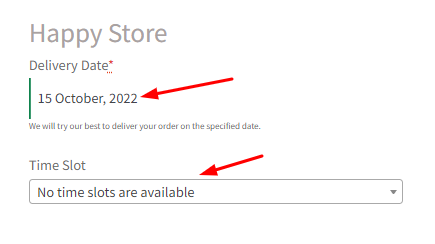
The first timeslot we’ve blocked is the 16:00 to 16:30 for the date 15th October 2022. When the customer chooses this date, they will see that no timeslots are available for it because only 16:00 to 16:30 timeslot was added for this date.
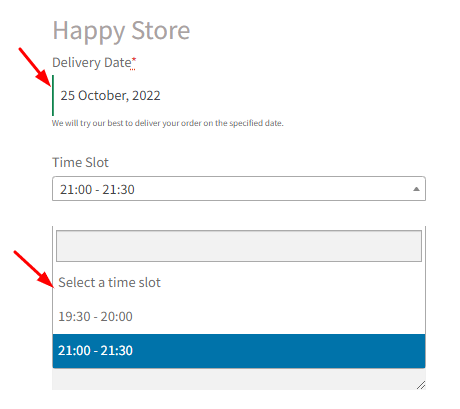
Now, let’s say that you have added three different time slots for the weekdays. They are 16:00 to 16:30, 19:30 to 20:00 and 21:00 to 21:30. Since you have blocked the 16:00 to 16:30 timeslot for Tuesdays, when the customer chooses any date on a Tuesday, they will not find the 16:00 to 16:30 time slot as shown below:
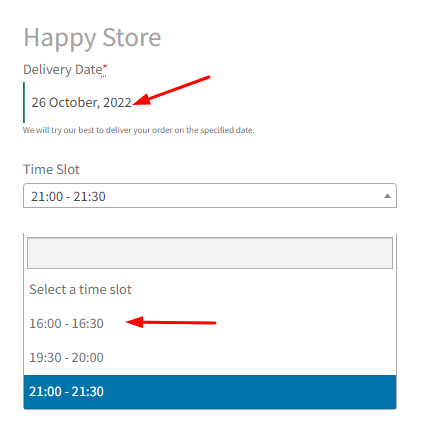
If they choose any other date which does not fall on a Tuesday, then they would see the 16:00 to 16:30 time slot as shown here:
6. Additional Settings
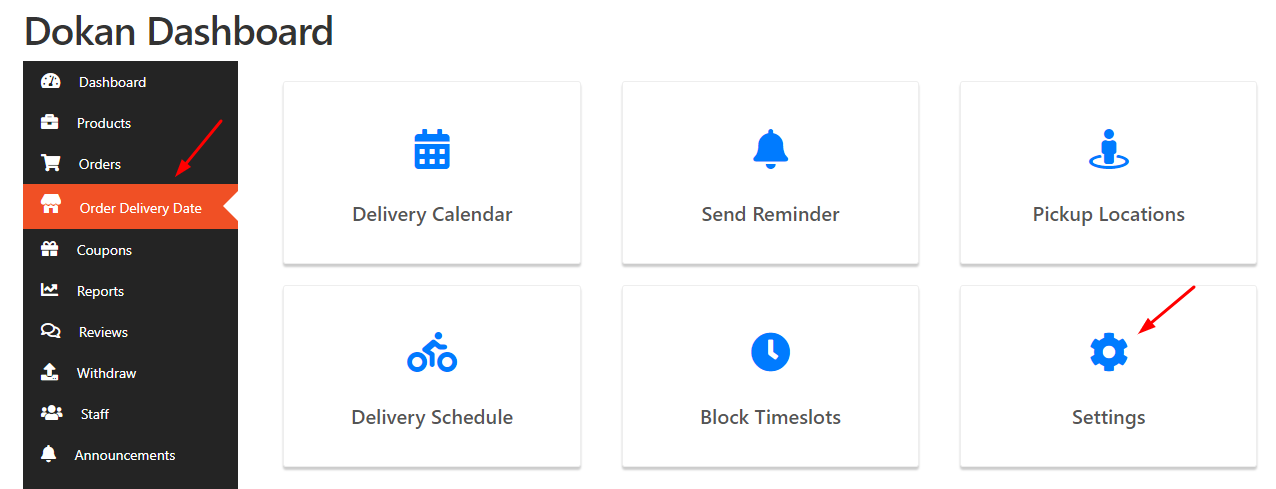
This setting will let your vendors choose the working days and opening time for their store. Based on this, they can manage their deliveries easily. Go to Order Delivery Date > Settings
It will open the following page:
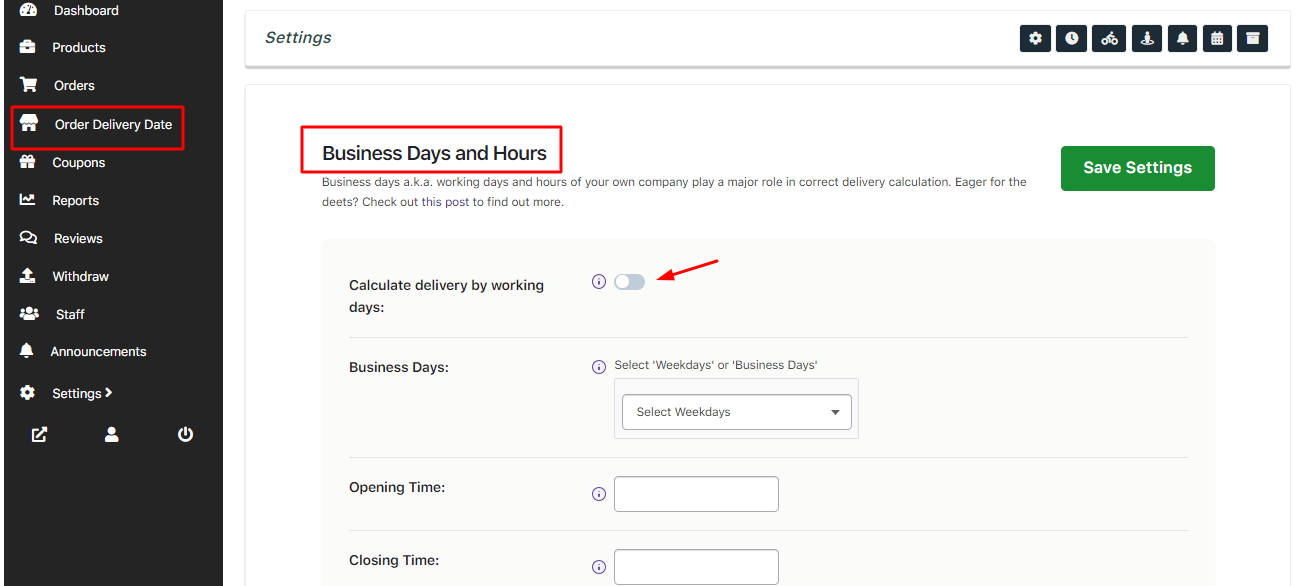
Enable by ticking the checkbox for Calculate delivery by working days.
Under Business Days option, you can choose the days on which your store is open for business. For example, let’s say that your business works on all the days, so here you will enter all the days.
Next, you need to enter the time at which your business opens. Let’s say that your business opens in the morning at 10 am. You will select the 10:00 am option in the dropdown of Opening Time. Similarly, you will choose the closing time of your business. For example, you can select 6:00 pm under the Closing Time option.
Once you have entered these details, here’s how the page will appear:
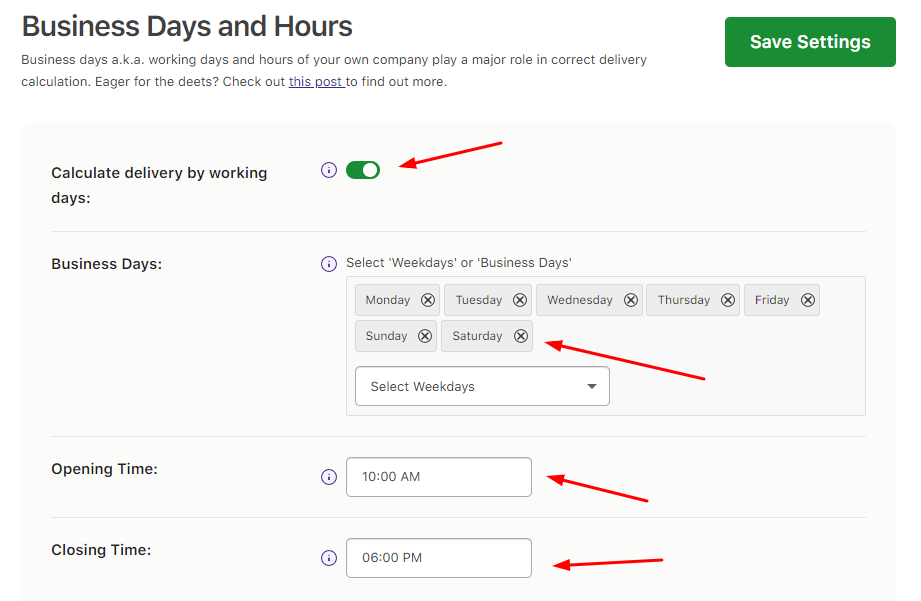
After making these changes, you can click on the Save Settings button. This would mean that your Vendor’s store is available to do business on all days from 10:00 am to 6:00 pm. The orders that would be placed by the customers in your store will be ready to send to your shipping company on these days.
Please note that your store’s Business Days are different from Delivery Weekdays. Business days refer to those days when your store is open or those days specifically when you will be able to provide your products to your 3rd party delivery & shipping provider. Delivery Weekdays, on the other hand, are those days when your delivery & shipping provider will be able to deliver your products to your customers.
Please also note that you can leave this setting unchanged if your store is handling delivery & shipping on your own instead of a 3rd party provider (like Fedex, Dehlivery, etc.)
Let’s say that your delivery days are the weekdays. You have also set your Minimum Delivery Time as 24 hours.

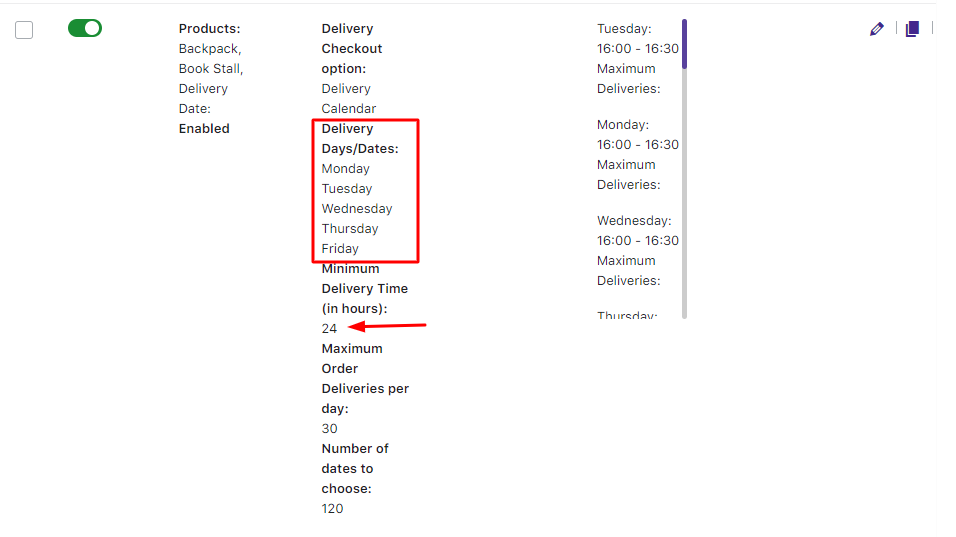
Now, if the customers try to place an order, then they will find the first available date available for delivery after 24 hours from the current WordPress time.
According to the settings that we applied earlier, you will see that the Minimum Delivery time will be applied accordingly. Thus, if today is Thursday, then the first delivery will be available on Monday (8 hours of Thursday + 8 hours of Friday + 8 hours of Saturday = 24 hours minimum delivery time covered).
Considering this calculation, you might be wondering that the first delivery should be available on Sunday and not Monday because our minimum delivery calculations are over on Saturday. But, as we can see above, we have set our delivery days starts from Monday to Friday. That’s why the first available delivery is on Monday and not Sunday because your store’s delivery & shipping provider does not deliver on Sundays. We can see the first available delivery as displayed on the Checkout Page as such:
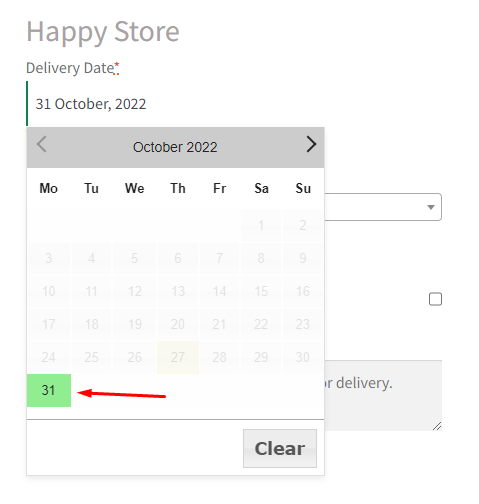
The timeslots added for Monday will all appear once that day is selected by your customer:
