In order to use the Resource feature, you will have to assign them to your bookable products.
For this, you will have to go to the Products page and select a product. On the Edit Product page, under the Booking meta box, there is an option called Resources. Enabling this option will allow adding the resource to that product.
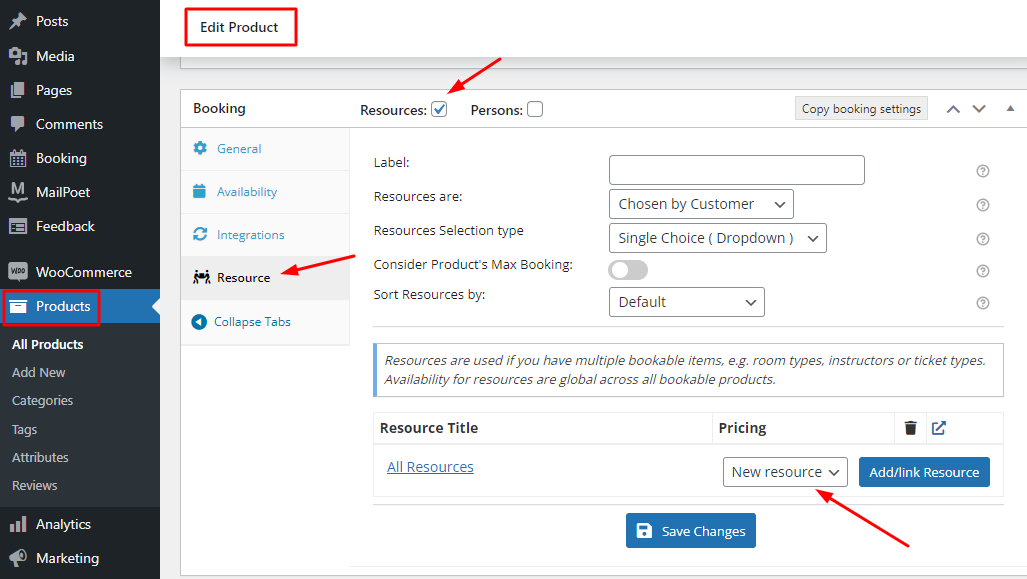
Under the Resource Tab, you will find the following settings:
1. Assigning Resources to a product
The Resource Table is where you can add an already-created resource.
Also, you can directly create a new resource and add it to the service by clicking the ‘Add/link Resource’ button. It will then ask you to give a name to your resource and configure its availability.
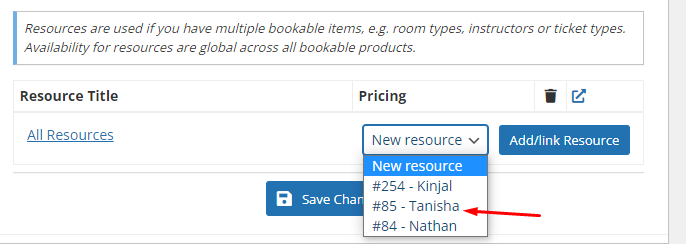
Under the Resource Title, you can click the dropdown for New resource. You will be displayed the resources added by you.
Choose the ones you wish to add:
After adding them, you will have to enter the base cost for these resources. The base cost is the cost for the resource which will be added to the overall cost of the bookable product. For example, if the bookable product price is $100 and the base cost is $20. By adding the resource the cost will be $120.
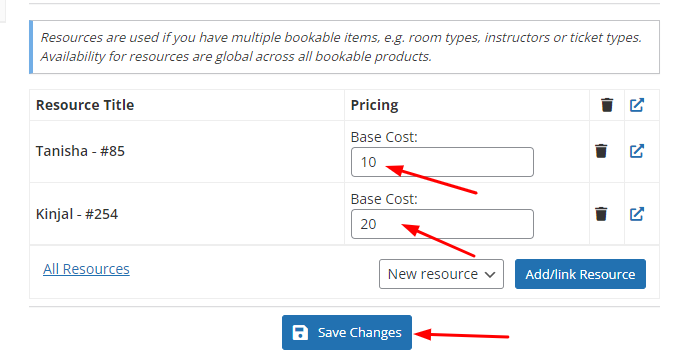
After clicking the Save Changes button, your resources will be assigned to the bookable product.
2. Label
You can set the label for the Resources Dropdown that will appear on the front-end product page.

For instance, you can label it as ‘Resource to be booked’
3. Define how resources are assigned under ‘Resources Are’
You can allow your customer to select the available resource or the resource can automatically get assigned to the service when it is booked.
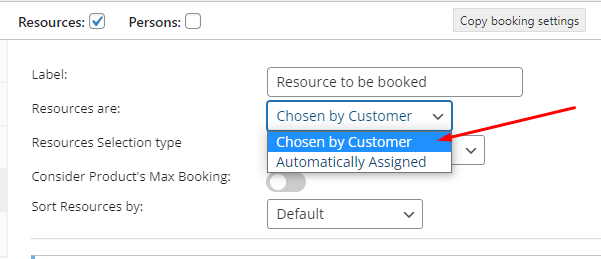
If you go with ‘Automatically Assigned’, then the customers will not get a choice to select the resource. They will be automatically applied based on the resource availability allotted to them:
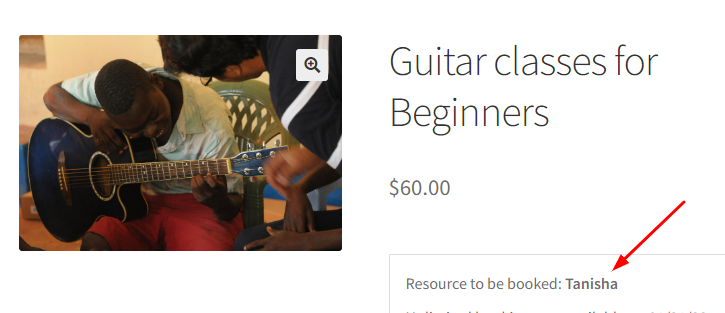
When you go with ‘Chosen by Customer’, the choice for the resources will be given to them:
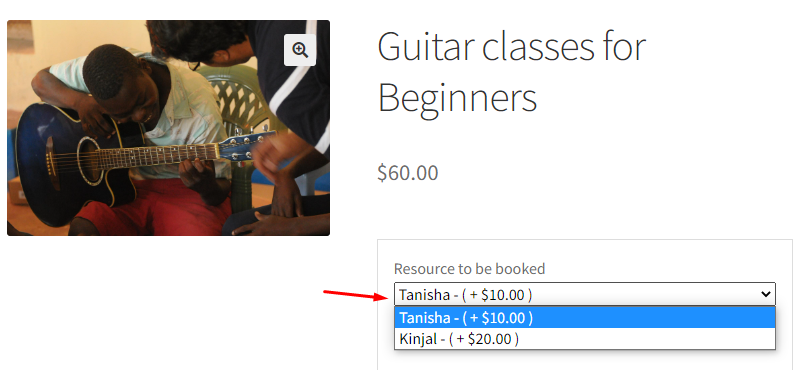
4. Resources Selection Type
This setting lets you display the resources as dropdown or as checkbox options for the customers.
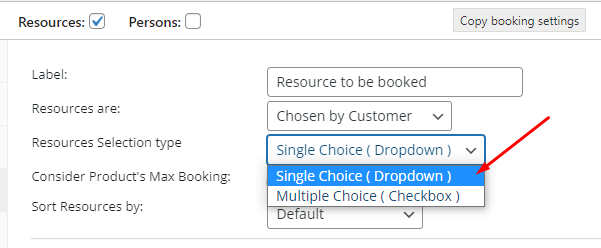
If you choose Single Choice (Dropdown), the customer gets to choose the resources in this manner:

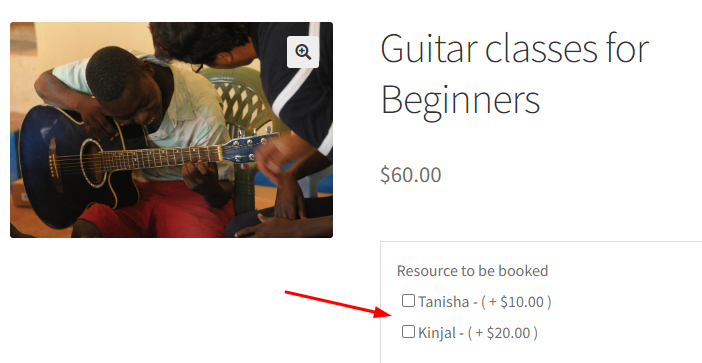
When you choose Multiple Choice (Checkbox), then the customers will get the tick the resources as shown here on the front end:
5. How to use ‘Consider Product’s Max Booking’ setting
Enabling this setting will ensure that the Product’s maximum booking is considered over the Resource’s available quantity.
For instance, you own a cake business and have 2 products with the same resource. You wish to consider the product’s max booking for one product while not for the other.
You can create your setup in this manner: Your resource is ‘Cake Baker’. You can set its quantity availability to 2.
To set the Resource’s available quantity, go to Booking > Resources > Select your Resource > Available Quantity as shown here:

This resource will now be used for your two products.
The first product is ‘Wedding Cake’.
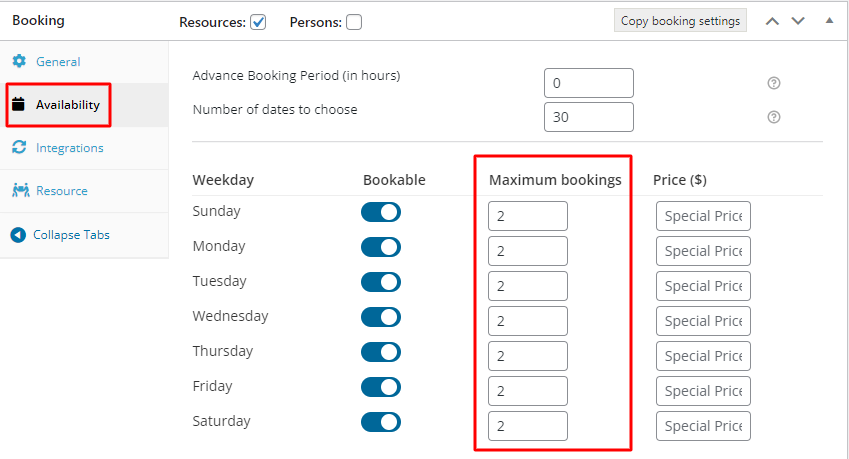
The selected product’s maximum booking can be set by going to the Availability Tab > Maximum bookings. Since it’s a wedding cake, preparing it will take time. Your resource may only be able to prepare one of them every day. So, setting the maximum bookings for each day as 1 makes sense.
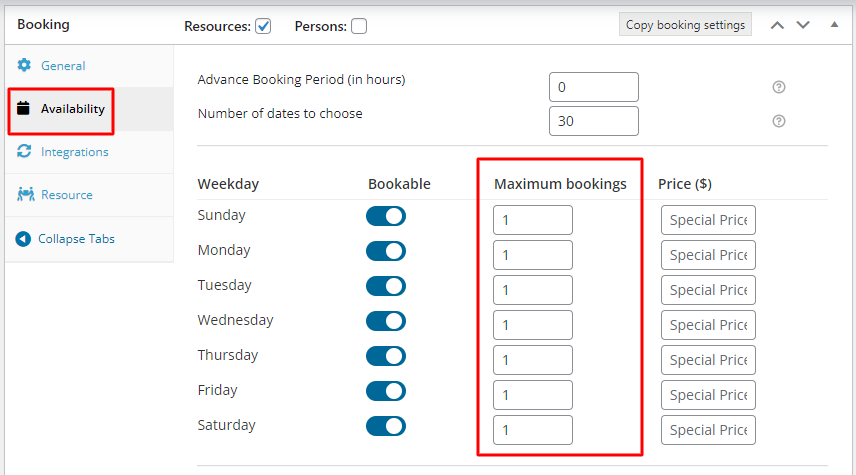
Next, go to the Resource tab, enable the Resources checkbox, add your Resource, and enable the ‘Consider Product’s Max Booking’.
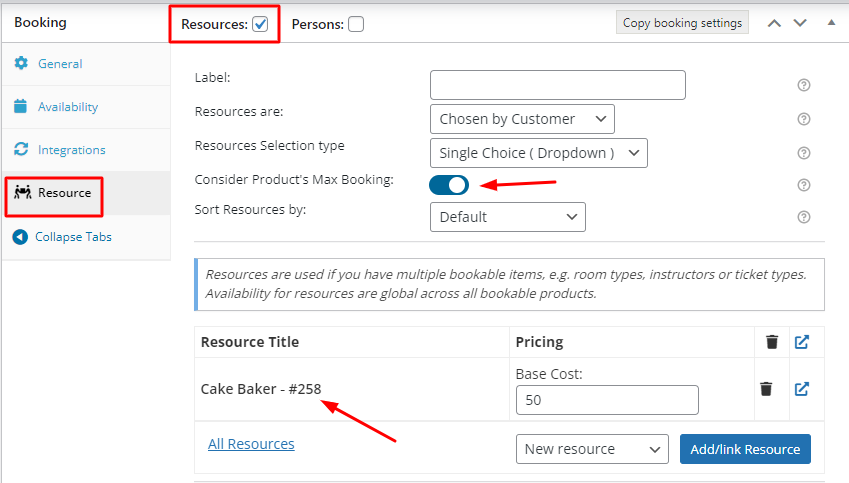
In this case, despite your resource’s quantity being 2, your product’s max booking which is 1 will be considered. Let’s say that a customer has decided to go with this product and booked it for 18th April 2023, only 1 booking will be available as shown here:
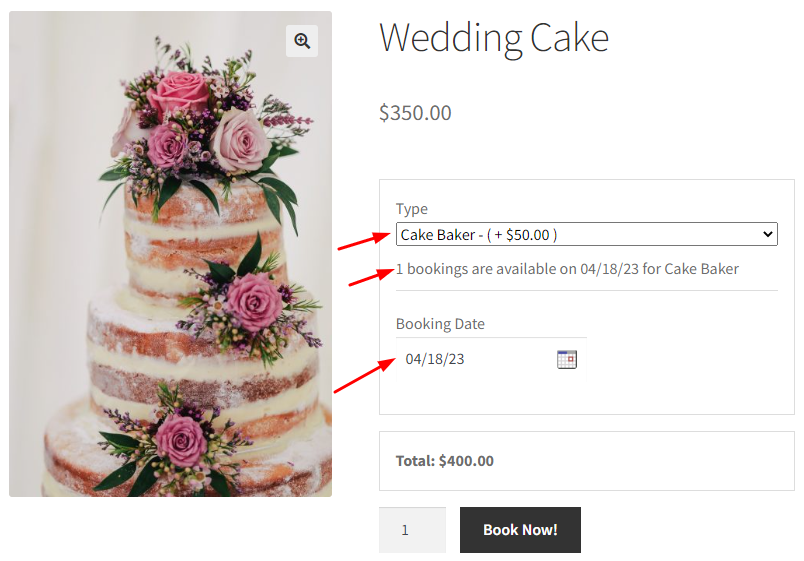
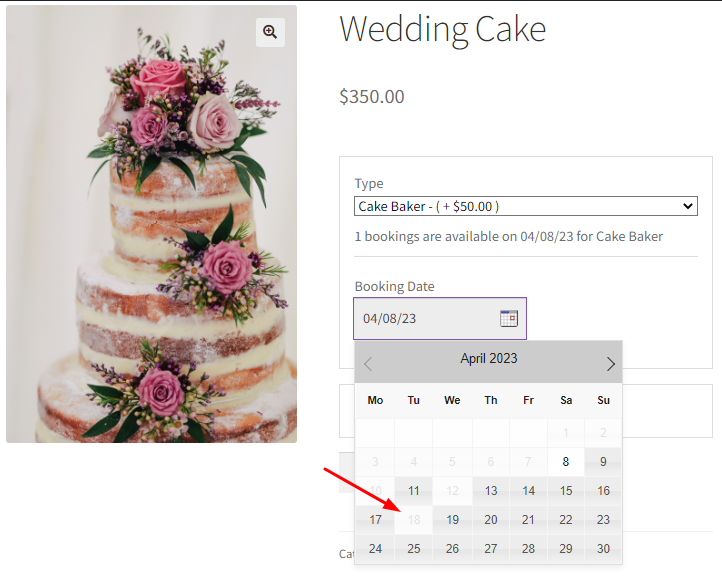
After this booking is completed, if another customer wishes to book this same product for the date 18th April 2023, they will not be able to book the cake with the “Cake Baker resource” because it will no longer be available as the product’s max capacity 1 was completed with the previous booking itself.
Now, let us go with another product ‘Berry Cake – Large.’ This product will not have the ‘Consider product’s max bookings’ setting enabled.
The resource available quantity will remain the same which was set earlier. It was set to 2.
Let’s say that your resource can only make 2 of these large cakes on a particular date. You can thus fill its maximum bookings to 2.
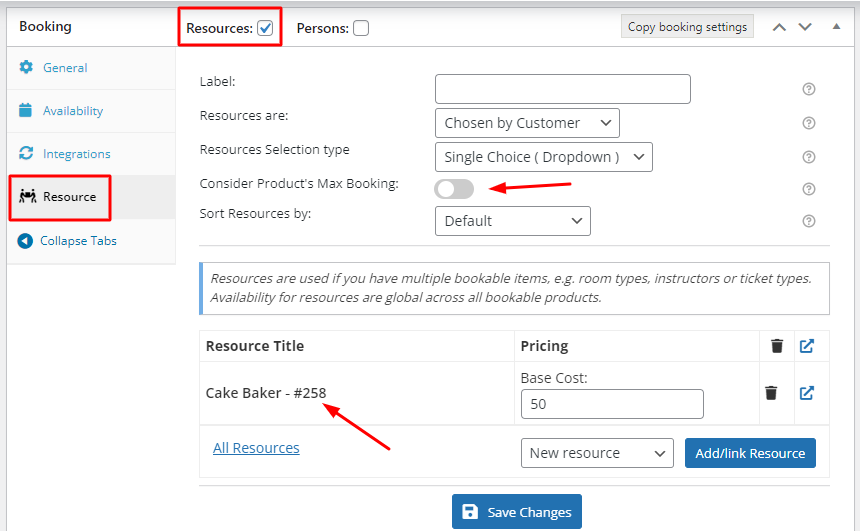
You’ll continue to fill the settings in the Resource tab but this time, you will not enable the ‘Consider product’s max booking’ setting as shown here:
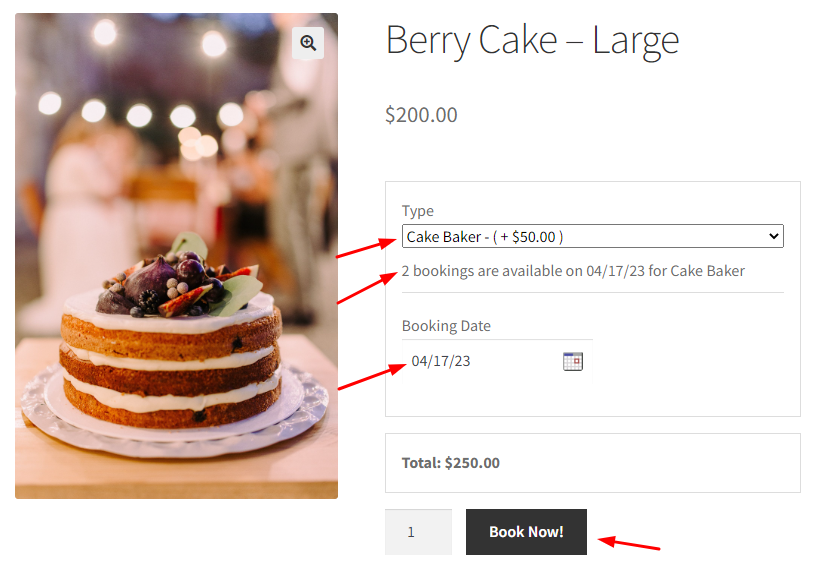
In this case, because your Resource’s available quantity is set to 2, the availability of the cake with the resource “Cake Baker” will be shown as 2 on the product page.
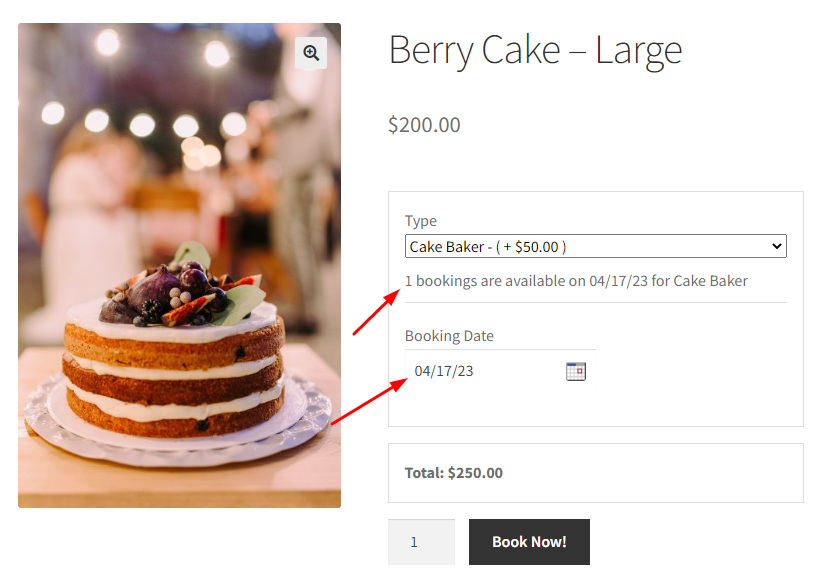
If a booking for the Berry Cake – Large has been made for 17th April 2023, if another customer tries to book the cake on the same date, then they will be able to book one because 1 booking is still available as shown here:
In another scenario, if a customer tries to book the product Wedding Cake on 17th April 2023 after one booking has been made for Berry Cake- large on the same date (17th April 2023) with the resource ‘Cake Baker’, the customer will not be able to do a booking because according to your settings, Wedding Cakes product’s maximum booking value 1 will be considered.
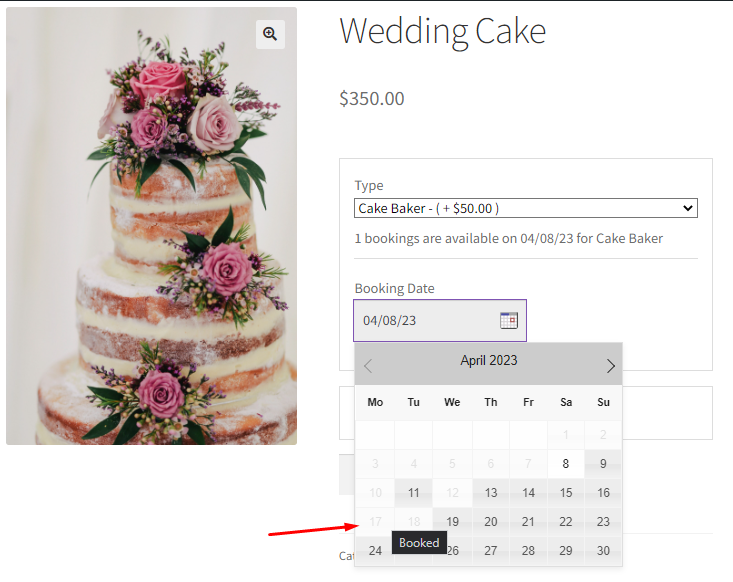
If the customer hovers over this date, a ‘Booked’ message will be displayed as shown above.
6. Sort Resources by
Using this setting, you can ensure that the resources are visible to your customers in a particular order on the front end. You can sort your resources according to these options:
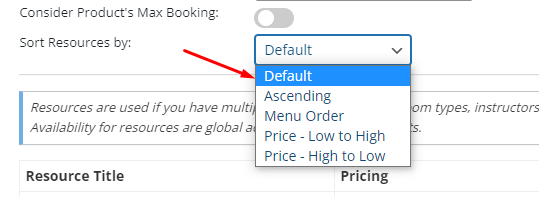
The Default Resources where you have added the resources along with their prices will help you sort them.
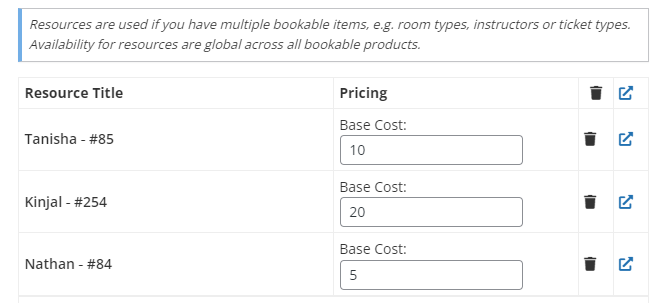
Default Resources Table
1. Default option lets you display the resources in the manner they appear in the table
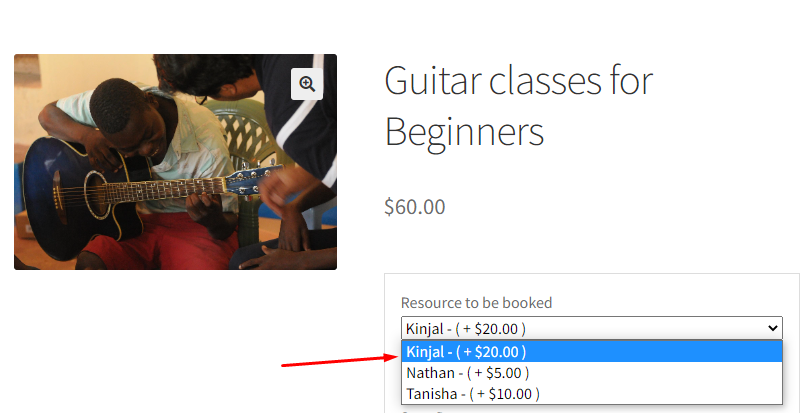
2. Ascending option displays them in an ascending order starting from the alphabet A
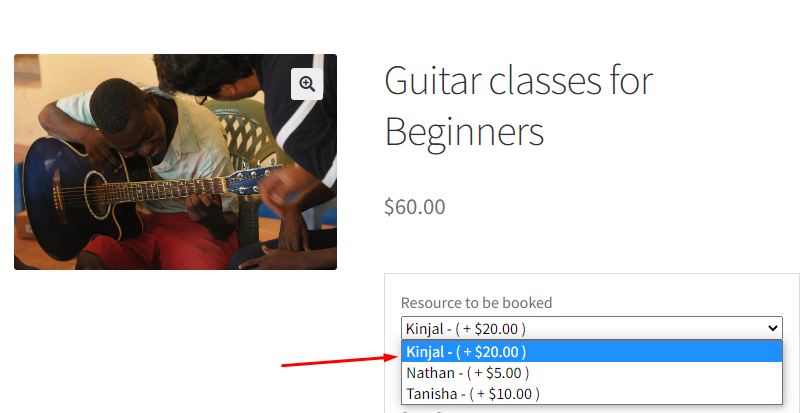
3. Menu Order option will display them based on the value order set by you in the Menu of that particular Resource.
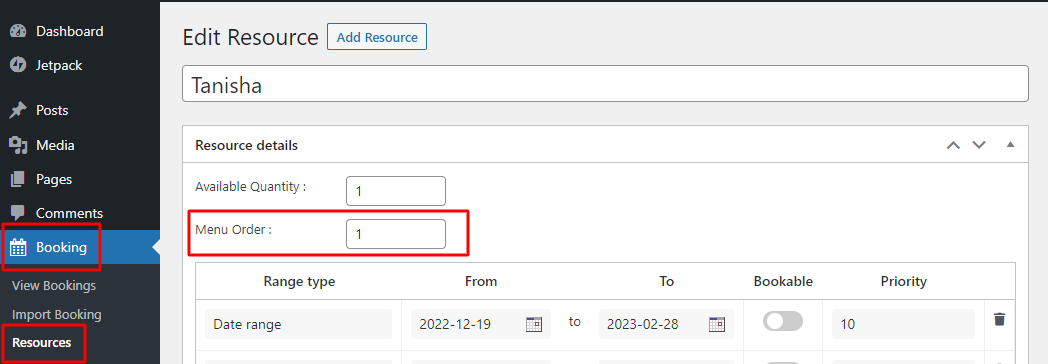
Choose the resource by going to Booking > Resources > Choosing your resource.
Under the Menu Order box, you can enter the value. For resource Tanisha, we have added 1.
This resource will thus be displayed first in the dropdown on the front end for customers.
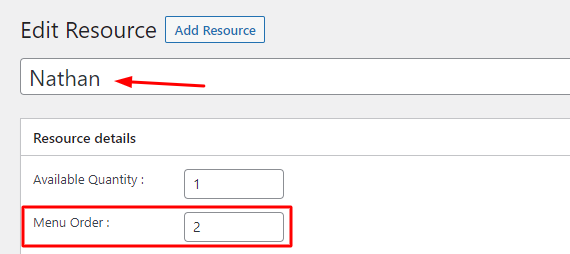
For resource Nathan, we’ve entered the value 2. It will be displayed next in the line.
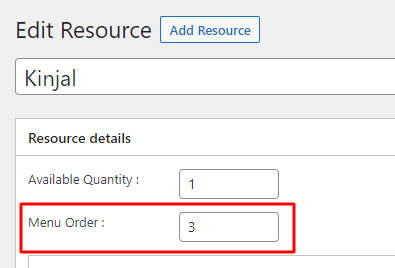
Lastly, for resource Kinjal, we’ve entered the value 3.
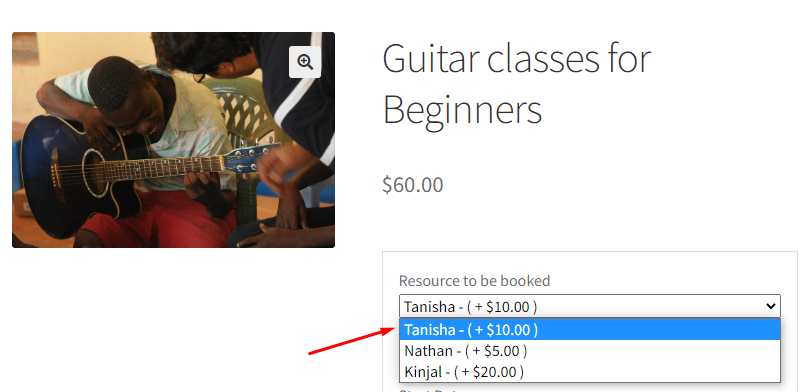
Thus, the order in which the resources will be displayed on the front end will be Tanisha, Nathan, and then Kinjal as shown here:
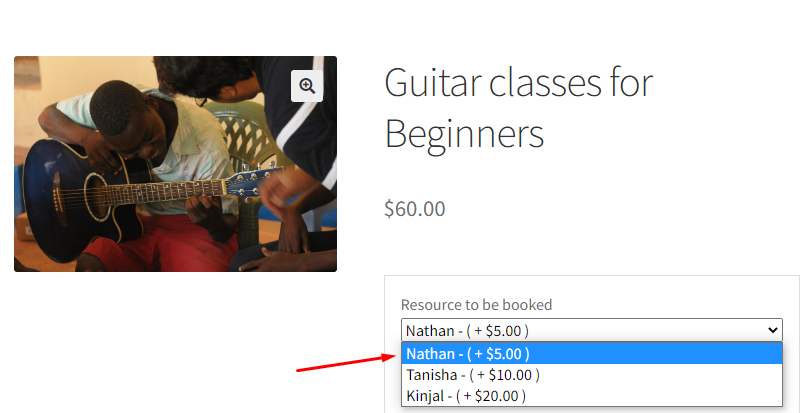
4. Price -Low to High option will display resources from low-priced resources to high-priced resources
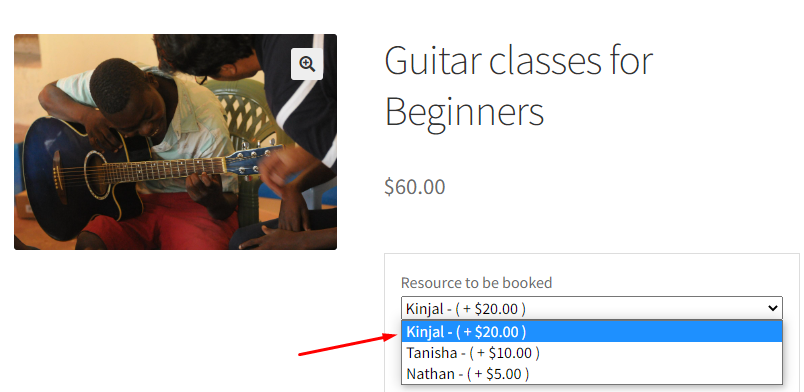
5. Price- High to Low option will display resources from high-priced resources to low-priced resources
Thus using these settings you can set your resources according to your needs.