The Booking & Appointment Plugin for WooCommerce comes with a time saver feature called ‘Bulk Booking Settings’ which allows the store owner to add booking settings to multiple products from one place.
Instead of visiting each individual product page and applying the booking settings to it, one can add booking settings to multiple products in one go. Not only does it save a lot of time for the store owner, but it also makes the process of adding settings easy.
1. Configuring Bulk Booking Settings
2. Bulk Booking Settings for Products
3. Bulk Booking Settings for Products Categories
4. Save selected options as default
1. Configuring Bulk Booking Settings
Go to Booking > Settings > Bulk Booking Settings tab.
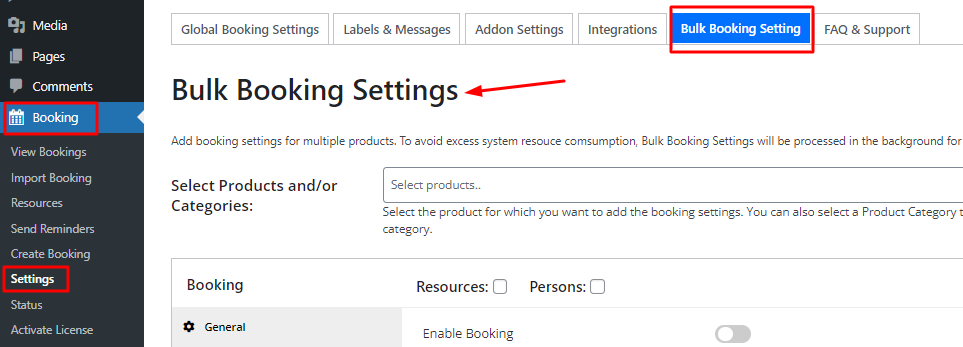
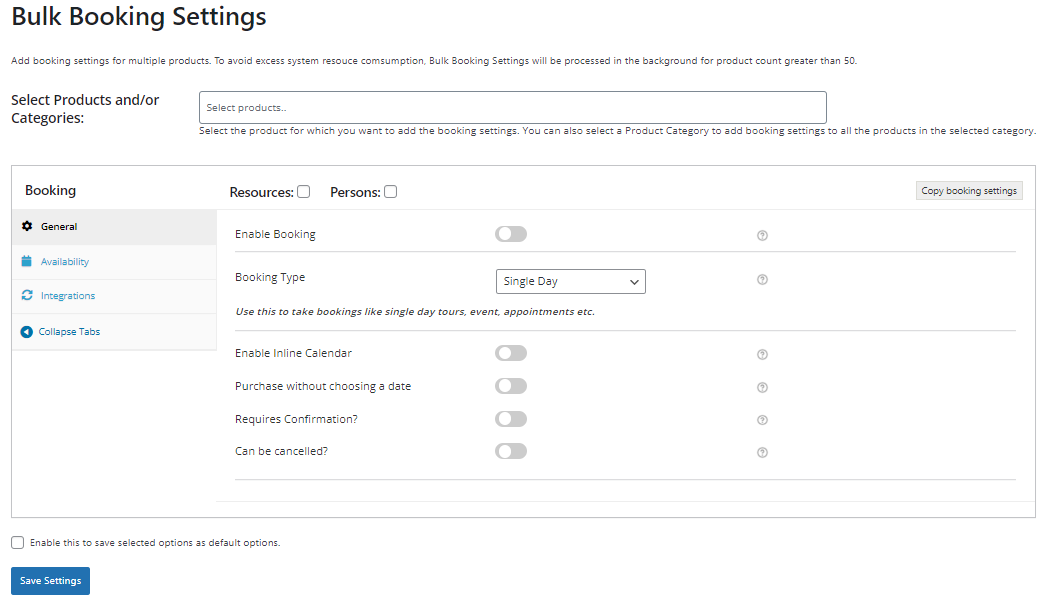
As you can see in the above screenshot, the ‘Select Products and/or Categories‘ field is available for selecting multiple products or product categories.
On clicking this option, the dropdown will display an ‘All products’ option, list of individual products in your store as well as options with different Product Categories.
You can select the option of your choice and choose the booking settings you need in the Booking meta box.
2. Bulk Booking Settings for Products
Let’s say you are running a website that allows people to book appointments with multiple doctors. Using the Booking plugin you want to set up appointments with all or multiple doctors (products).
All doctors are available to book on 10:00 – 11:00, 11:00 – 12:00, 12:00 – 13:00, 16:00 – 17:00, 17:00 – 18:00, and 18:00 – 19:00 on all days.
Using Fixed Time booking type and Bulk Booking functionality this can be set up easily for multiple products.

As you can see in the above screenshot, Doctor A, Doctor B, and Doctor C are selected in the ‘Products and/or Categories‘ field. Along with this, the required settings have been enabled in the General tab.
Now, let’s create the time slots in the Availability tab.
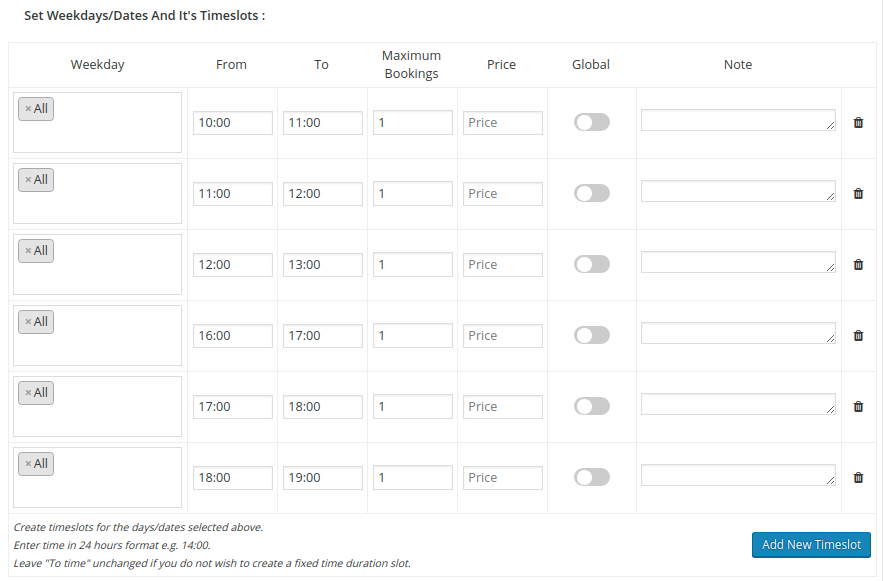
After adding all the time slots, click the Save Settings button. This action will add all the selected booking settings in Doctor A, Doctor B, and Doctor C products.
3. Bulk Booking Settings for Products Categories
Now, let’s say that you wish to add bulk booking settings based on different Product Categories.
You can select the specific product category you want.
For instance, here we have selected all the products that fall under the ‘Boat Tour’ product category.

Following this, you can enable the booking for it and select a Booking Type for it, configure the Availability settings, and then click on Save Settings to apply it to all the products that fall under the selected Product Category.
If you want to add booking settings for all products then in the Products field you can select ‘All Products‘ option and enable require settings in the Booking Meta box. Clicking the Save Settings button will save selected booking settings for all the products.
In the same way, it is possible to apply booking settings according to the different booking types which are Single Day, Multiple Nights, and Duration Based Time.
Visit the individual product page if you need to change a particular setting for a particular product after applying the setting in bulk.
Note: If the selected product in the ‘Products’ field is already having booking settings then it will be overridden by the new settings selected in the Booking meta box.
If you want to add, delete and update the availability-related information only in multiple products then you can use the Manage Availability of Products functionality of the Booking plugin.
4. Save selected options as default
Site admins can also set default booking options for them while adding bulk booking settings. This feature saves the time of setting values every time when you create a bulk booking.
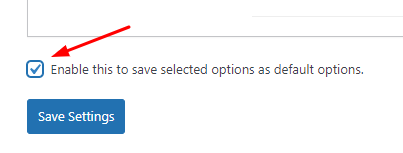
The option to set the default booking option is present just above the ‘Save Setting’ button as shown in the image:
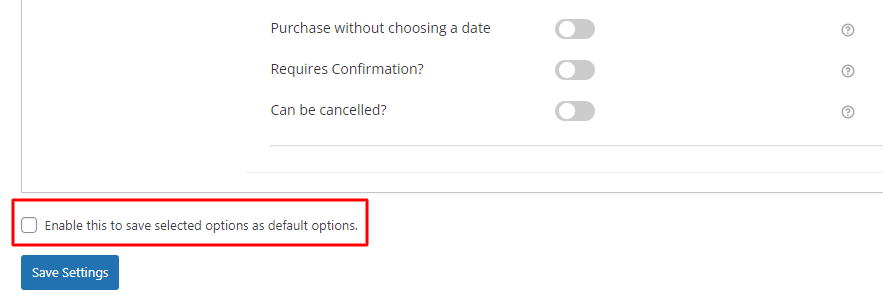
You will have to tick the checkbox and click on Save Settings.
Let us see how this setting can be used.
Let’s assume that you run online Guitar classes for different levels. It is most likely that you will use the ‘Fixed Time’ booking type along with the ‘Persons’ setting as your Booking settings for most of your products.
You can fill in these settings and tick the checkbox for the default option setting as shown here:
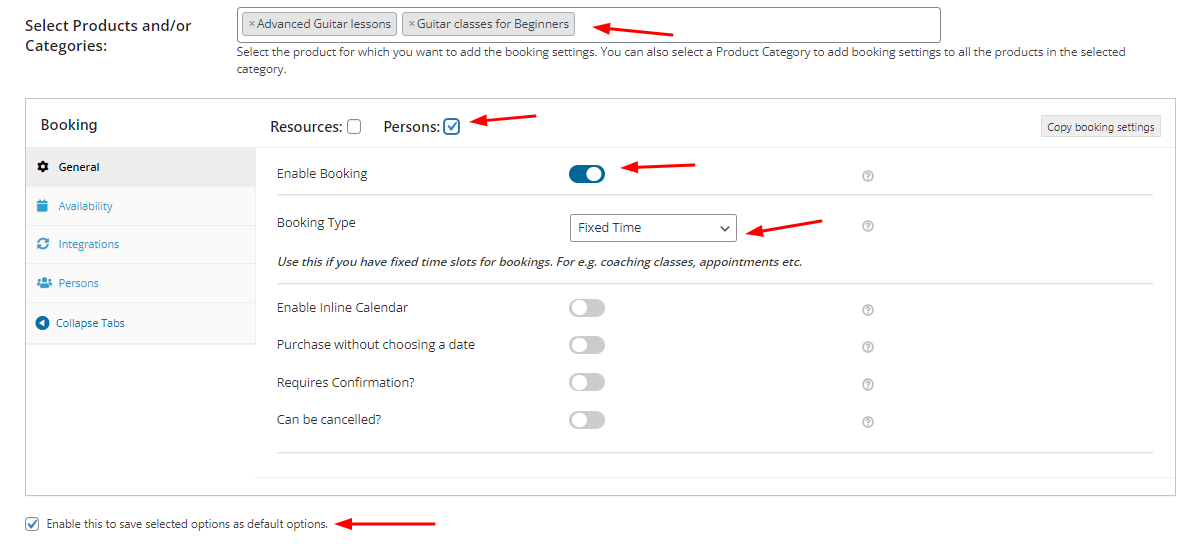
This would mean that the next time when you try to configure bulk booking settings, by default the settings added by you will be available readily.
A ‘Clear defaults’ option will be present at the button to help you clear the default values and set unique options for the products.
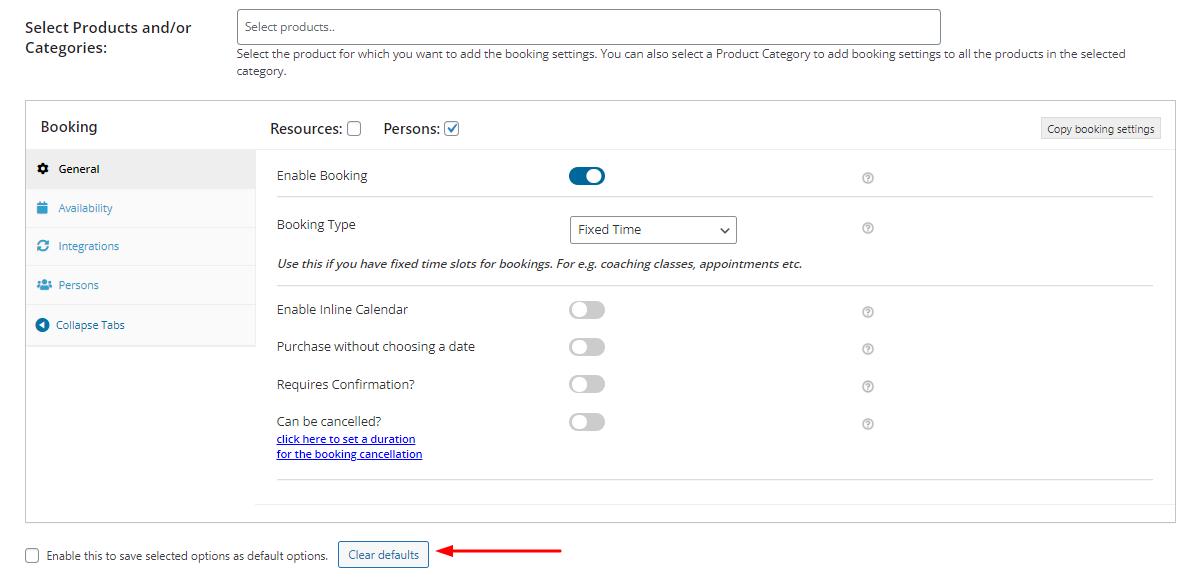
Clicking on the ‘Clear Defaults’ button will scrape off all the previous default booking options. While it is in this process, the button will have the words ‘Clearing’ over it as shown here:

Once done, your Bulk Bookings Page will be fresh as a new one without the previous default settings.
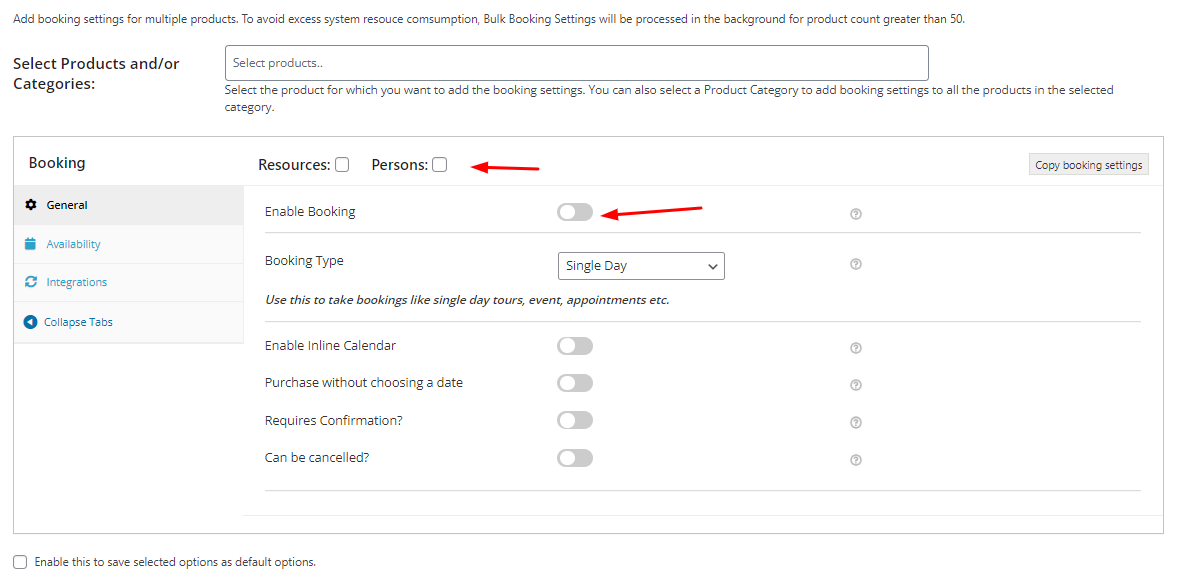
Thus, with the Bulk Booking settings, you can simply set the same booking settings directly from one place for all of your products in a seamless manner.