In v5.2.0 of Booking & Appointment Plugin for WooCommerce, we have introduced a new feature that allows you to integrate the plugin with Zoom. This integration will allow the creation of meetings in Zoom for all the bookings & appointments placed on your site.
Zoom is a cloud-based video conferencing service you can use to virtually meet with others. It is the leader in modern enterprise video communications, with an easy, reliable cloud platform for video and audio conferencing, chat, and webinars.
Businesses that need Booking & Appointment with Zoom Integration
Some of the businesses where the Zoom integration can be helpful are Gym and fitness, Yoga centers, Hospitals, Dental clinics, Nutrition and wellness clinics, Event and activity Organizers, Consultants, and professionals such as lawyers, accountants, designers, Online classes for education & coaching all will require bookings & appointments.
The integration of the Booking plugin with Zoom allows users to give their customers a great video conferencing solution. This will also allow them to streamline and automate their sales activity from initial prospect to video call.
Let us see how you can set up the Zoom integration in the Booking plugin.
ADMIN SETTINGS
You can find this feature in Booking -> Settings -> Integrations -> Zoom Meetings as shown below:
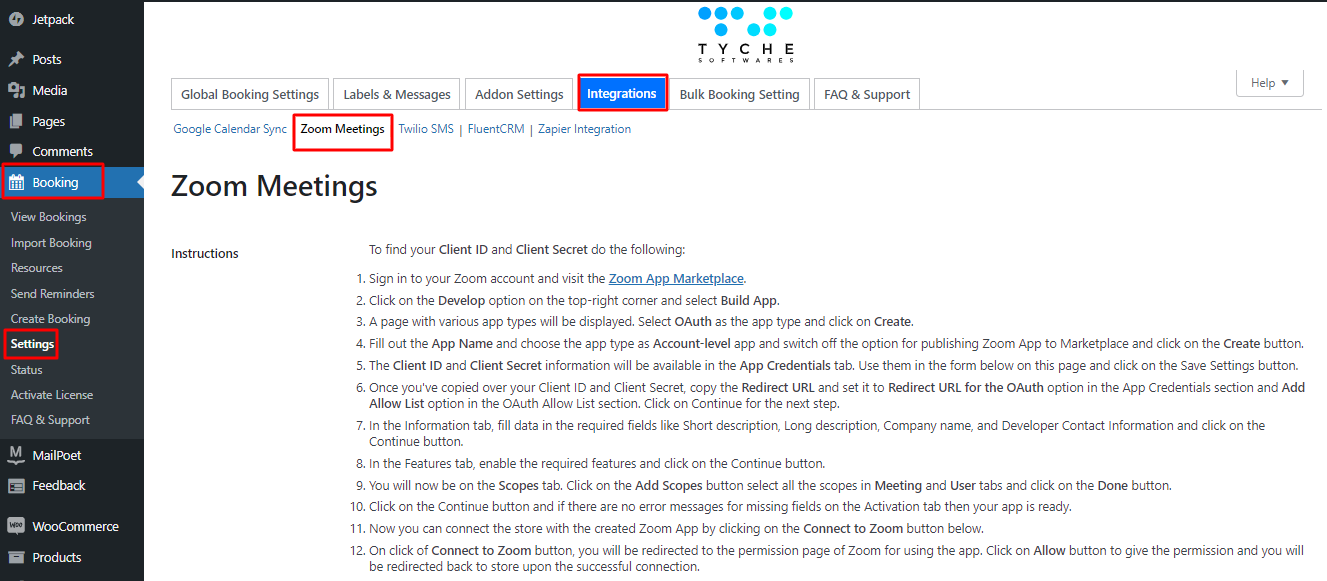
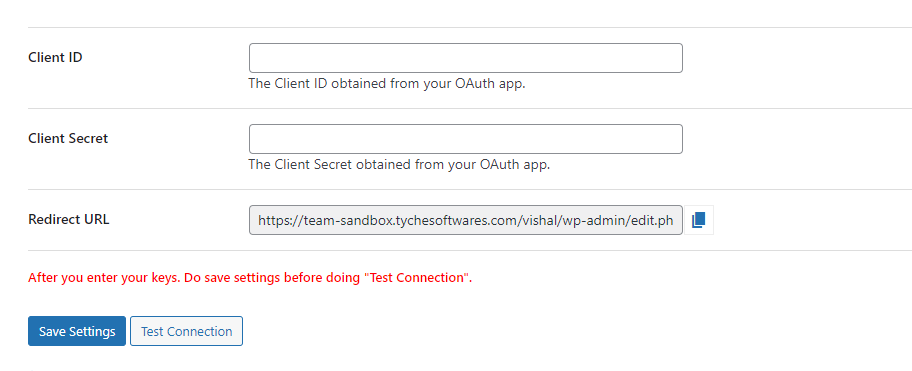
First, you need to connect your Zoom account by using the Client ID & Client Secret. You can obtain this from your Zoom account using the below instructions. This integration will take place through OAuth App Type from v5.23.0 onwards.
To find your Client ID and Client Secret, do the following:
Sign in to your Zoom account and visit the Zoom App Marketplace. Click on the Develop option on the top-right corner and select Build App.

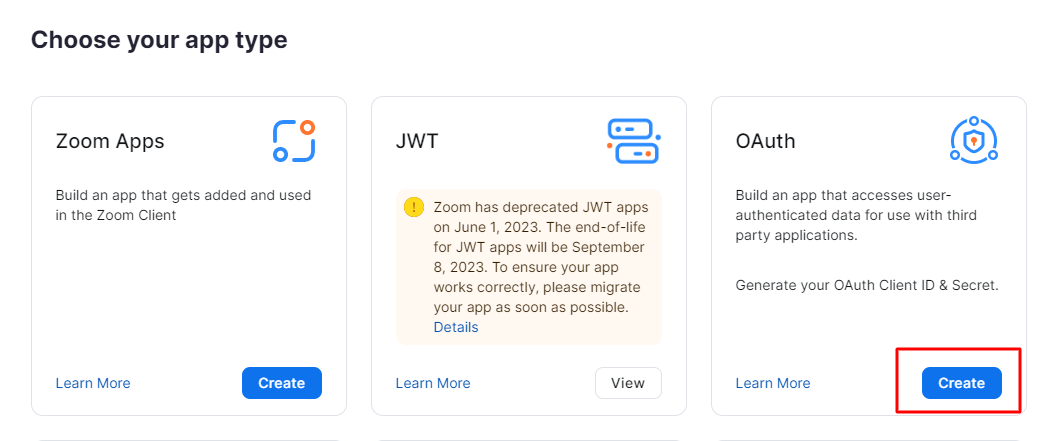
A page with various app types will be displayed. Select OAuth as the app type and click on Create.
Please note that previously, if you had integrated the plugin using JWT then it’s now time for you to migrate your app using OAuth.
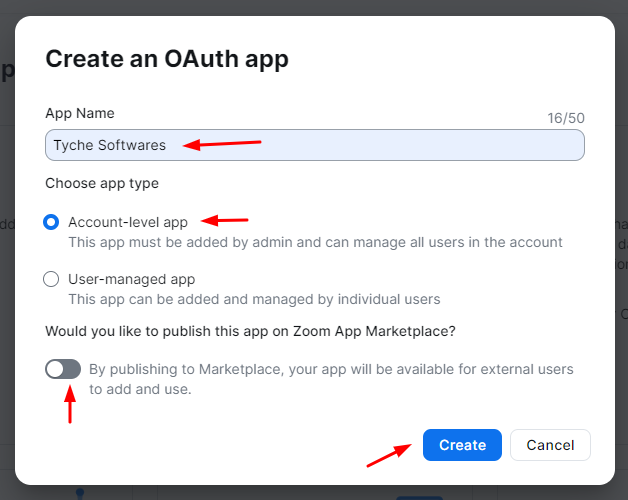
Fill out the App Name, and choose the app type as Account-level app. Disable the option for publishing the Zoom App to Marketplace and click on the Create button.
The Client ID and Client Secret information will be available in the App Credentials tab.
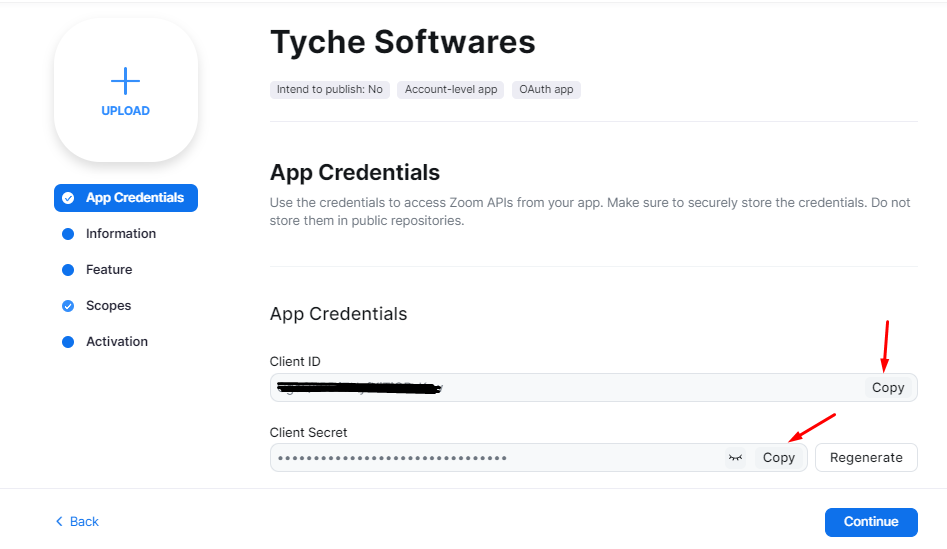
Copy them from here and paste them into the form on your WooCommerce Booking page. Click on the Save Settings button.
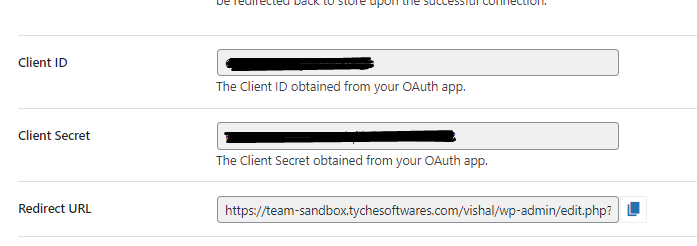
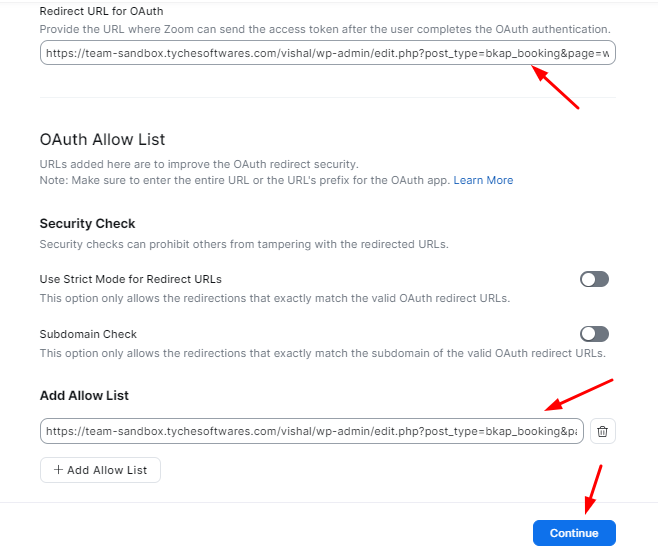
Now copy the Redirect URL. Go back to the Zoom Marketplace link.
Paste it in the Redirect URL for the OAuth option in the App Credentials section and Add Allow List option in the OAuth Allow List section.
Click on Continue for the next step.
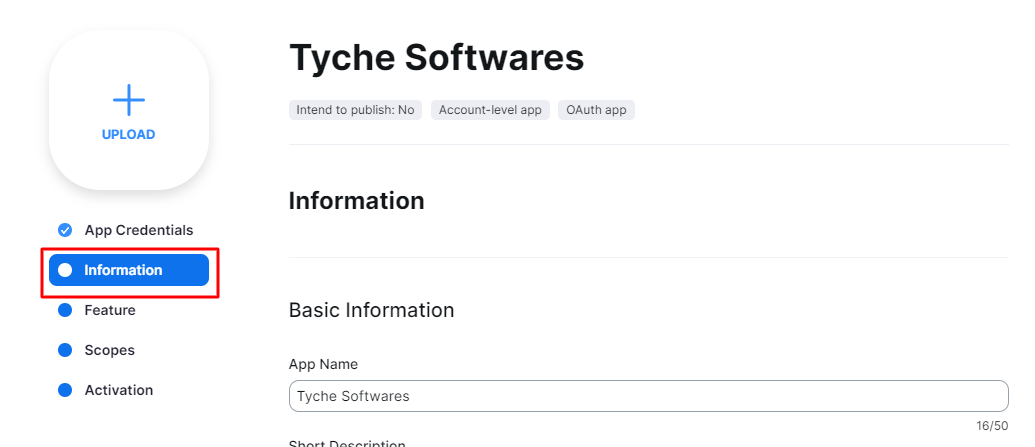
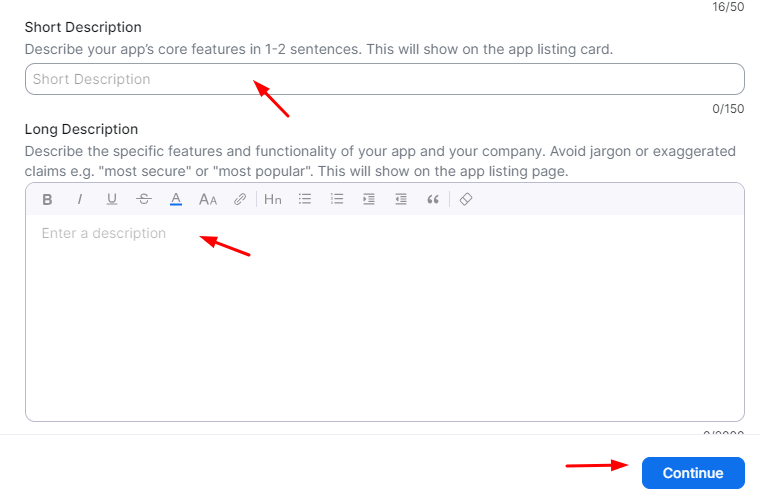
In the Information tab, fill data in the required fields like Short description, Long description, Company name, and Developer Contact Information and click on the Continue button.
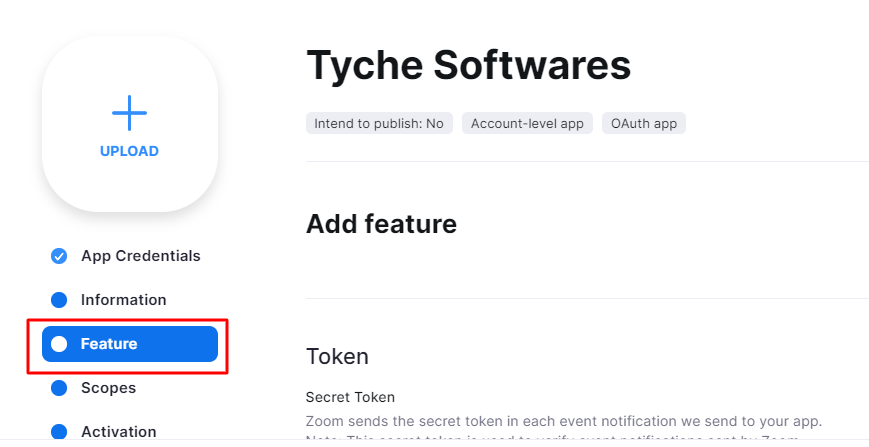
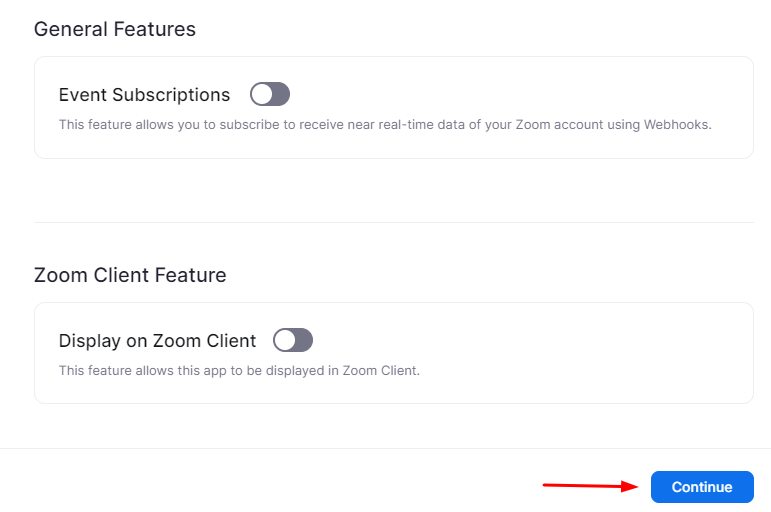
In the Features tab, enable the required features and click on the Continue button.
You will now be on the Scopes tab. Click on the Add Scopes button.
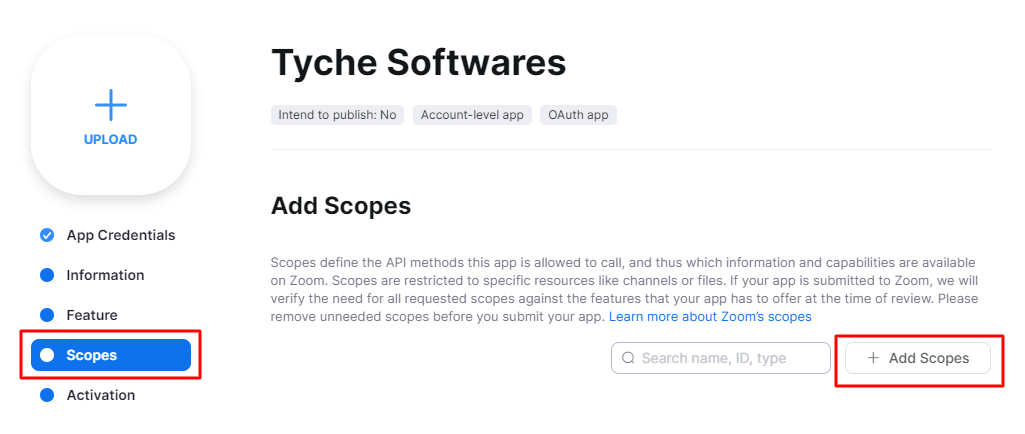
Select all the scopes in the Meeting and User tabs and click on the Done button.
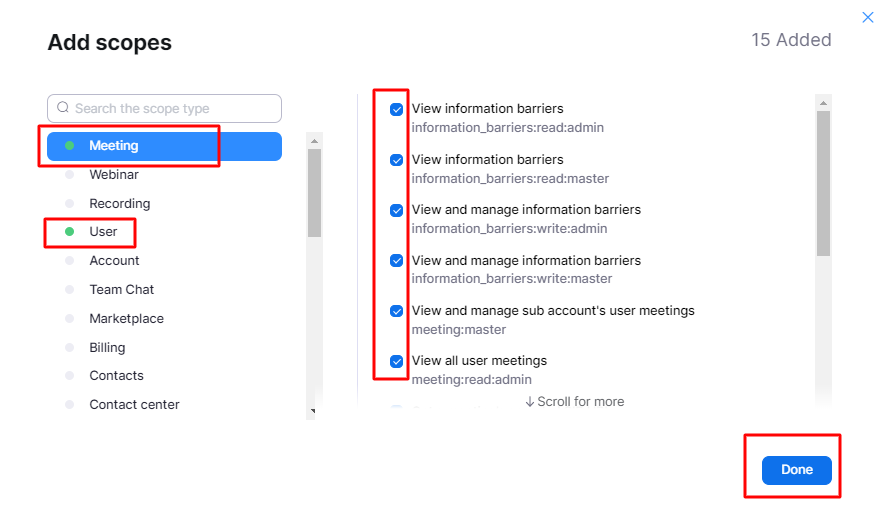
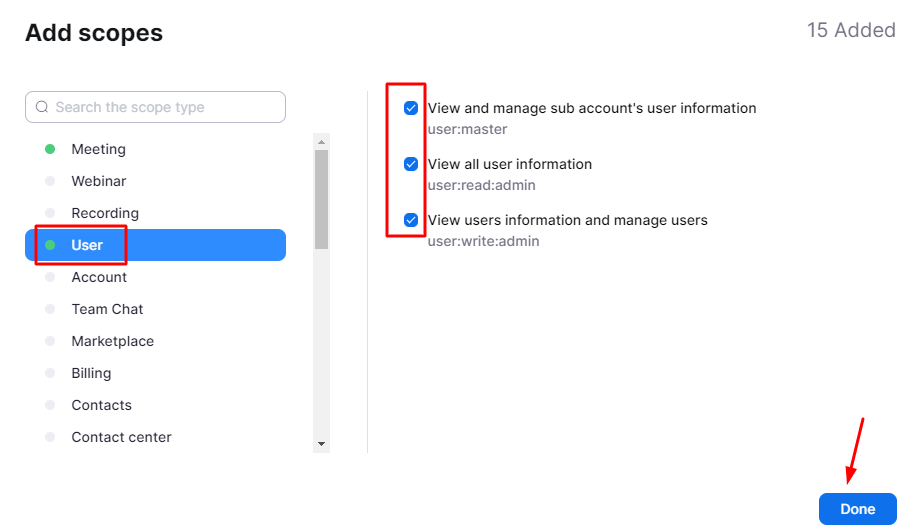
Once added, they would appear like this:
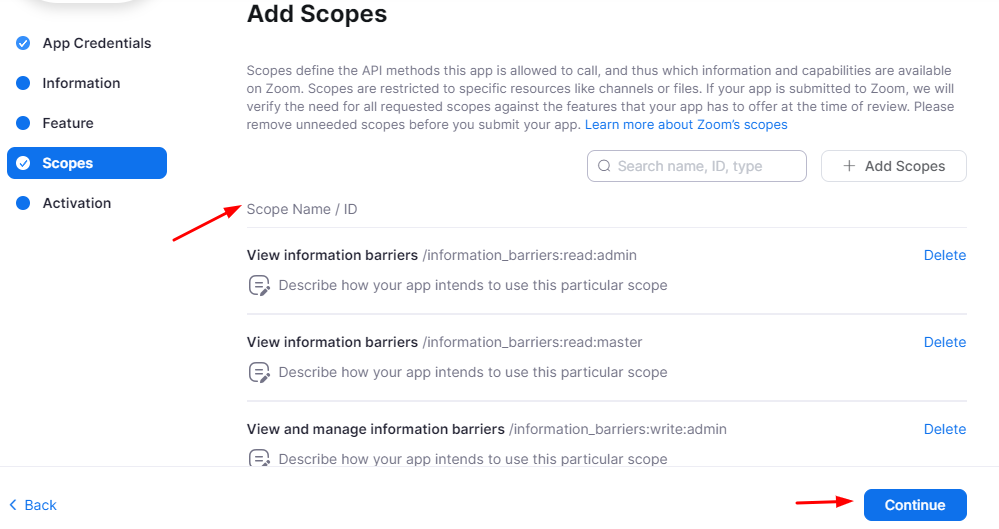
Click on the Continue button and if there are no error messages for missing fields on the Activation tab then your app is ready.
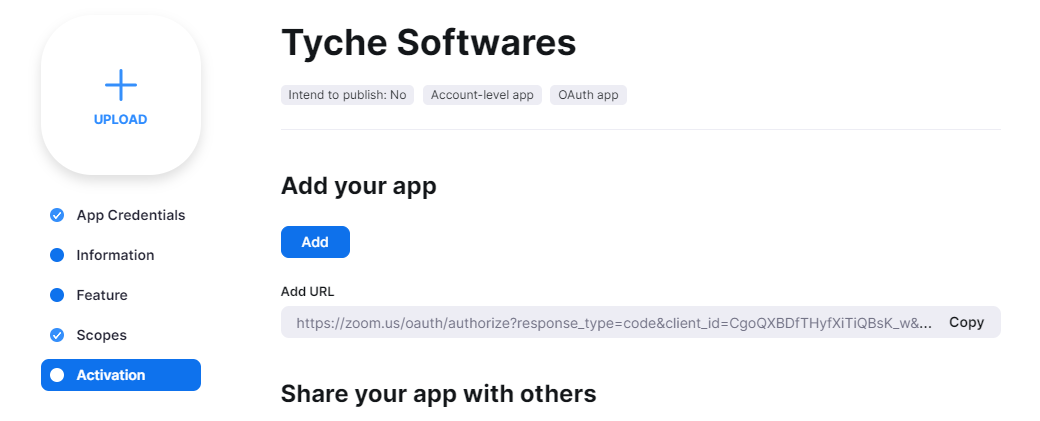
Now you can connect the store with the created Zoom App by clicking on the Connect to Zoom button below.
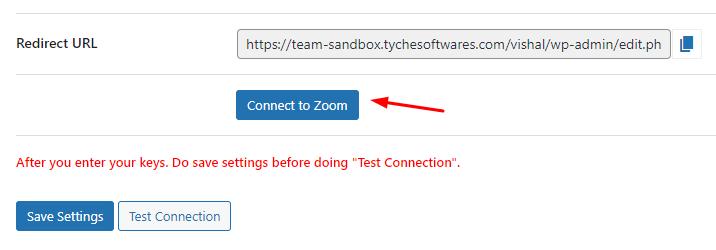
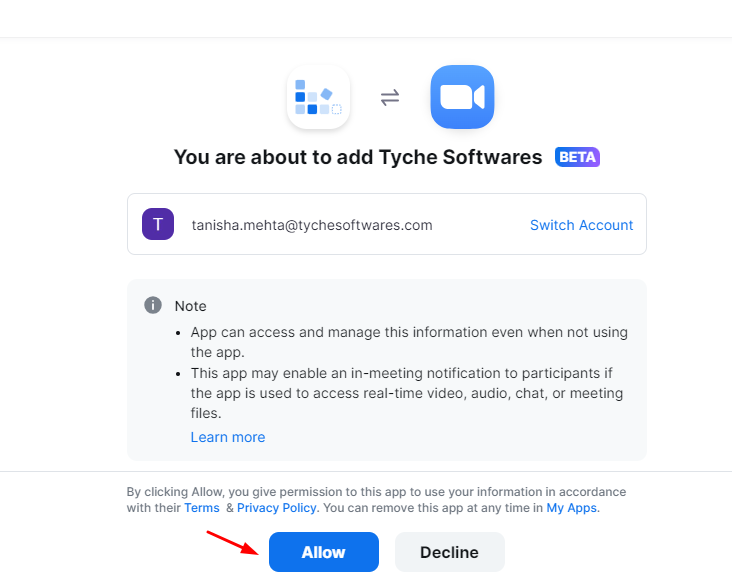
On clicking of Connect to Zoom button, you will be redirected to the permission page of Zoom for using the app.
Click the Allow button to give the permission and you will be redirected back to the store upon the successful connection.
Once done, you will see the Connected to Zoom text in green:

You may Log out and sign in to another account when needed.
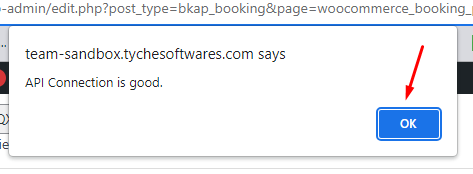
You can even start Assigning meetings to the bookings after checking the Test Connection. The following message will be displayed when your connection is successful:
Once you do this, you can save the above settings.
How to enable Zoom Integration at the Product level?
You can enable Zoom Integration on your site in two ways. One at the Product level and the second at the Global level.
Let’s first enable this feature at the Product level.
In admin, go to Products -> All Products -> select any product and go to the Edit page of that product.

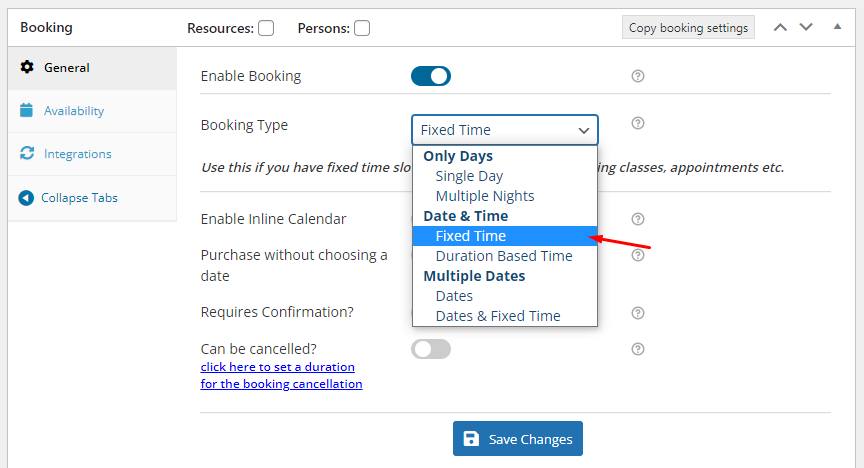
On the edit page of the product go to Booking Meta Box as shown in the below screenshot. Enable Booking setting and select Booking Type as per your product:
Then go to ‘Integrations’ tab. After clicking on the ‘Integrations’ tab, two options can be seen as shown in the below screenshot. Click on Zoom Meetings and you will see the following settings:
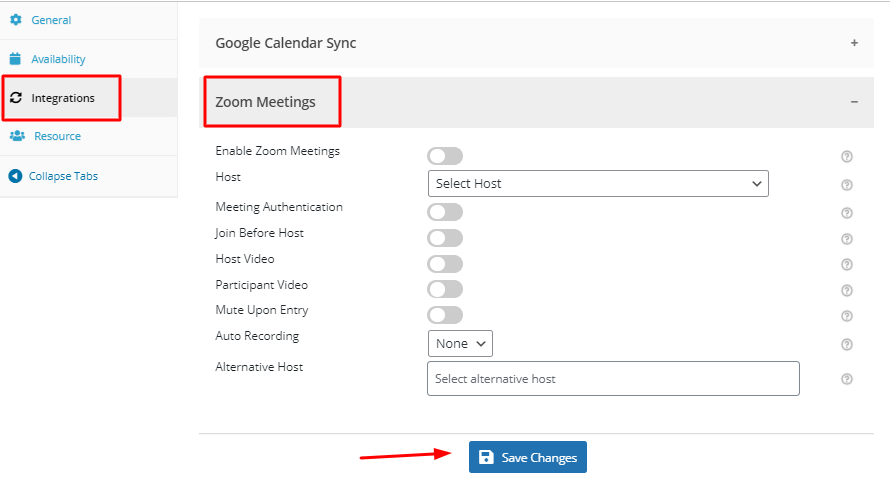
You will have to enable Zoom Meetings setting button & select the Host from the dropdown. Here, the host would be the one who would be in charge of the meeting, i.e, letting participants inside the meeting, sharing their presentation, and so on.
If you only wish to let authenticated users join the Zoom meeting, then you can enable the Meeting Authentication setting.
When you enable Join Before Host setting, then the participants will be able to join the meeting before the host enters the meeting.
If you enable Host Video setting, then the host’s video will start when they enter the meeting.
Similarly, if your wish to start participant’s videos when they join the meeting then you can enable the Participant Video setting.
If you enable Mute Upon Entry setting, then the participants will be muted as soon as they enter the meeting.
The Auto Recording setting will allow you to automatically record your Zoom meeting as soon as it begins. You choose to either store this recording on your Local device or on your Cloud by using the dropdown as shown below:

Under the Alternative Host setting, you can enter the alternative host’s email.
After you’re done making changes, you can click the “Save Changes” button.
Most importantly, don’t miss out on updating the changes done for the product as shown in the below screenshot.

In this way, you can Enable Zoom Integrations for each and every product in your store.
Now, let’s say that your product also has different resources added to it. As you already know for this, you will have to go to the Resources tab where you have added your resources:

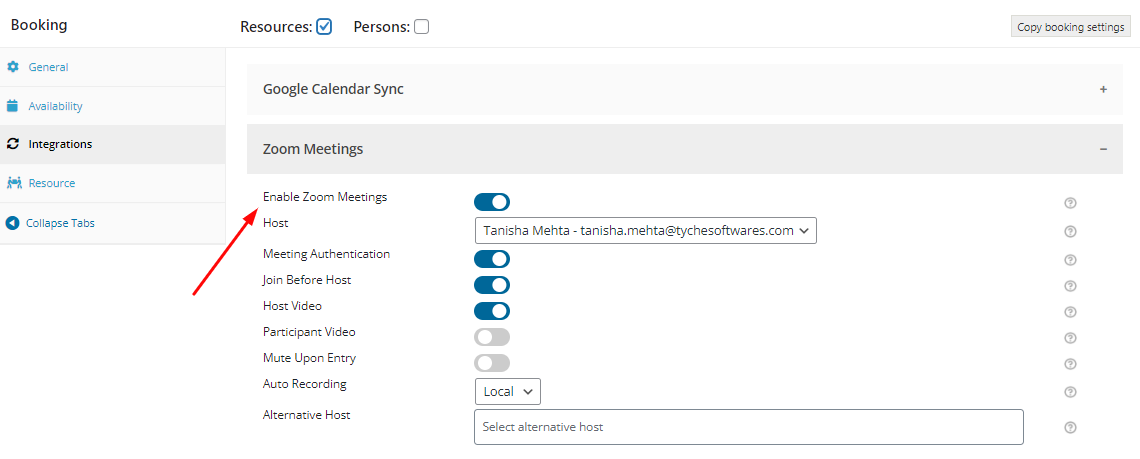
For our science lesson, we have added two resources who are our Faculty for teaching the lesson. We’ve added our resources by titling them ‘Teacher: Nathan’ and ‘Teacher: Tanisha’. For each of these resources, we have added their base cost. Also, it is extremely important to enable a Meeting host for these resources. To do this, you can go to each Resource’s edit page by clicking on the icons that are located in the red box located on the right-hand side in the image above. Let’s say that we have selected the resource Teacher: Tanisha. The edit resource page for it will be displayed to you as such:

Go to Resource details > Meeting Host and choose the meeting host you wish to assign to this resource.
For example, here we have selected the meeting host Tanisha Mehta. Here, your Meeting Host could even be the Zoom ID of your Zoom Business account. After this, you can click on ‘Update’.
Similarly, you can do the same for your other resources. Once you are done, you can click on ‘Save changes’ on your Resources tab & then click the ‘Update’ to update the changes you’ve made to your product.
How to enable Zoom Integration for all products?
The second way to enable Zoom Integrations for all the products on your store in one go is as follows:
In admin, go to Booking -> Settings -> Bulk Booking settings as shown in the below screenshot:

As you can see in the above screenshot, select specific Bookable Products of your store from the dropdown on which you want to assign Zoom Integrations. If you select ‘All Products‘ from the dropdown, then Zoom Integrations will be enabled to each and every product on your store whether they are Bookable Products or not.
Next, you need to ‘Enable Booking’ button, and then select the Booking Type of your product. We have selected the ‘Date & Time’ option for the Science Classes product with ‘Duration Based Time’. You can also select ‘Fixed Time’ option depending upon your product.
Zoom Integrations is more helpful for bookable products having ‘Duration Based Time’ or ‘Fixed Time’.
Once you are done with all other settings, go to the ‘Integrations’ tab as shown in the below screenshot.
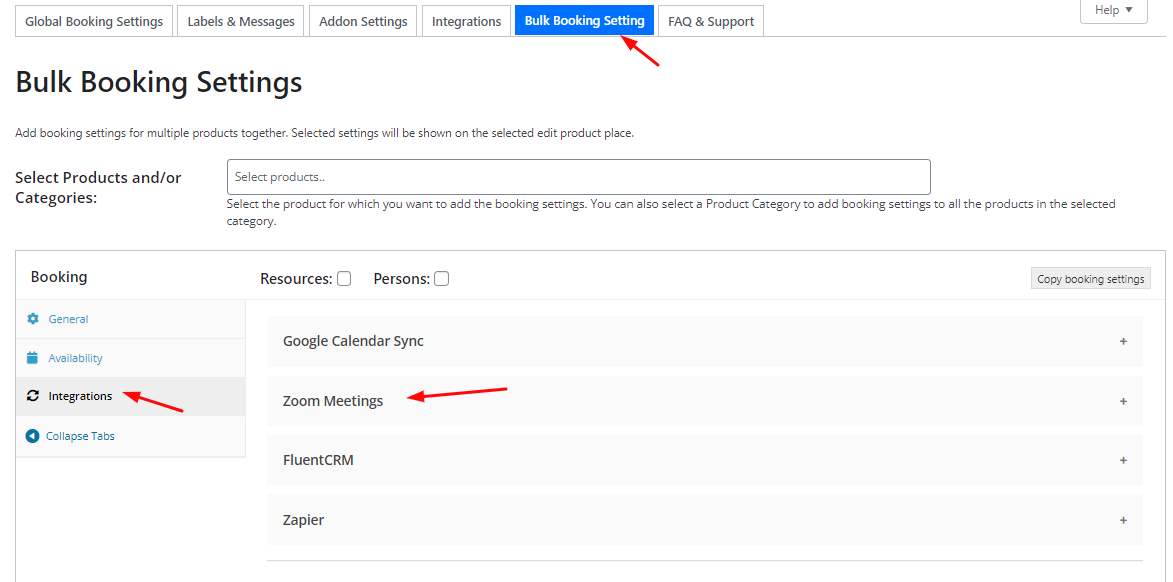
Select the ‘Zoom Meetings’ and you will find the same settings for Zoom Meetings as ones that were at the Product level.
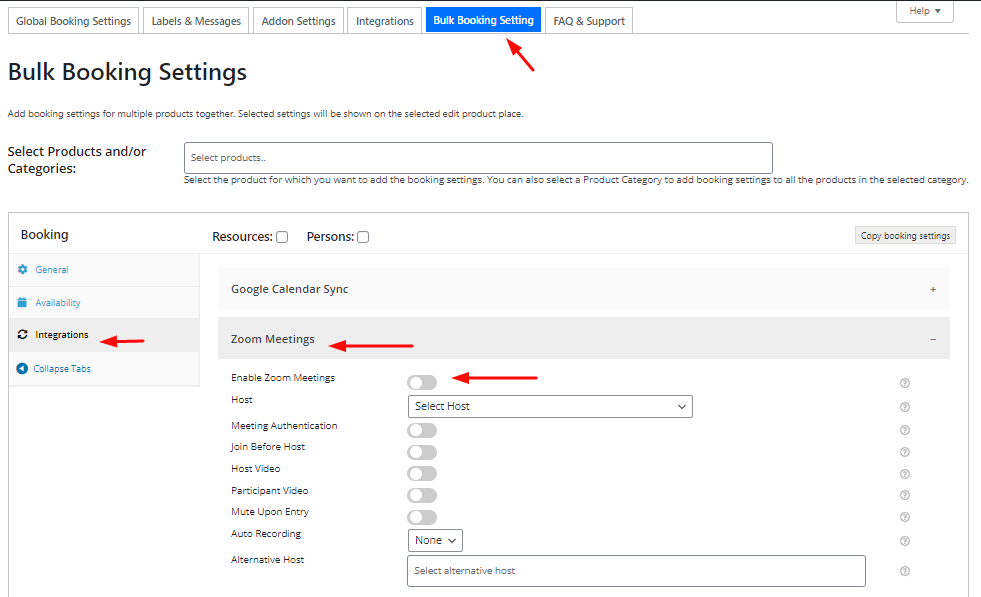
You can ‘Enable Zoom Meetings’ button, select Host and configure all the other settings. Once done, you can click the ‘Save Settings’ button.
When you have saved all settings on global level, then ‘Enable Zoom Meetings‘ button will be enabled automatically for all Bookable Products or for selected Products on Product level only if the ‘Enable Booking’ button on the product edit page is enabled. Otherwise, the Products whose Enable Booking is disabled on the Product Edit Page will not be assigned Zoom Integrations.
Creating a Zoom Meeting link for past orders with future booking dates
When you have updated to v5.2.0 of Booking & Appointment Plugin, and if you have received future orders say for the next six months on your store, then you can assign Zoom Meetings link to all those orders manually.
Assuming that ‘Zoom Meetings’ tab on product level for product Science Classes is disabled and you have received three orders. Then Zoom Meetings icon will not be displayed on View Bookings page as shown in the below screenshot. “Join Meeting” link also will not be received in email to Admin as well as Customer.

Science classes bookings screenshot with zoom disabled
Steps to be followed to assign Zoom Meetings link manually:
Step 1: Go to ‘Science Classes’ products Edit page, Booking meta box, Integrations tab, click Zoom Meetings, Enable Zoom Meetings button, select Host, and then select Save Changes button.
Science classes bookings screenshot with Zoom Meetings tab enabled
Step 2: Also, Update all these changes as shown in the below screenshot.

Step 3: Now go to Bookings -> Settings -> Integrations -> Zoom meetings and then click “Assign Meeting to Bookings” button as shown in the below screenshot.

Step 4: After clicking on that button, “Settings saved” message and “Zoom meeting links are getting generated and assigned in the background for future bookings. This process may take a little while, so please be patient.” message will be shown on screen as shown in below screenshot. The “Assign Meeting to Bookings” button will be hidden until the meeting links have been generated. This process will happen in the background while you can continue with your admin operations & navigation.

Step 5: Once the Zoom meeting links for past orders have been generated, you will get a message “Zoom meeting links have been generated and assigned to future bookings“. It’s shown in the below screenshot in point 6. This means that all your orders with future booking dates (which were placed before Zoom integration was enabled for this product) will now have a meeting created for each order for that product.
Step 6: Now if you go to the Booking -> View Bookings page, all the past orders will have the Zoom Meeting created.

Following the above steps and procedure, Admin can manually create Zoom Meeting links to all the past orders having future booking dates.
How to notify Customers of manually created Zoom Meetings link
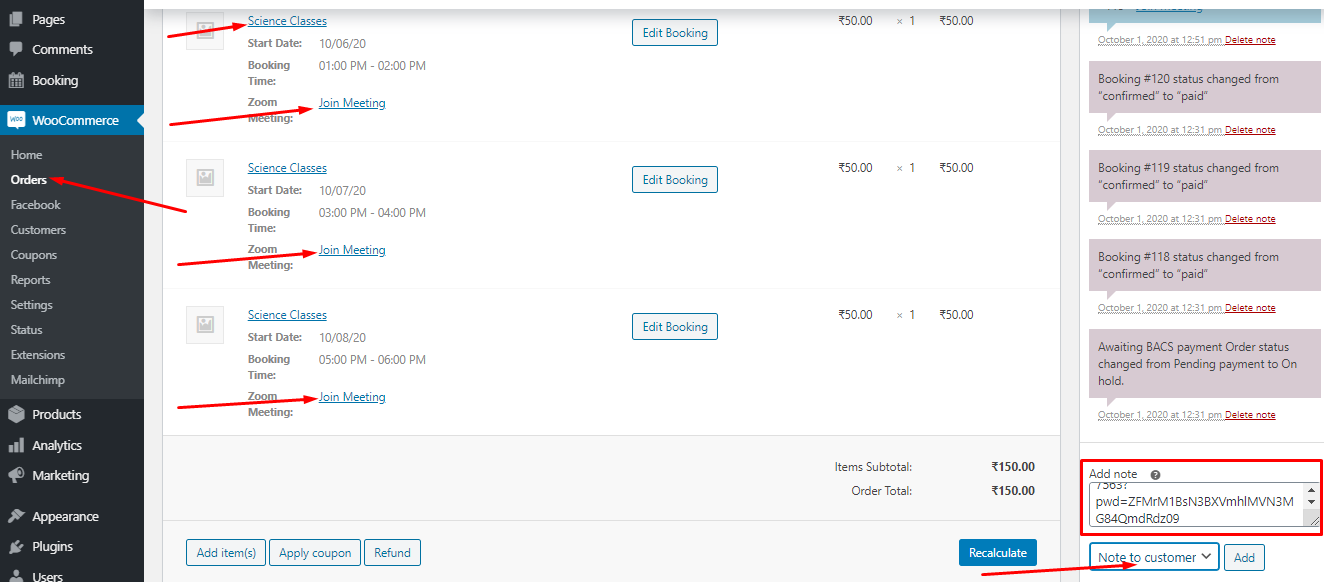
You can go to WooCommerce -> Orders -> Edit orders page as shown in the below screenshot.
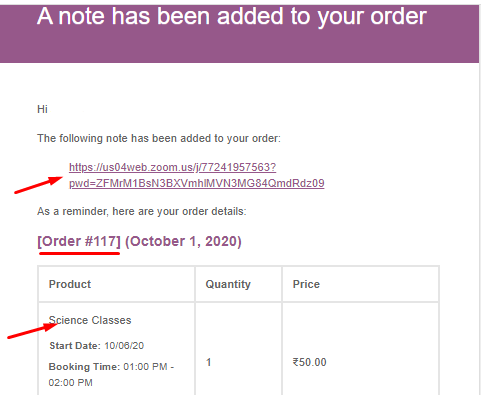
Right-click on the “Join Meeting” link, and click on the Copy link address and paste that copied link in Add Note box. Select “Note to Customer” and then click on the “ADD” button. An email will be sent to customer with the Zoom Meeting link in it.
An email will be sent to the customer with the Zoom Meetings link in it as shown in the below screenshot.
FRONTEND BEHAVIOR
Let’s see where and how the admin and the customer can find this feature on the frontend.
Whenever an order is placed, the Admin will receive an email with all the order details.
In that email, you can see the Zoom Meetings link. Customers will receive the Zoom Meeting link in the email ONLY when the order status is updated to ‘Completed’.

Admin will also receive Zoom Meeting link in email as shown in the below screenshot.

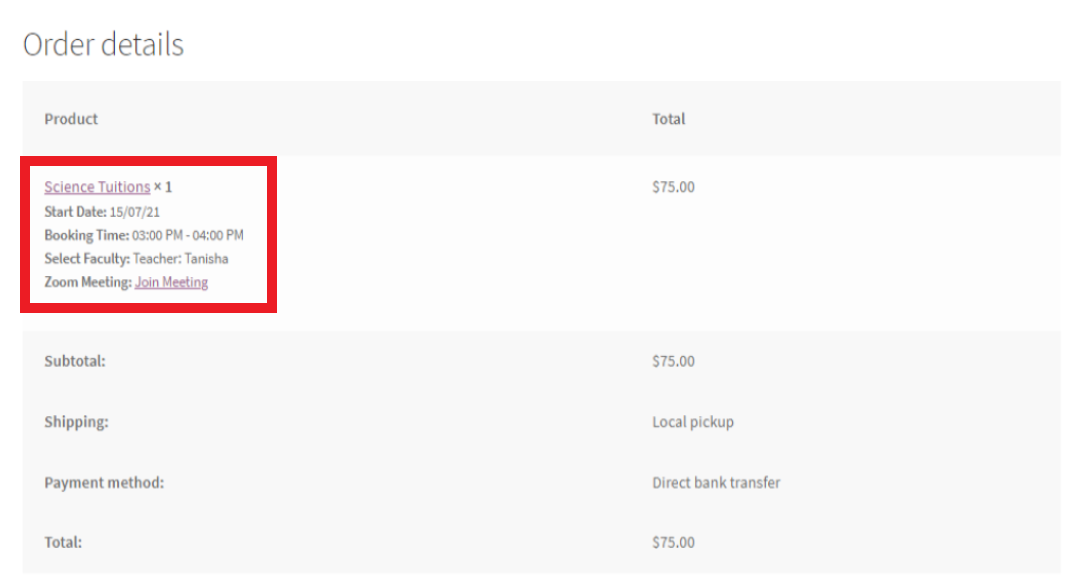
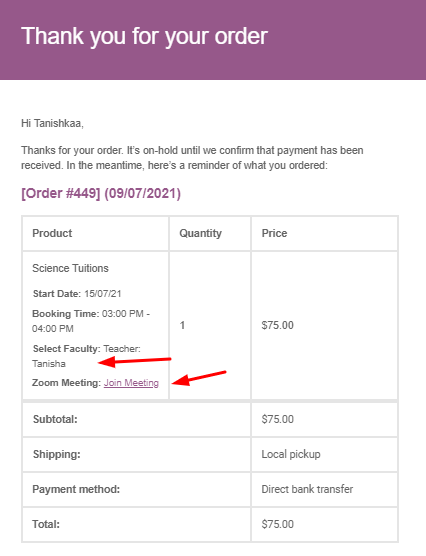
In the above screenshots, in the product details block, the Join Meeting link can be seen.
As for when you have added resources to your products, the Order Page & the email will include the name of the resource as well as the Zoom Meeting link. Here’s how the Order Received Page will appear:
Here’s how the customer will receive the email:
Important note: For those of you who have their bookings & appointments linked with Google Calendar, you can view your Zoom meeting details over there too. For this, you will have to go to Bookings > Integrations > Google Calendar Sync > Event Description like this:
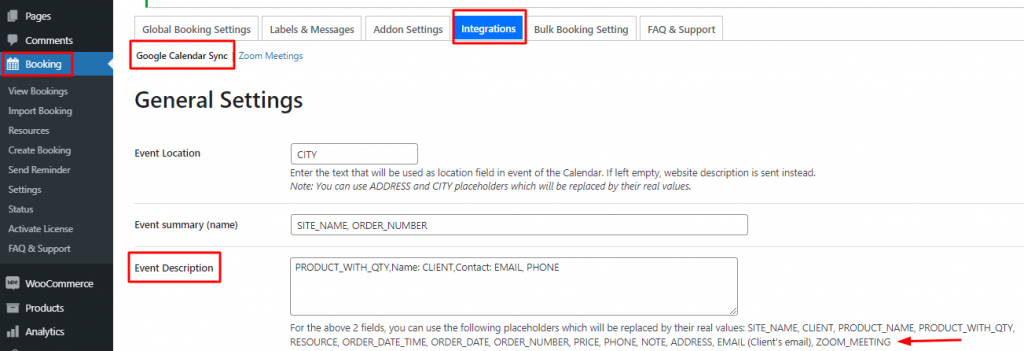
Here, you can add the shortcode “ZOOM_MEETING” to show Zoom Meeting information in Google Event Description as such:

After saving these settings, you can go to your Google Calendar and view one of your bookings. It will appear like this:
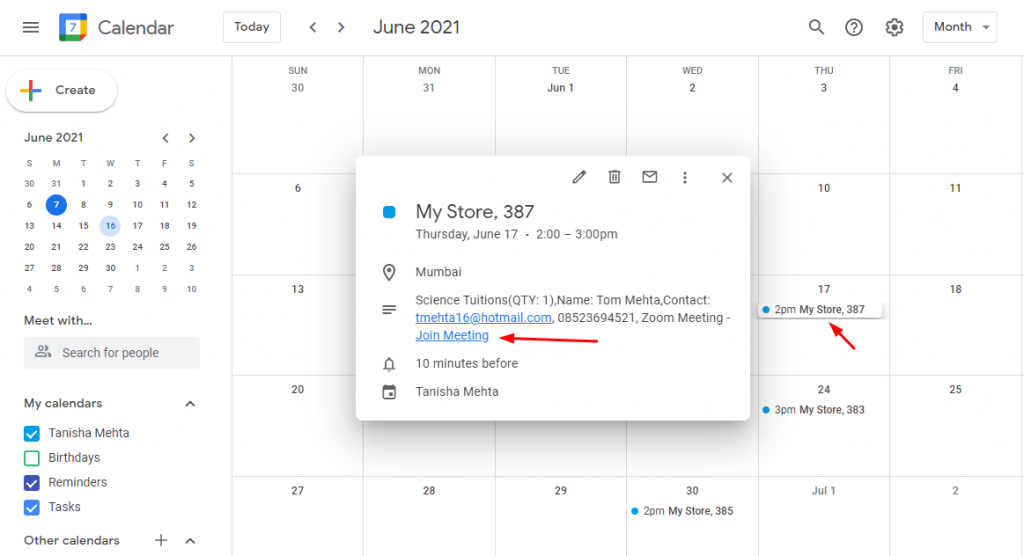
Zoom meeting details on the Google Calendar