The General Settings section in the Abandoned Cart for WooCommerce plugin gives you access to the following settings:
1. Email Settings
2. Cart Settings
3. Settings
4. GDPR Consent
5. Coupon Settings
6. Setting for sending Emails & SMS using Action Scheduler
7. Rules to exclude capturing abandoned carts
8. Settings for abandoned cart recovery emails
9. Unsubscribe Emails Settings
Have a look at how these settings can help you:
1. Email Settings
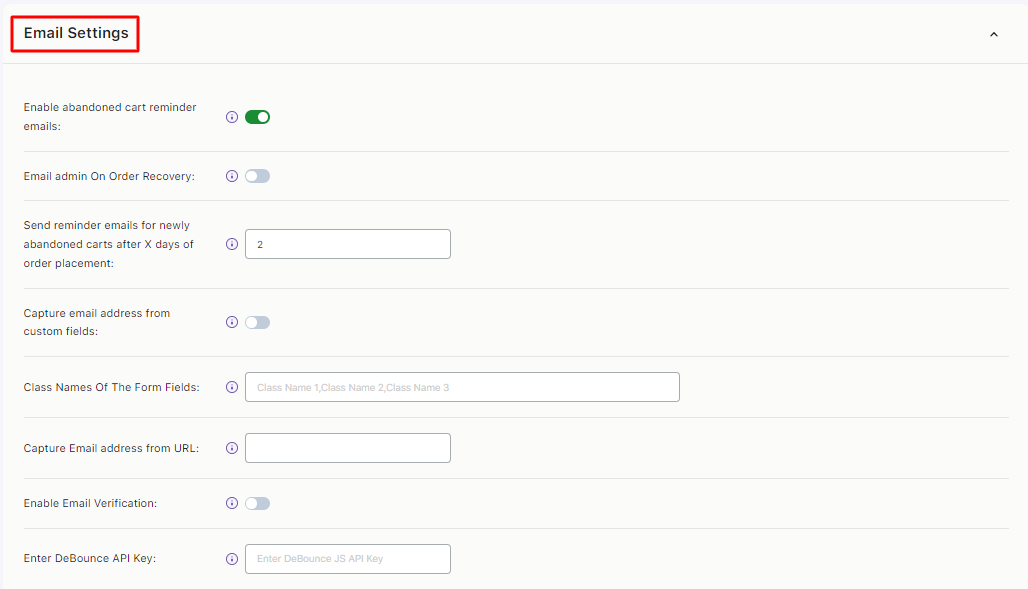
Enable abandoned cart emails
This setting allows you to send abandoned cart emails to customers who have not completed their transactions.
Reminder emails will not be sent when any cart gets abandoned by logged-in users and guest users if this setting is disabled.
Email admin On Order Recovery
This is a very important setting as the admin will be able to keep track of how many abandoned orders have been recovered.
This notification will be received by the admin automatically once the incomplete sale is completed. Hence for the admin to receive the email for order recovery, this setting has to be enabled.
Send reminder emails for newly abandoned carts after X days of order placement
This setting allows store owners to set the number of days after which a reminder email will be sent for a newly abandoned cart since the last order was placed by the same user.
For e.g., If user A has purchased the product on the date 10th August 2020. The same user has abandoned another cart after placing an order with the same email address.
If you want to avoid such customers being sent a reminder email suppose for the next 5 days then you can set 5 here. Then another cart will be tracked after 10 days and then, the reminder email will be sent as per the set time.
Capture email address from custom fields
The email address field is present in different forms and the newsletter popups on the website. These fields appear at the very first stage when the user accesses the website. It is possible that the visitors enter an email in that custom field and then, abandon a cart without entering an email again anywhere else.
So in this case, shop owners may want to capture the email address of the visitors if they enter it in the custom field and send them a reminder email for their abandoned shopping cart.
Thus, using this feature, email addresses can be captured from the custom email field. You also have the option to enter the class names of the form fields from where an email address can be captured. So, if the user enters an email into that field and abandons a cart then the email address will be captured and a reminder email will be sent.
You will simply have to enable the setting first. For instance, You are using the WPForms plugin on your website and have created a form asking for the visitor’s name and email.
You need to add the CSS class to that input field. You can right-click on the field you want to inspect and find the class attached to that input element. In this case, we have added a class wpforms-field-email>input under the option Class names of the form fields.

Let’s say that a guest user visits your site and enters the name and email in the form and then added a product to the cart. Additionally, they visited the checkout page but didn’t enter the email again. The email entered in the form field is automatically transferred to the checkout page.
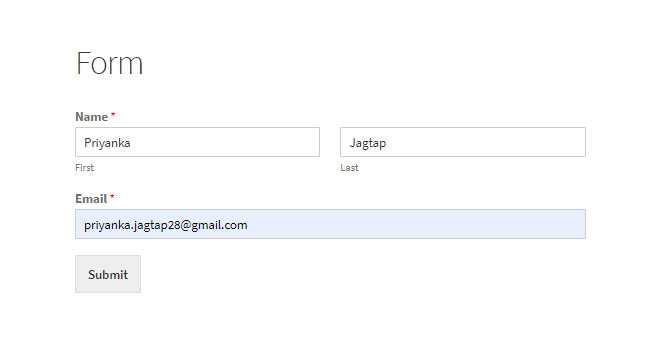
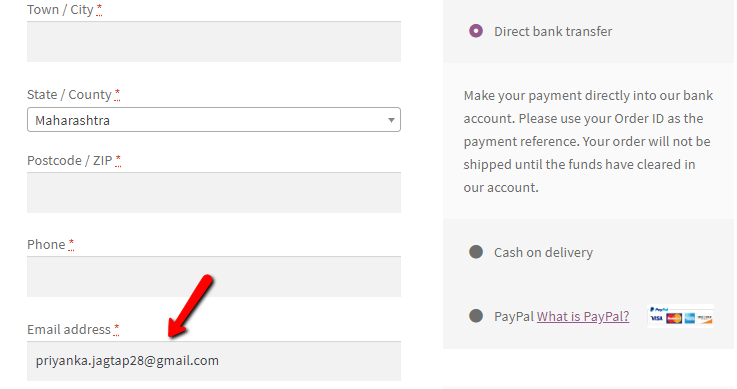
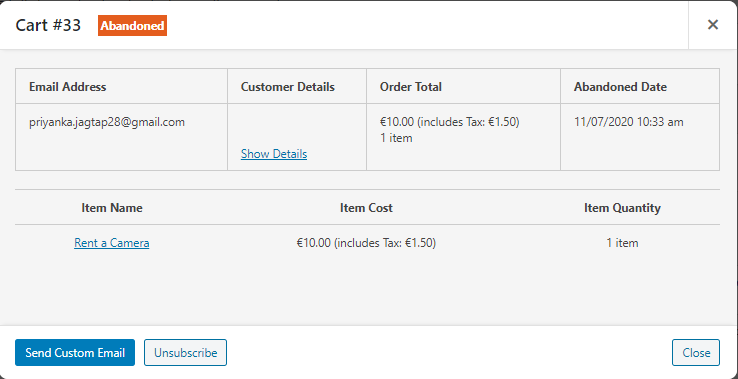
Email addresses will also be captured if the customer first adds items to their shopping cart and then, fills in the email address in the custom field.
Please note that just the email address will be captured in the plugin only if the shopping cart is abandoned. You can use this feature with the Ninja Forms, Gravity Forms, Contact Form7, WPForms plugin, and any other plugin/theme which provides the custom email field.
Class Names Of The Form Fields
The use of class names of the form fields will be done as shown above.
Below is the ready list of classes of some popular plugins we have gathered so you can start using them directly:
Gravity Forms: ginput_container_email>input
Contact Form 7: wpcf7-email
Contact Form by WPForms: wpform_email>input
Ninja Forms: wcap_ninja_email
MailChimp Form: mc-field-group > .email
Capture Email address from URL
This feature helps store owners to capture visitors that visit the site without having them add an email address while shopping. First, the key needs to be added in the field by the admin under the Settings tab. When the visitor visits the site and their URL contains the same key as added by the admin, then the value assigned to that key will be added as an email address of the customer
For instance: If an admin is promoting some products via email newsletter then he can add the key as the user’s email address in the URL itself. So once the user opens the email and clicks the product to add it to the cart, his email address will be captured.
To ensure that this setting works, setup needs to be done at two places, your email marketing tool and the Abandoned Cart Pro plugin in WordPress.
1. Setup in the email marketing tool:
Let’s say that you’re using an email marketing tool to send out different promotional emails to customers. Your email marketing allows you to use different merge tags/variables. One of these is [email address]
If you are planning to run a promotional offer for Christmas, you would be including Add to Cart links for your products in these emails. When you send this email out through your email marketing tool, your Add to Cart link in the email would be something like https://www.tychesoftwares.com/?add-to-cart=25&quantity=1&email=[email-address]
Here, 25 is the ID of the product which will be auto-added to the cart when the user clicks on the link in the email. [email-address] will be your merge tag/variable from your email marketing tool.
When your email marketing tool sends out this email, it will replace [email-address] with the email address to which the email is being sent.
So suppose the email is sent to [email protected], then the actual link in the email would be
https://www.tychesoftwares.com/?add-to-cart=25&quantity=1&[email protected]
2. Setup in the plugin
Remember the key mentioned earlier? Now’s the time when you will have to set up this keyword that was used in your email marketing tool.
To do this, go to Capture Email address from URL.
Since we used the word ’email’ in the link, we will enter the same in the plugin settings. This will ensure that when your site URL has the same key then the email address will be captured.

Note: The text which we add in the Capture Email address from URL field is considered as the key.
Here, we’ve taken the example of the keyword ’email’ but you can replace it with any word of your choice. Some of the options that you can consider are: ‘user’, ‘address’, or any random word. If you are using ‘user’, the link in the email would be https://www.tycehsoftwares.com/?add-to-cart=25&quantity=1&user=[email-address] & the keyword ‘user’ will be saved in the plugin settings.
Once the emails are sent out and when the user clicks on the link in the email, the product will be auto-added to the cart. At the same time, the email address will be captured by the plugin.
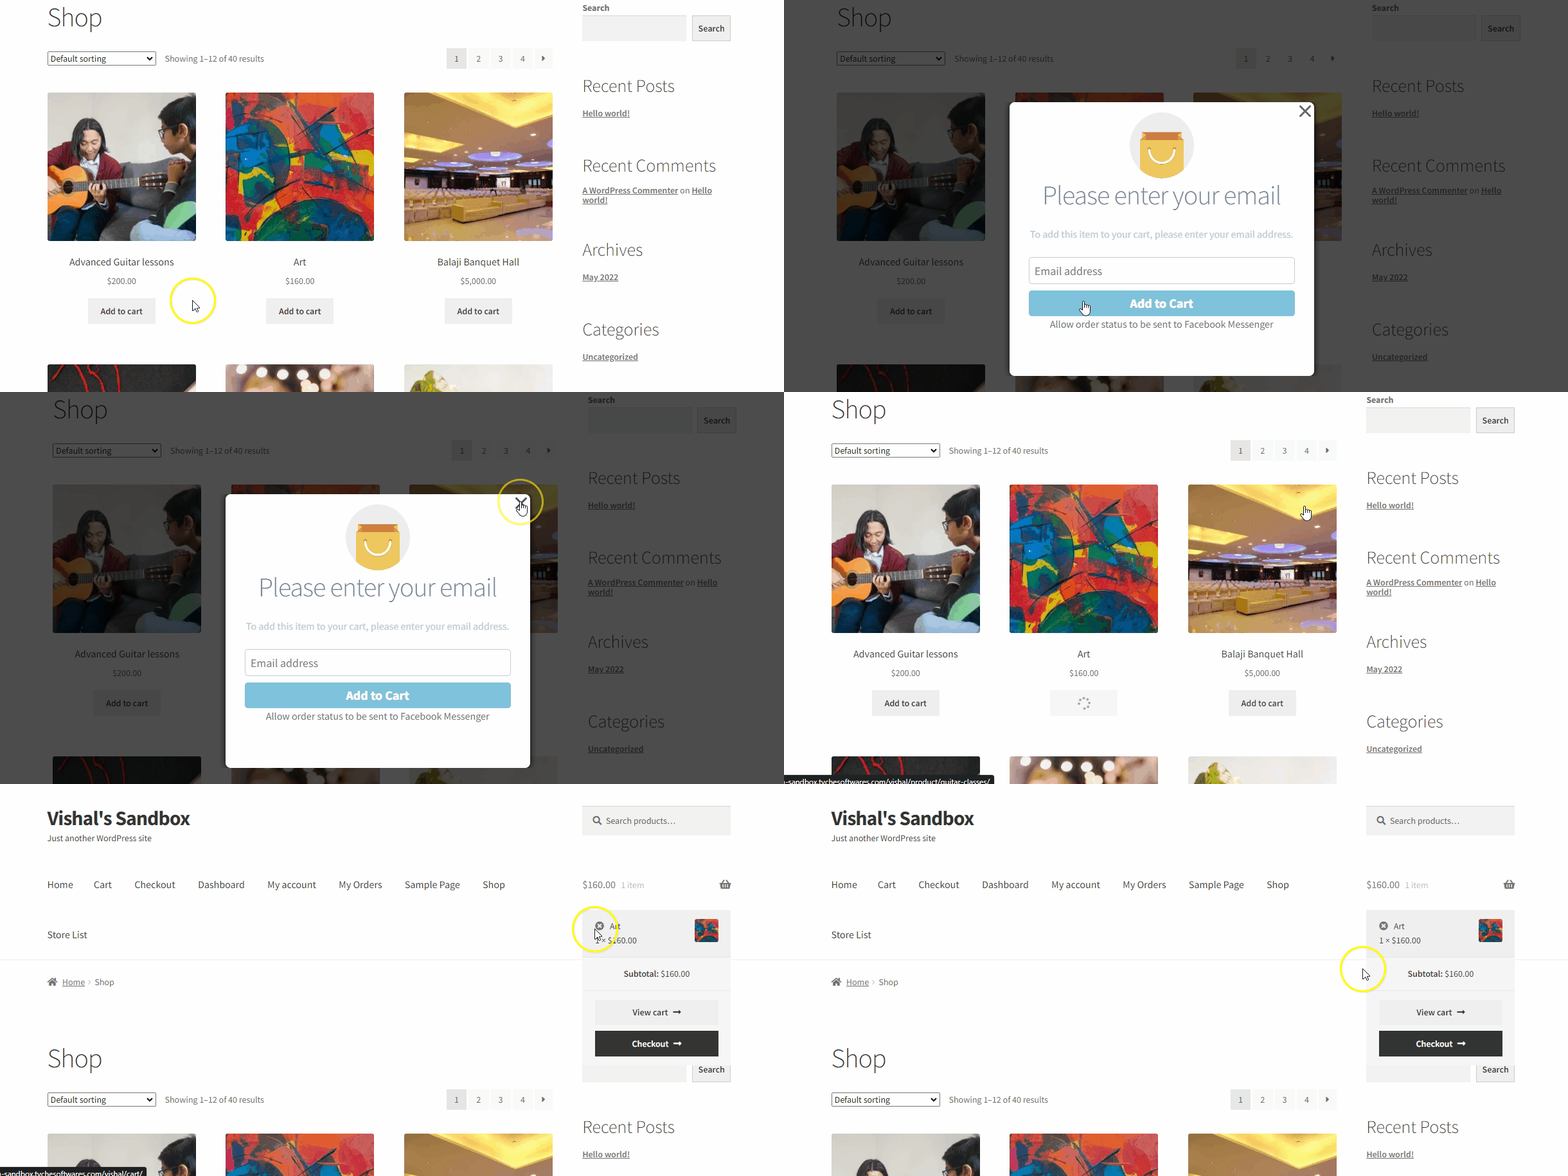
Also Note: When a guest user visits the site and their email address is captured from the URL, then the Add to cart popup modal will not be shown to that user as their email address has already been captured.
Enable Email Verification
This setting allows the admin to verify whether an email address is valid or invalid as soon as the user enters the email address in the Add To Cart popup email. Verification is done via Debounce email verification service.
It will allow the emails entered in Add to Cart Popup modal to be validated in runtime (the time they have been entered).
This allows store owners to avoid fake emails being entered along with minor errors by customers such as .con instead of .com
Enter DeBounce API Key
If you want to enable the service, enable the checkbox and add the API Key from Debounce. If you don’t have an account with Debounce, you can register from here.
After registering, the key can be found in your account below:

Add a name to the API and click on Submit. Your API key is now available like below:
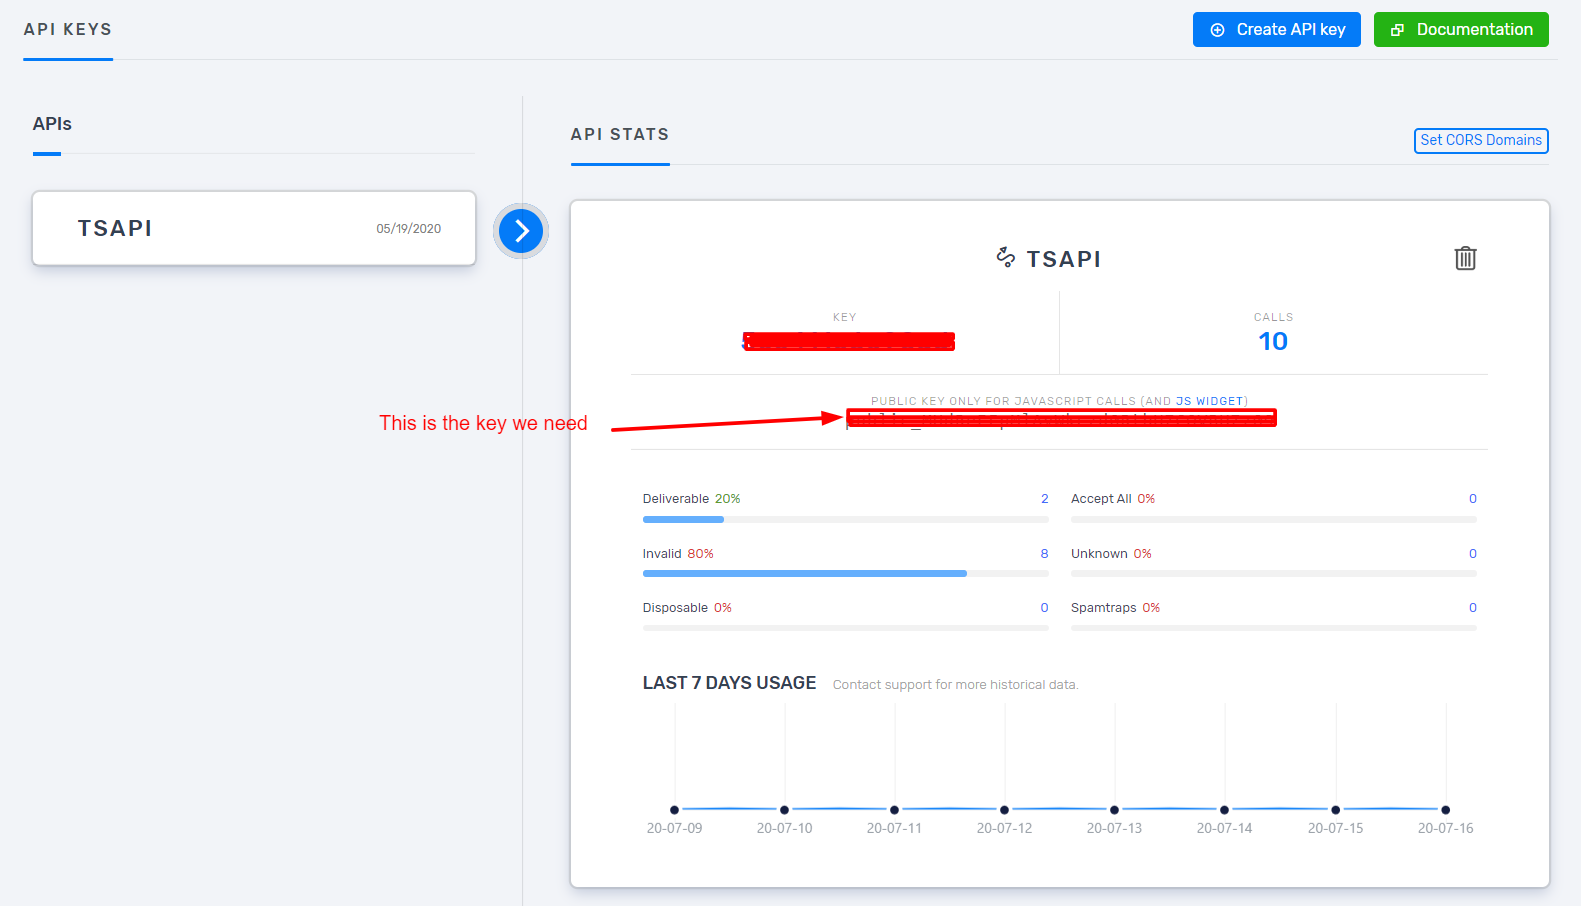
Copy the key and paste it into our plugin settings and save the settings.
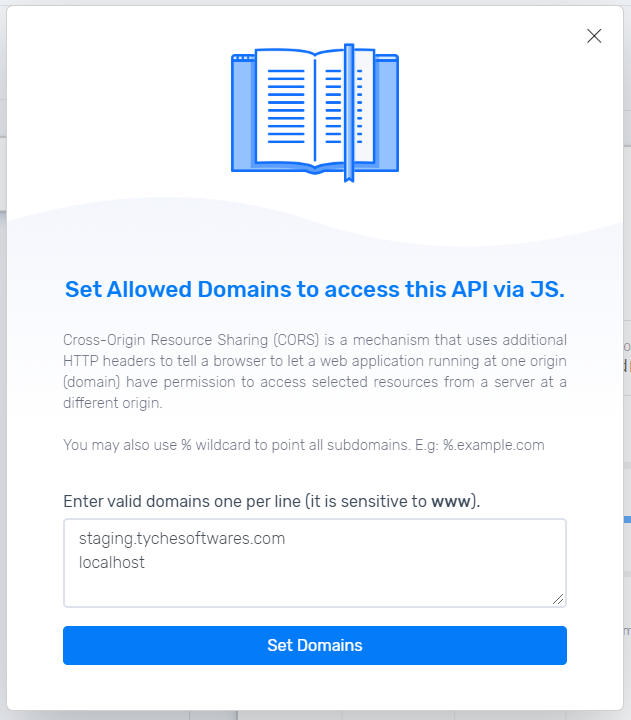
After setting the key it is important to set the domain on which the key will be used. For this, click on the “Set CORS Domain” button. A popup will appear. Set the domains on which the service will be used like below and click Submit.
2. Cart Settings
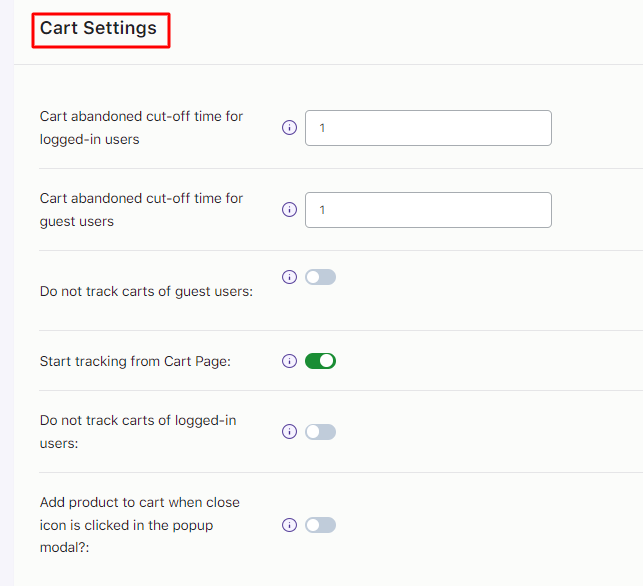
If you do not want to capture guest carts and visitor carts once these are abandoned, then this setting should be enabled.
As per the requirements, you can even disable the setting if you wish to track the abandoned carts of guest users as well as visitors.
When a customer enters no personal details after adding items to the cart then that customer is considered as a Visitor.
Such customers like to hide their details while making a purchase. Hence when the abandoned cart gets captured for this user, there are no details of them.
Therefore if this setting is enabled, the cart gets captured from the cart page as soon as he adds any product to the cart.
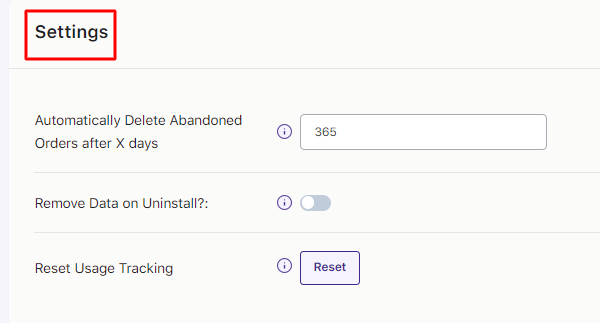
3. Settings
Automatically Delete Abandoned Orders after X days
This is the number of days assigned after which the abandoned orders will be deleted automatically.
This typically happens when the lost customer does not respond to the reminder emails for X days and hence the order sits in the cart for that long and finally gets deleted as per the settings.
Remove Data on Uninstall?
Enabling this setting before uninstalling the plugin will completely remove Abandoned Cart data when the plugin is deleted.
Reset usage tracking
When you click this button, the site data that is sent to Tyche Softwares for plugin improvements will be stopped because usage tracking will no longer continue.
The store owner/manager will then again be asked if they want us to track their data for performance improvements.
4. GDPR Consent
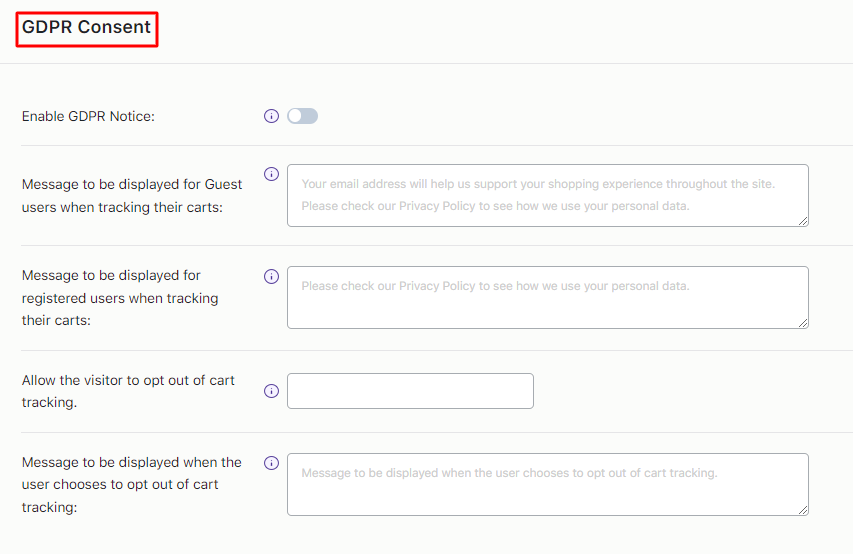
This refers to the message that will appear on the Checkout page and Email Address Capture pop-up for Guest Users.
In compliance with GDPR, the message needs to be displayed for the Guest user to inform them about how the admin will use their email address or other personal details entered.
For instance, a message can be: Your email address will help us to enhance your shopping experience and will not be misused. For further details, kindly check our Privacy Policy.
The message entered here will be displayed for Registered users and appear on the Shop & Product pages.
In compliance with GDPR, the admin needs to add this message on these pages to inform Registered users of how their data will be used.
For instance, the message can read: Your personal details are safe with us. Please check our Privacy Policy to learn how we will use your data.
5. Coupon Settings
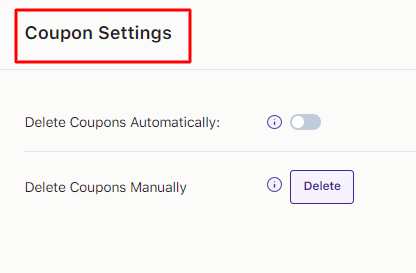
Delete Coupons Automatically
This will allow the store owners to automatically delete the expired and used coupon codes every 15 days.
Delete Coupons Manually
If you don’t want to delete the coupons automatically every 15 days, then you can use this option.
Whenever you want to manually delete the expired and used coupon codes then you can click on the Delete button provided there.
6. Setting for sending Emails & SMS using Action Scheduler
The plugin uses the Action Scheduler to send automatic abandoned cart reminders. The Action schedular runs all the scheduled actions at the desired time/frequency and it will be displayed at Tools > Scheduled Actions > Pending.
Even if the WP Cron is disabled, the action scheduler library runs the actions which have been scheduled when an admin page request occurs.
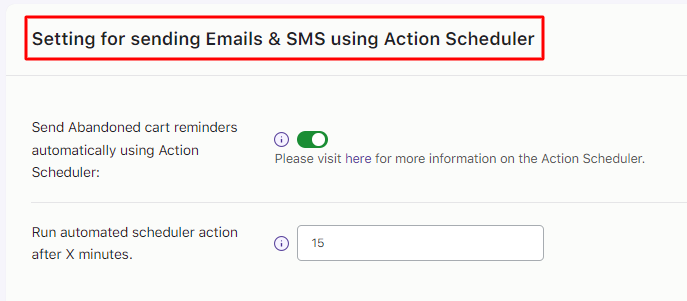
Send Abandoned cart reminders automatically using Action Scheduler
If you enable this option, the abandoned cart reminder emails will be sent automatically as per the set time. If this option is disabled then reminder emails will not be sent automatically using the action schedular and need to be set manually from cPanel.
For more details and to set up the cron job, contact us.
Run Automated Scheduler after X minutes
In this field, you can enter the duration in minutes. The Action scheduler will run automatically after this duration to send abandoned cart reminder emails and SMS to the customers.
For Eg, If you enter 2 minutes, then after every 2 minutes, the schedular will run and send reminder emails and SMS automatically to the customers.
This is the time that has to be set first for automatically sending reminder emails.
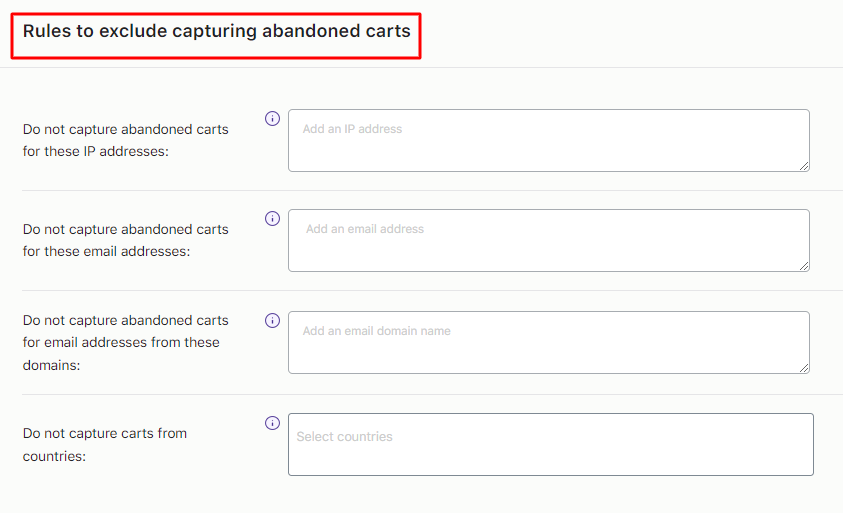
7. Rules to exclude capturing abandoned carts
Restriction Settings are used to stop capturing abandoned carts of specific customers. It can be set according to your requirements.
This will help you avoid SPAM and BOT issues since it is found to be a major issue with online merchants. This provision is given especially to restrict such actions.
Do not capture abandoned carts for these IP addresses
With this setting, the carts which the customers abandon with the mentioned IP addresses will not be captured. Thus, no reminder emails will be sent to these customers as their carts won’t be captured.
Enter the IP address, scroll down, and click ‘Save Settings’ once done. Please note that you can enter multiple IP Addresses by separating them with a comma.

This functionality implies that all the carts which are abandoned from the mentioned IP addresses will not be tracked by the plugin. Therefore you need to write all the IP addresses separated by commas whose abandoned carts you do not want this plugin to capture.
You can block the specific IP address by adding the IP address in the setting as shown above in the image. As the above image demonstrates that IP address 28.4.43.122 will not be captured for the abandoned cart.
For instance, if you have noticed that you have spam from certain IP addresses and it is ruining the abandoned statistic of your store, then you can block the full range of the IP addresses.
The plugin update 4.3 version has provided the feature where you can use the wildcard ‘*‘ character for blocking the range/block of the IP address.
The IP range starting from 27.5 is always spam which abandons the carts, so you can use the wildcard character to block the whole range. You just need to add “27.5.*” in the “Do not capture abandoned carts for these IP addresses” setting and save it.
So while capturing the customer’s carts, the plugin will check if the customer’s IP Address starts from 27.5 and if so, it will not be captured and won’t be displayed in the Abandoned Orders tab.
Do not capture abandoned carts for these email addresses
This option allows you to stop capturing abandoned carts of customers with the mentioned email addresses. You can use this for specific customers who have never come back by clicking on the checkout link from the reminder emails. After knowing the behavioral pattern of such customers, you can decide to block capturing their abandoned carts for sending reminder emails.
For instance, if you enter the address ‘[email protected]’ then any carts abandoned by this user will not be captured.
To implement this, enter the email addresses by separating them with a comma, scroll down, and click ‘Save Settings’.
Do not capture abandoned carts for email addresses from these domains
This option lets you avoid capturing abandoned carts in bulk from the domains specified by you.
For example, if you enter the domain name ‘hotmail.com’ or ‘yahoo.co.in’ etc in the field, then all the abandoned carts of customers whose email addresses have these domain names will not be captured.
Do not capture carts from countries
This option allows you to restrict capturing carts from specific countries.
For instance, if you select the country ‘India’ or ‘Sri Lanka’ from the dropdown in this field, then the abandoned carts from these places will not be captured.
8. Settings for abandoned cart recovery emails
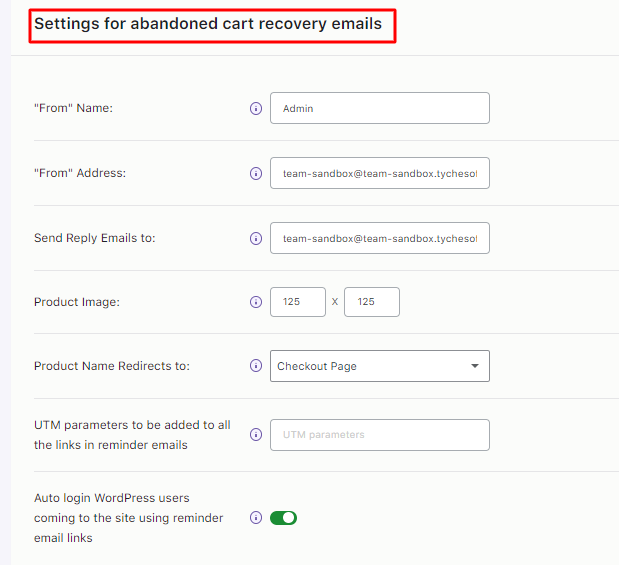
“From” Name
The name that is entered in this field will appear in the email sent to the customer. Eg. Admin: when an admin sends an email to the customer.
“From” Address
The email address entered here is the one from which reminder emails are sent out. Please note that this setting is applicable when the PHP mail function is used by a Hosting Provider. It will not be used if SMTP mail plugins are used.
If the mail configuration is based on SMTP, then this setting will not be functional.
Send Reply Emails to
The reply to the email will get sent to the email addresses entered here. Eg. let’s say that the Admin’s email address is entered in this field. When the customer clicks on Reply upon receiving the email, the reply will be sent to Admin’s email address.
Product Image( H x W )
You can set the dimension of the product image which appears in the abandoned cart reminder emails. For instance, you can have 25 x 25 as your dimensions.
Product Name Redirects to
This option will allow the site admin to choose the page where the product link in reminder emails should redirect to.
If you select the Product page here then clicking on the product link in the reminder email will redirect to the product page.
If you select the Checkout page here then it will redirect you to the checkout page with the abandoned items.
UTM parameters to be added to all the links in reminder emails
If you wish to add some UTM parameters for all the links that are provided in the reminder emails, the can be done here.
9. Unsubscribe Emails Settings
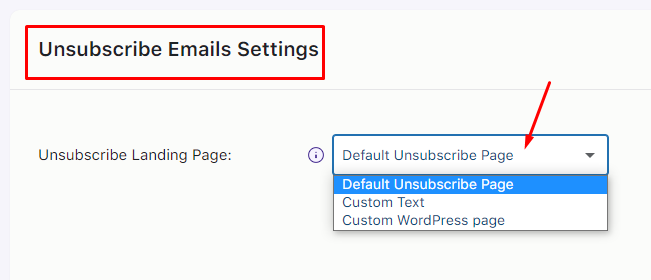
Unsubscribe Landing Page
As seen above, the plugin now allows the site admin to choose from 3 options. Each of these is described below:
a) Default Unsubscribe Page
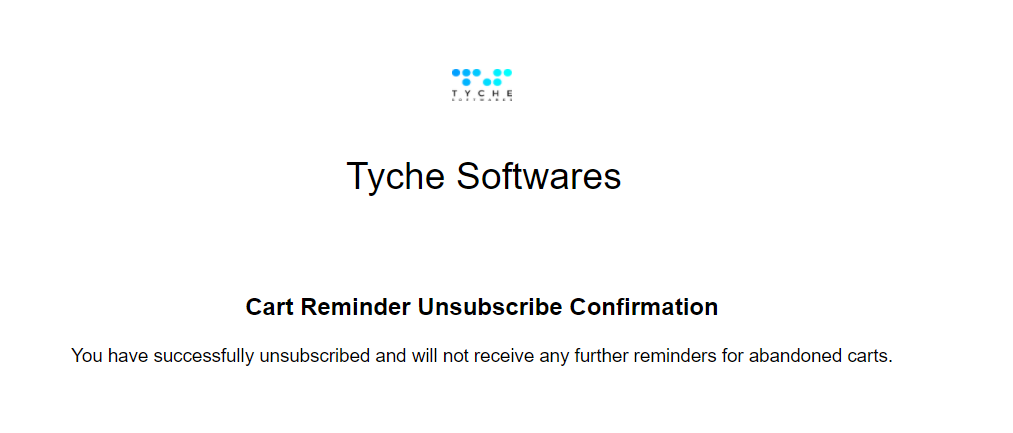
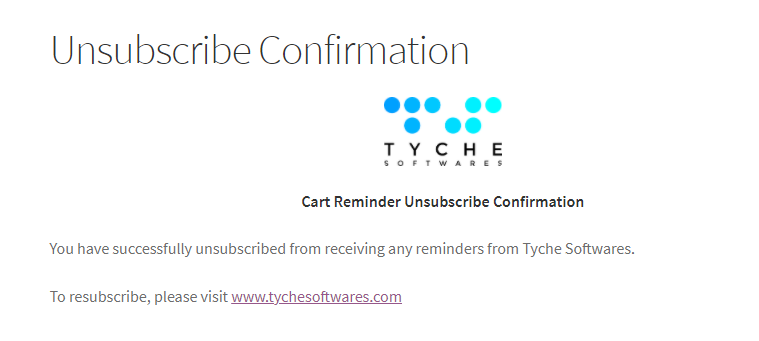
The plugin now generates a default unsubscribe landing page. This page displays the site icon along with the site name and some default text informing the user that they have now been unsubscribed and will no longer receive any reminders for their abandoned cart.
b) Custom Text
You can now set up any custom text you wish to display on the subscribe landing page. The default text will be:
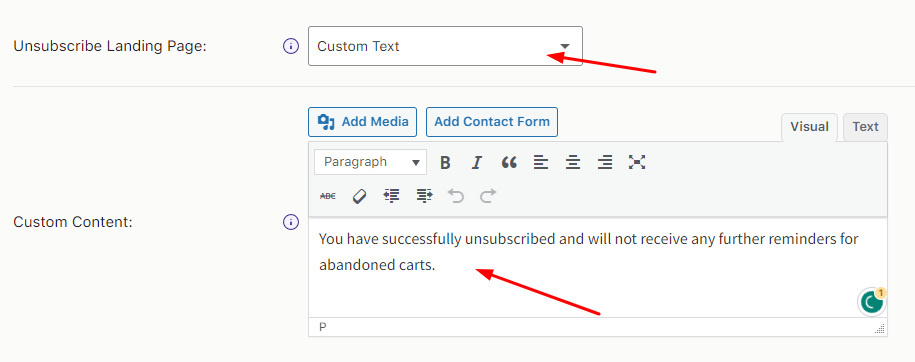
You can change the text to something like this:
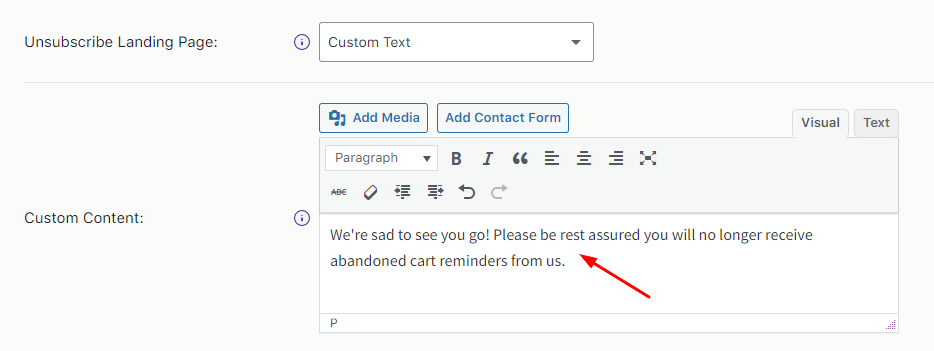
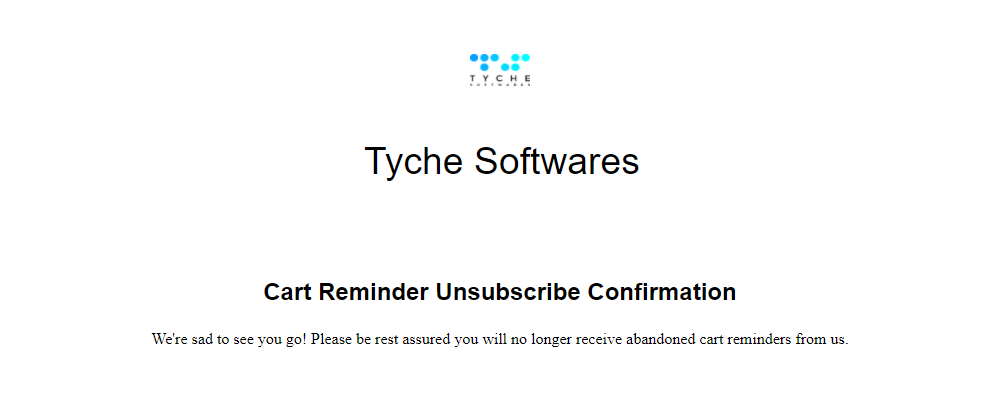
The page will continue to show the site icon and name at the top and display the custom text below the same.
c) Custom WordPress page
The third option is to redirect the user to a custom WordPress page. You can select any WordPress page by typing in a few characters to start the search.
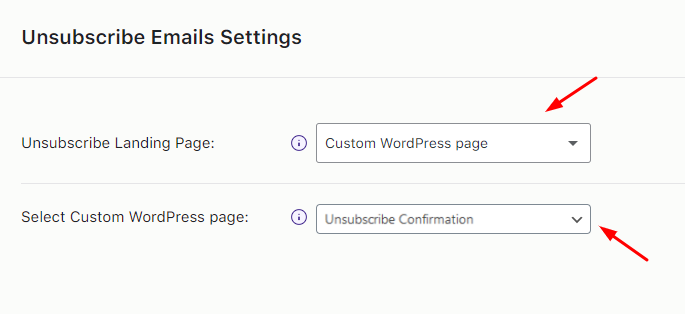
The customer will be redirected to the page when he/she clicks on the Unsubscribe link.
In case you wish to see any more options or settings to choose from, please free to send us an update.
