The Printable Tickets addon to the Booking and Appointment Plugin for Woocommerce allows you to email the tickets for the bookings to customers when an order is placed and completed.
1. Installation
2. Setting up Printable Tickets for all the products
3. Email Received by the Customer
4. View Bookings Page
5. Quick Start Guide
6. Changelog
1. Installation
Download the zip file and install it from the Plugins > Add New Plugin.
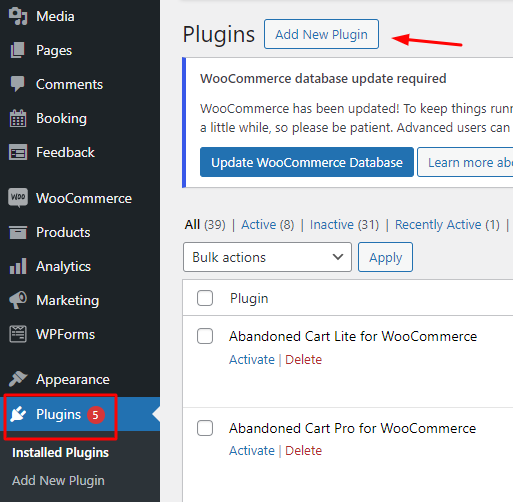
Activate the plugin in your WordPress admin area.

The addon settings will display under the Booking & Appointment > Addons > Printable Tickets.


2. Setting up Printable Tickets for all the products
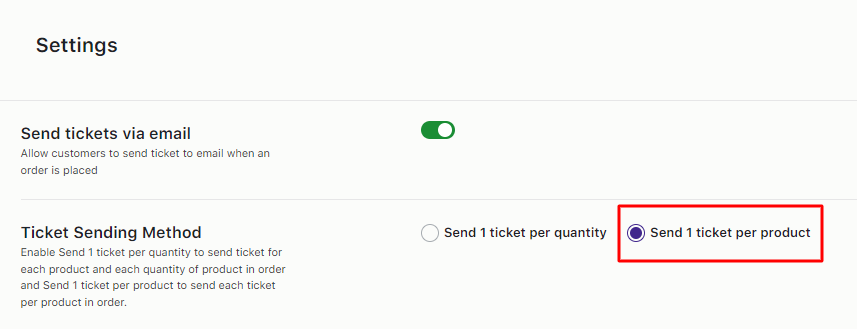
Once the addon is installed, you need to enable the “Send tickets via email“ setting to send the tickets via email.
You will also find a field named Ticket Sending Method which will have 2 radio buttons named Send 1 ticket per quantity and send 1 ticket per product.
The ‘Send 1 ticket per quantity’ will generate and send the tickets by email as per the quantity of the product in the order. If you have one product in your cart with a quantity of 2 then two tickets will be generated and sent to your email.
The ‘Send 1 ticket per product’ will generate and send the tickets by email as per the number of products in the cart. If you have 2 different products in an order with a quantity of 3, only 2 tickets will be generated for the two products.
Tickets are generated for Single-day booking, Multiple-day booking, single day with time slot settings.
This addon is compatible with other addons like the Multiple Time slot addon too.
Note: The security code will be generated and the ticket will get sent to customers only when the WooCommerce order is Completed.
3. Email Received by Customer
After a customer places an order and the order has Completed status, they will receive an email with a subject header like Ticket for Order #(your order number) along with the Customer Notification Email.
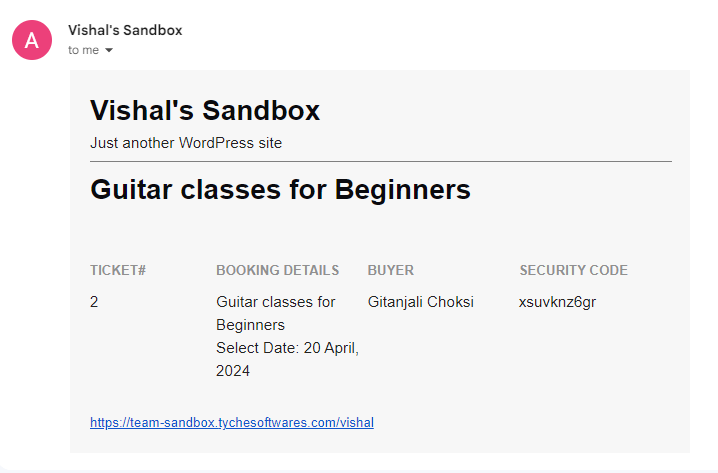
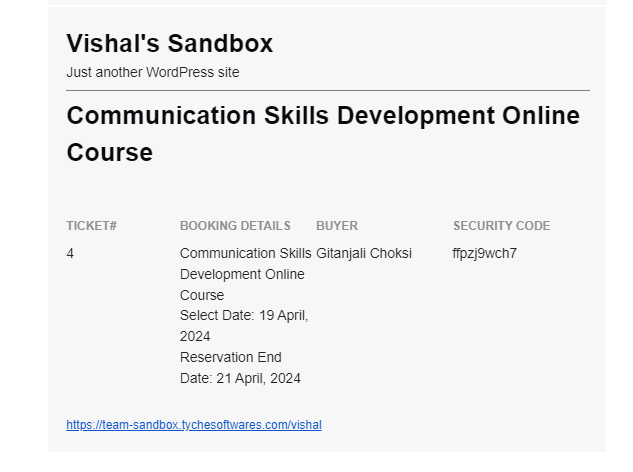
This ticket email will have the ticket number, booking details, customer name, and security code.
The security code generated is unique for all tickets.
For instance, let’s select ‘Send 1 ticket per quantity.’

In this case, the customer has booked ‘Guitar classes for Beginners’. They have selected only 1 quantity.
Since the order has 1 quantity, only 1 ticket will be created.
The Ticket received by the customer over email will look like this:
Let’s say that you select the Send 1 ticket per product setting.
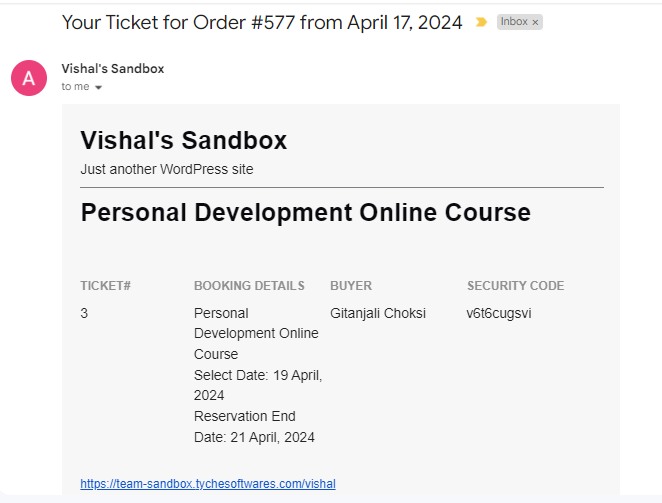
In this case, the customer has booked the ‘Personal Development Online Course’ and ‘Communication Skills Development Online Course’.
They have selected 2 different products. Therefore, for this order, 2 different tickets will be created.
The Tickets received by the customer in the email will look like this:
4. View Bookings Page
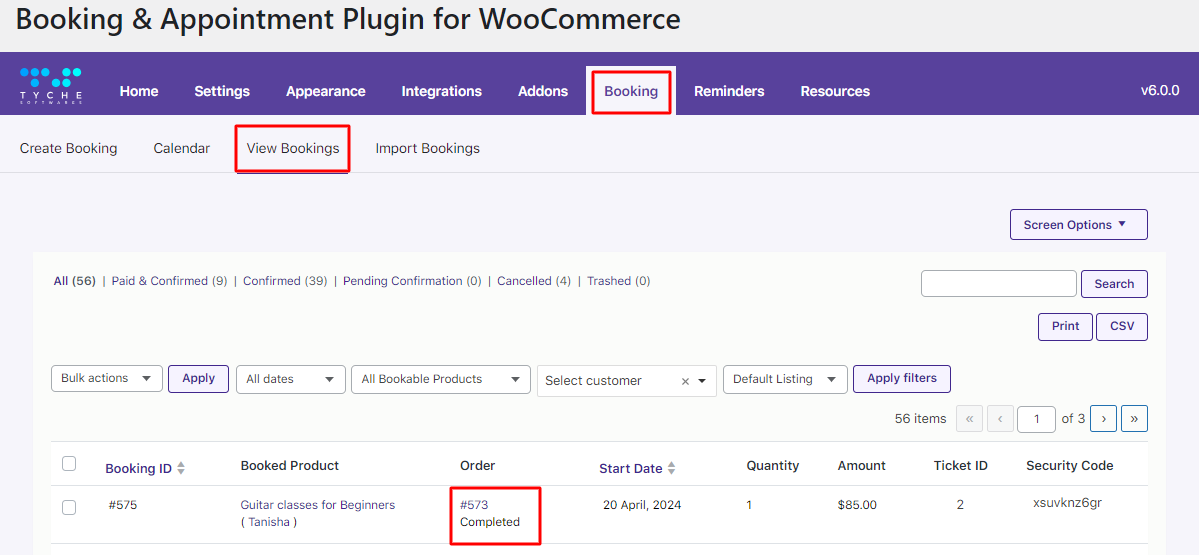
The admin will have access to the Security code and the ticket number.
It will be displayed on the Booking & Appointment > Booking > View Bookings page.
The Guitar booking made will appear as such on the View Bookings Page:
The Personal and Communication Skills Development bookings made will appear as such on the View Bookings Page:

5. Quick Start Guide
- You can generate the tickets by quantity or by the number of products in your order.
- These tickets would be helpful in security checks as every ticket generated will have a unique number and a security number.
- Always select the required method for the tickets to be sent with the customer email notification.
- The ticket number and the security code will be available with the admin on the View Bookings page.