With Booking & Appointment Plugin for WooCommerce, you can integrate FluentCRM.
FluentCRM is a Self Hosted Email Marketing Automation Plugin for WordPress. You can manage your leads and customers, email campaigns, automated email sequencing, learner and affiliate management, monitor user activities, and many more in one place.
After this integration, the Booking data will be available in the FluentCRM when a customer books a product. Once the data is available, one can set up email automation and other tasks based on the customer’s booking data. You can also manage these contacts and send custom emails based on the action being done on the Booking of that contact.
The Basics
To make this integration happen, you will need the following:
- WooCommerce plugin
- v5.12.0 of Booking & Appointment Plugin for WooCommerce
- Free version of the FluentCRM plugin from the WordPress plugin library.
- FluentCRM PRO plugin. Login here and download your Pro file. Upload it to your WordPress site.
1. Creating REST API
Firstly, you will have to create a REST API key.
Go to FluentCRM > Settings > Managers > Add New Manager.
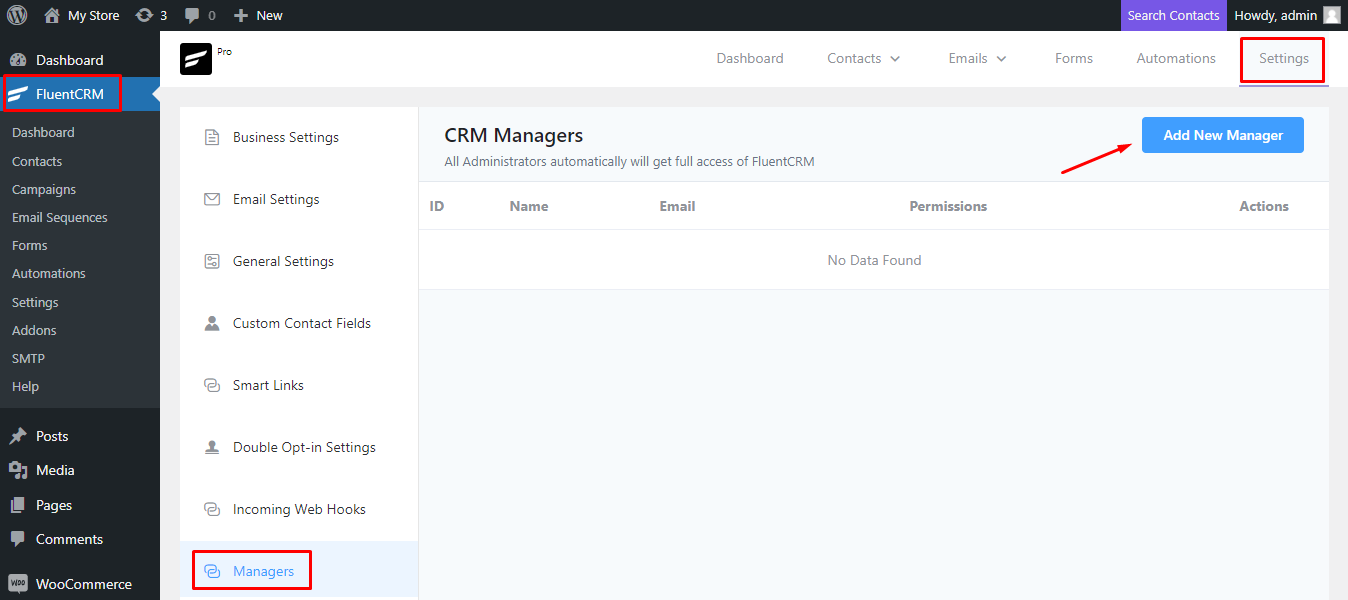
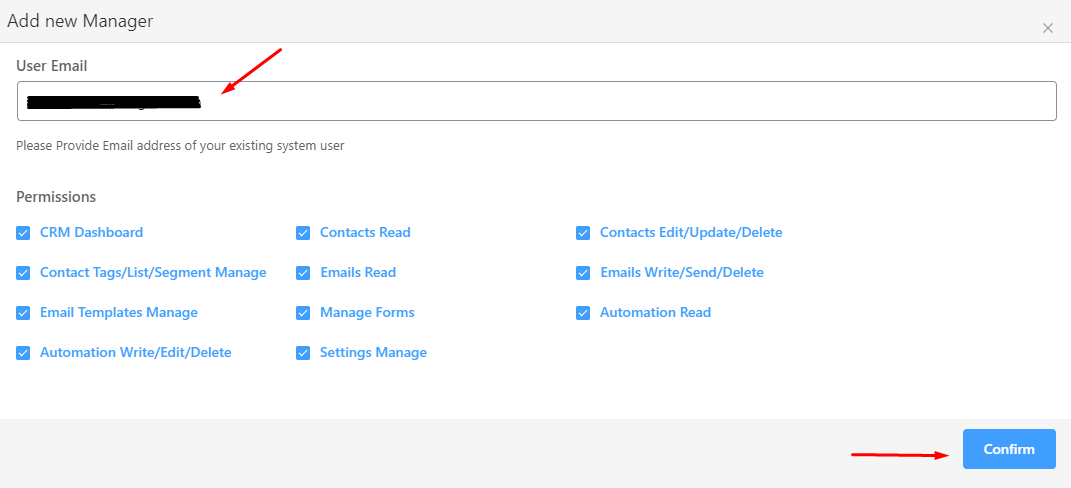
Add a manager from one of your existing users. Go for one who does not have admin access to your site- choosing a Customer role would be apt.
Enter the email address of the same. After entering, select the checkboxes for permissions and then click on ‘Confirm’.
Now go to FluentCRM > Dashboard > REST API tab and click on the ‘Add New Key’ button as shown here:
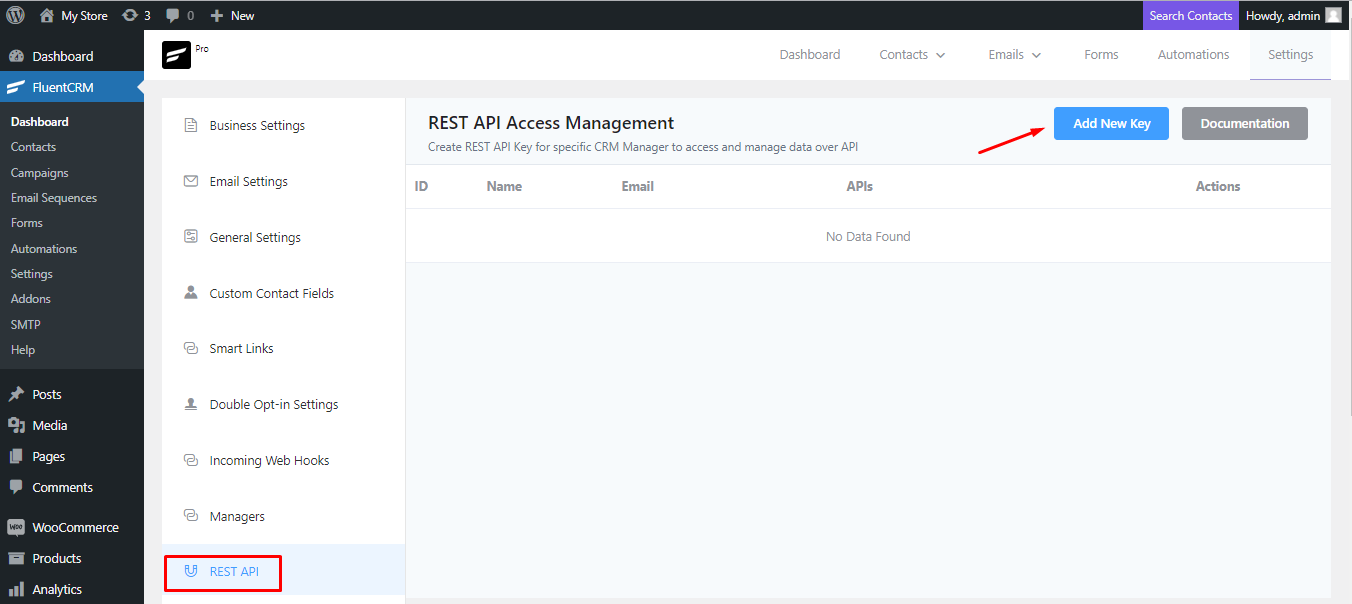
You can add a name to your key. Let’s go with the name ‘Booking User’.
Under Associate FluentCRM Manager, you will select the user email you had added earlier as a Manager.
Once done, click on ‘Create’.

Your REST API Key will be created.
Copy the API Username and Password and save it for later.
Make sure to copy it correctly and save it too.

2. Connecting FluentCRM with Booking & Appointment Plugin for WooCommerce
Now, you need to connect FluentCRM with the Booking & Appointment Plugin for WooCommerce.
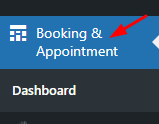
Go to Booking & Appointment > Integrations > FluentCRM.

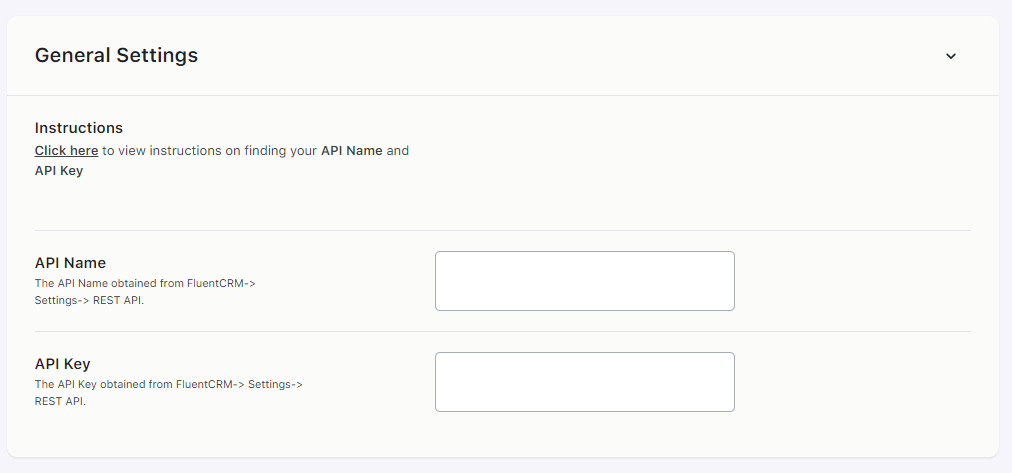
Enter the API Name and API Key that you had collected earlier and click on ‘Save Settings’.
Once settings are saved, the option to select the list will appear on the successful connection.
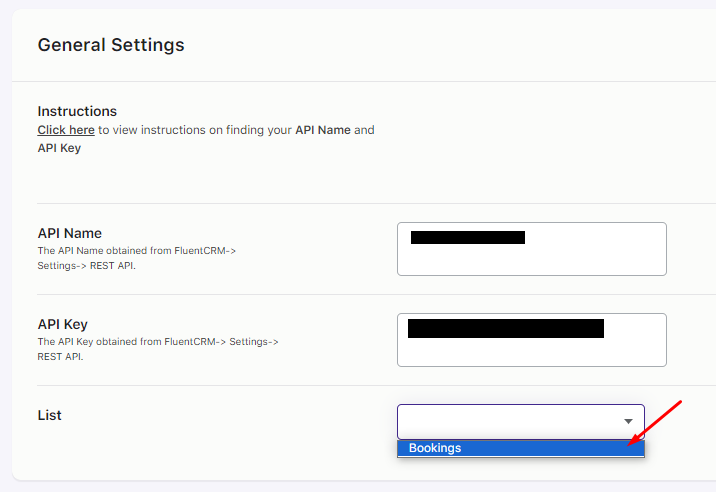
This option will display all the lists that you’ve created in the FluentCRM > Contacts > Lists.
If no lists are present in FluentCRM then after saving the API Name & Key, a default list with the name Bookings will be created automatically.
Contacts that were created for the customers who booked the product will automatically be assigned to the selected list.
Select the list and click the Save Settings button to save the data.
In case of a failed connection, an appropriate error message will be displayed.
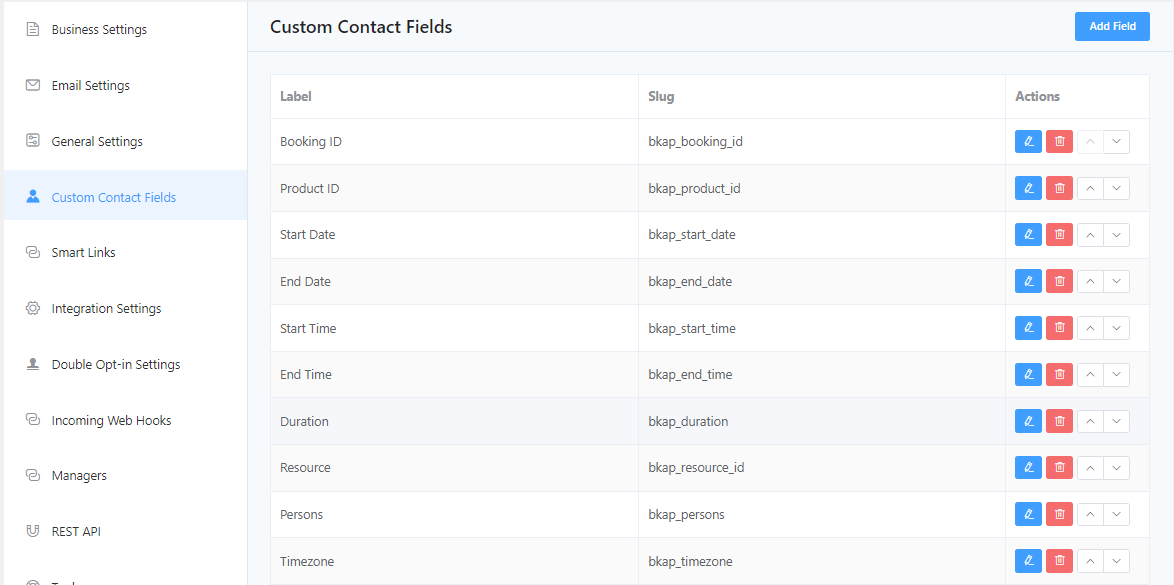
Once it is connected, Custom Contact Fields will be added to store the Booking Data.
These are the fields that you can use in the email that will be sent to your customers.
You can find them by going to ‘FluentCRM’ > Settings > ‘Custom Contact Fields’.
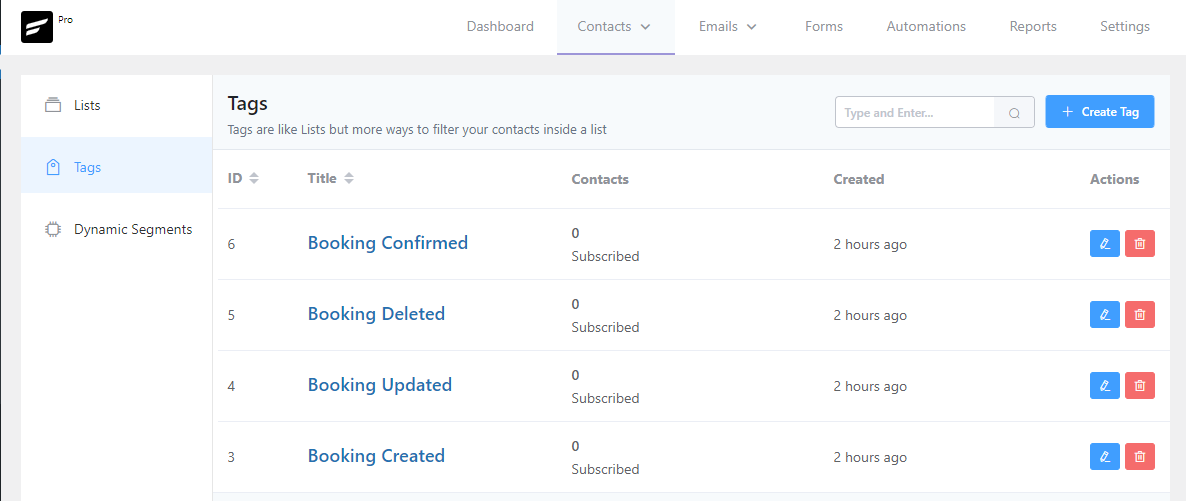
Additionally, the following tags will automatically get created in the FluentCRM.
These tags represent the current status of the Booking for the Contact.
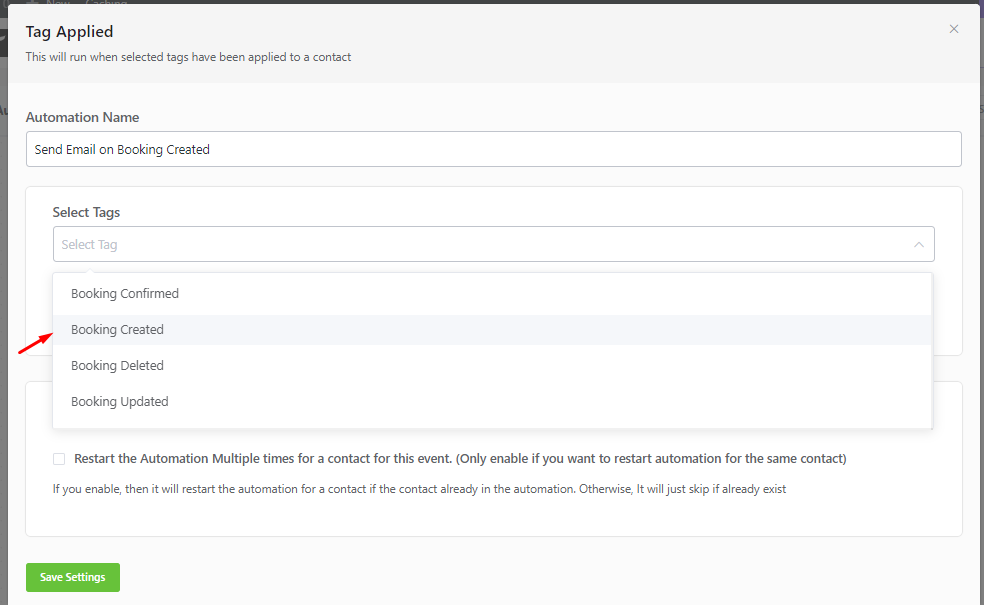
- Booking Created – It will get assigned to contact when the booking is created.
- Booking Updated – It will get assigned to contact when the booking is updated.
- Booking Deleted – It will get assigned to contact when the booking is deleted.
- Booking Confirmed – It will get assigned to contact when the admin confirms the booking.
So far, you have seen how to connect the Booking plugin and FluentCRM. Also, you have seen which data/fields get created automatically in the FluentCRM upon connection.
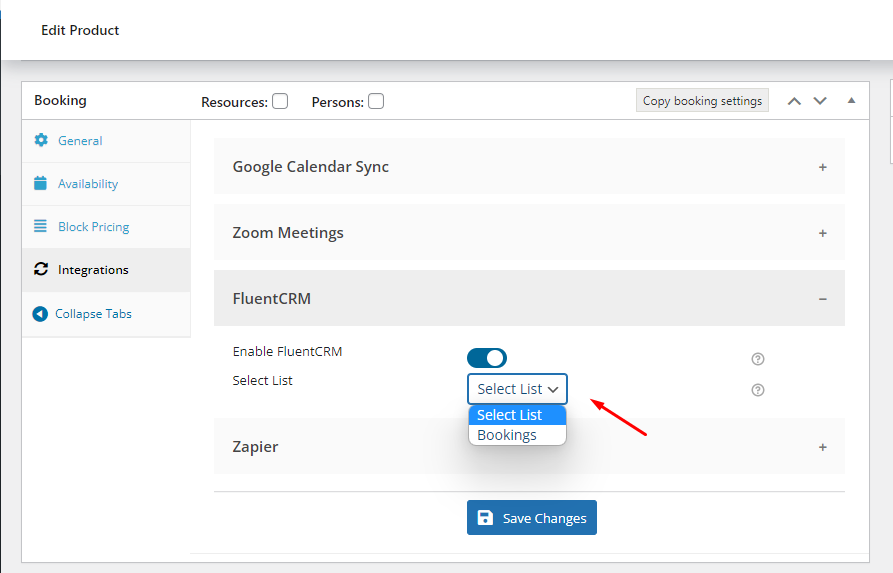
To make things work with individual products differently, you will have added options at Booking Metabox > Integrations > FluentCRM tab.
So to start sending the Booking data to FluentCRM, enable the Enable FluentCRM option and Select the list if you want to assign the contact to a different list than the one selected in the above screen.
Let’s say globally the list is selected as List 1 and at the product level, you have selected List 2. Upon booking this product, the contact for it is created in FluentCRM and then assigned to the List 2 list automatically.
3. Booking Data in FluentCRM
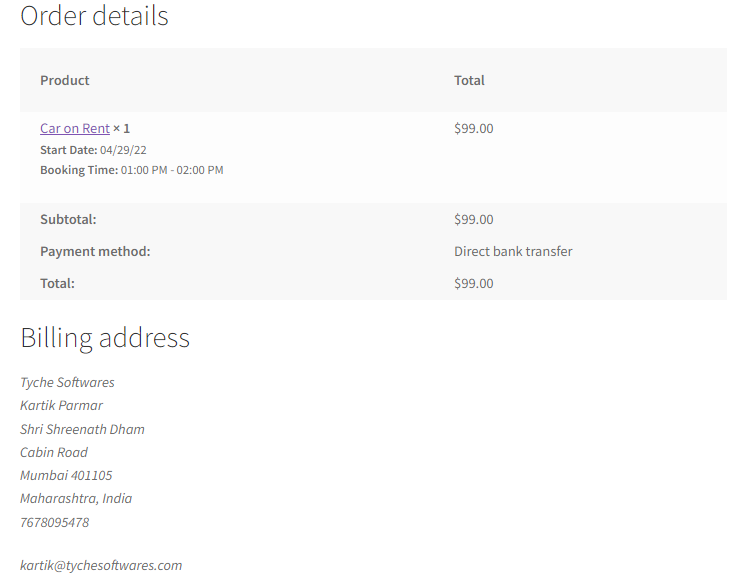
Let’s say that you have created a bookable product called Car on Rent which is set up with the Multiple Nights booking.
You have enabled the FluentCRM option and selected the Bookings list.
This product was booked with the date 29th April 2022 and 01:00 PM – 02:00 PM timeslot as shown in the below screenshot.
The Contact in the FluentCRM will get created automatically and it will be assigned to the Bookings list.
Along with that, the Booking Created tag was applied to the contact.

Click on the Email address to view all the data of that contact.
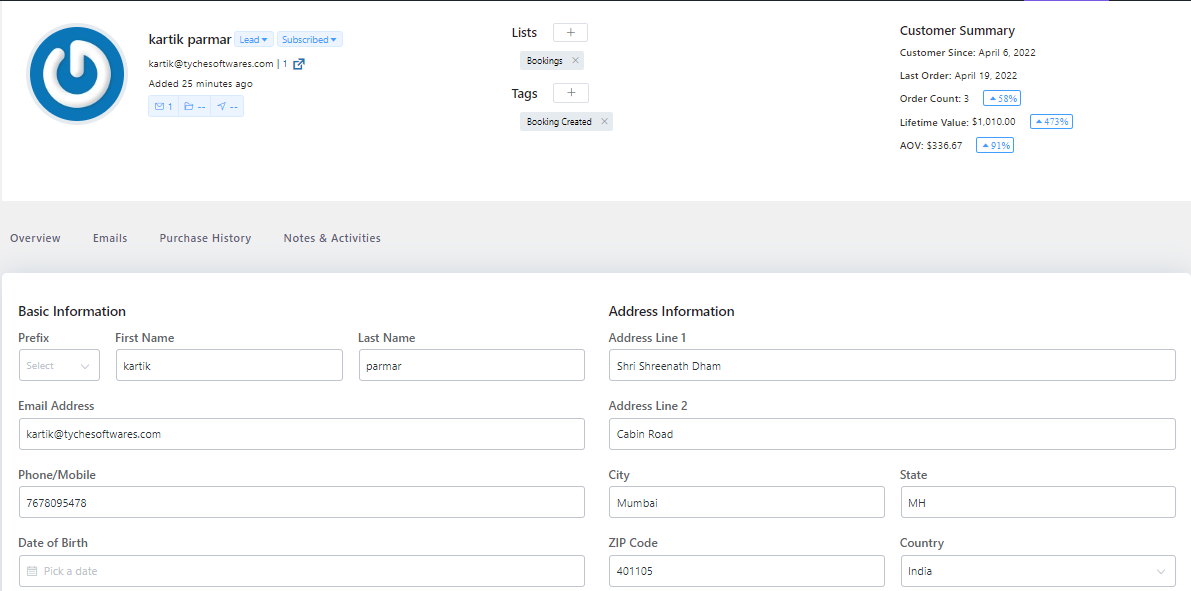
As shown in the above screenshot, in the Basic Information section, all the information will be present that was entered by the customer during the checkout process.
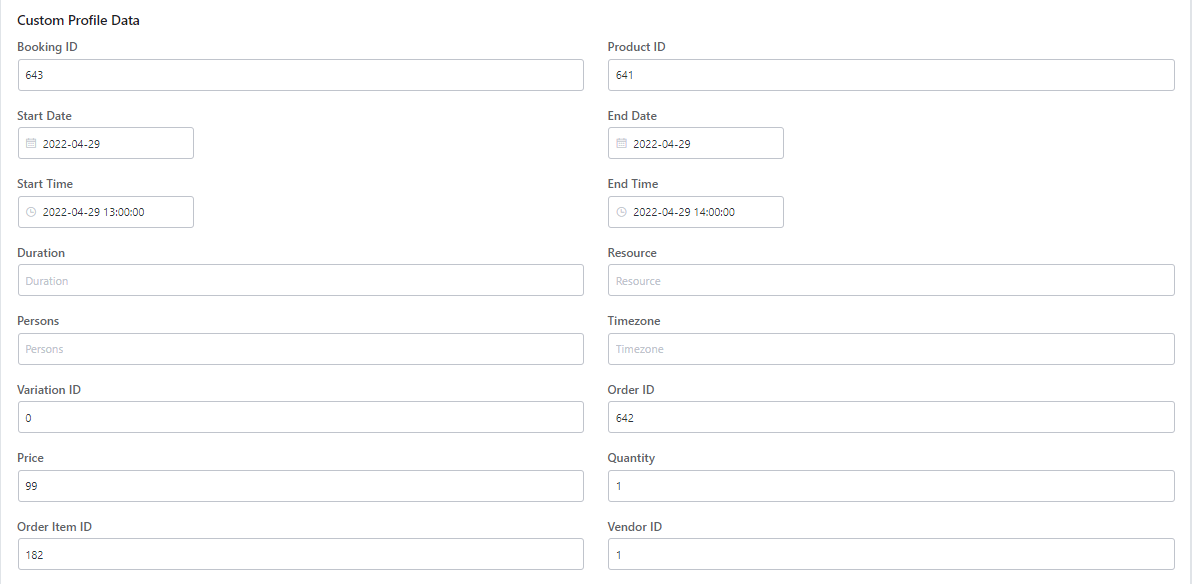
Below that, there will be a Custom Profile Data section to display all the custom data of that contact.
Booking Data will also be displayed in this section.
The booking information will be added to the Note as well.
This note will be added for each action done for the respective customer’s Booking.
All the Booking related notes will be available in the Notes & Activities section of the contact as shown here:

For a quick summary, upon the order placed, a contact will be created in the FluentCRM with the List ‘Bookings’ and Tags ‘Booking Created.’
All the Booking data will be available in the custom fields of that contact and a note for the same will be added in the Notes & Activities section.
4. Creating an Automation
Since booking data is now available in the FluentCRM, you can set up the automation based on the actions performed on the Booking.
Let’s say that you want to send an email when a booking is created.
To do this, go to FluentCRM > Automations.
Please click on the ‘Create a New Automation’ button once you reach there:

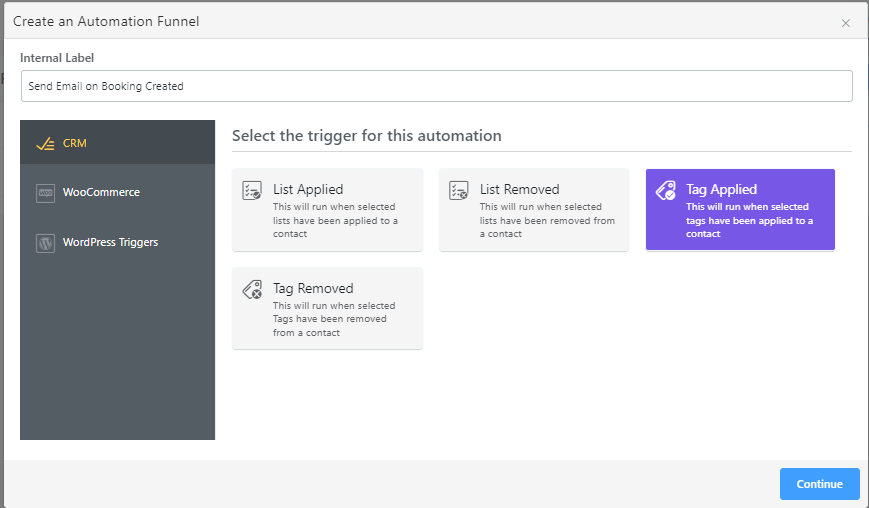
Choose a name for the ‘Internal Label’. You can go with ‘Send Email on Booking Created’.
Then, click on ‘Tag Applied’ and ‘Continue’.
Under ‘Select Tags’ go with the ‘Booking Created’ tag. This would mean that the tag will get assigned to a contact and then the contact will be auto-added to the automation.
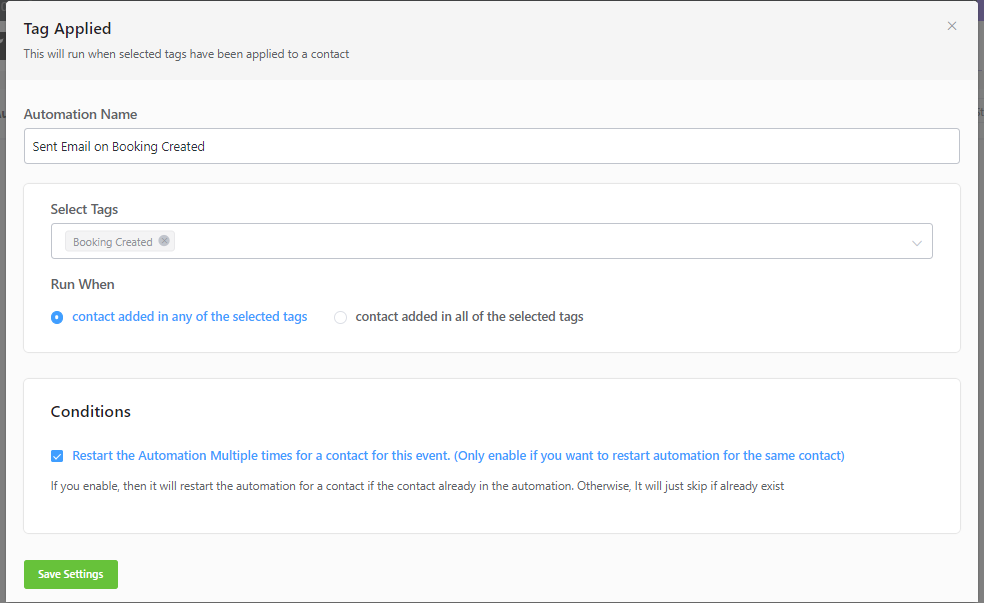
After this, you can check the ‘Restart the Automation Multiple times for a contact for this event’ option.
Please only enable it if you wish to restart the automation for the same contact.
Finally, click on the ‘Save settings’ button.
The automation will be created as shown below:

Hover over the + icon.
It will show two options, one is to add the Action/Goal and another to add the Conditional Action.
![]()
Click on the Add Action / Goal option and select the Send Custom Email option in the Email section.
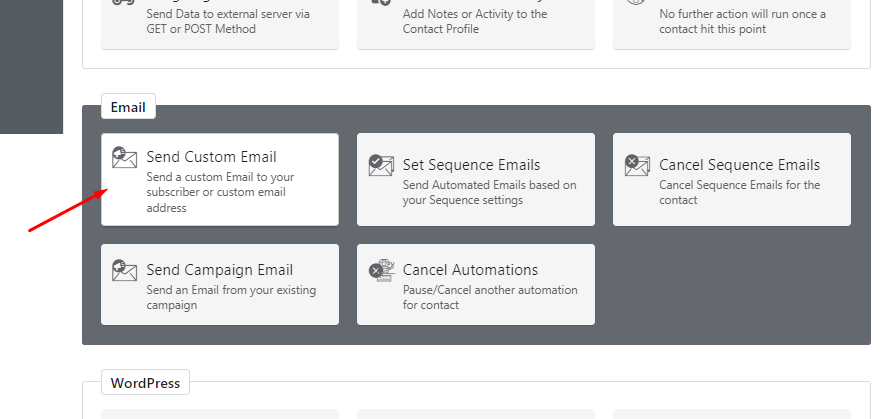
Once selected, a popup will appear to enter the Email Subject and Email Body with other options as shown in the below screenshot.
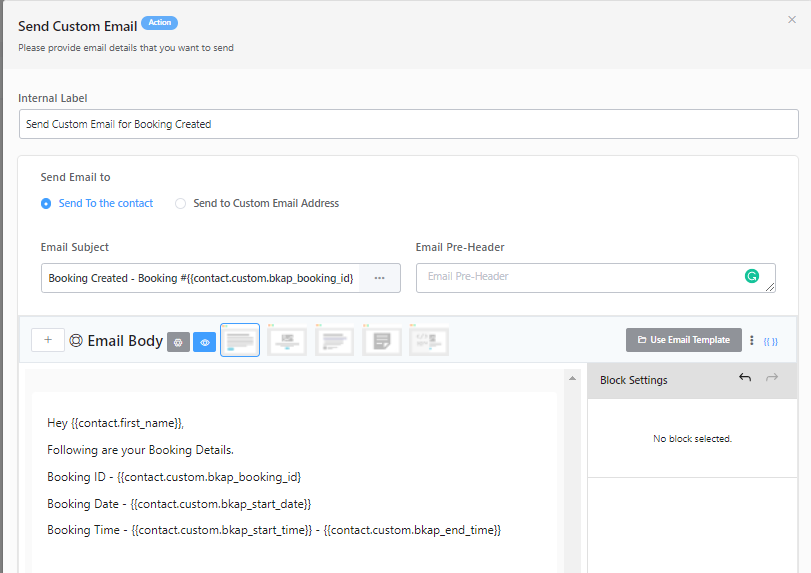
As shown in the above screenshot, you can use different merge codes to replace the data in the Email Subject and Email Body.
You can send a Test Email for the same and then click on ‘Save Settings’.
Once the booking is created, an email will be sent to the contact according to the automation set up. For instance, a customer has booked a Car on Rent product for the date 30th April 2022 and time 11:00 am to 12:00 pm. Following will be the email that they will receive.
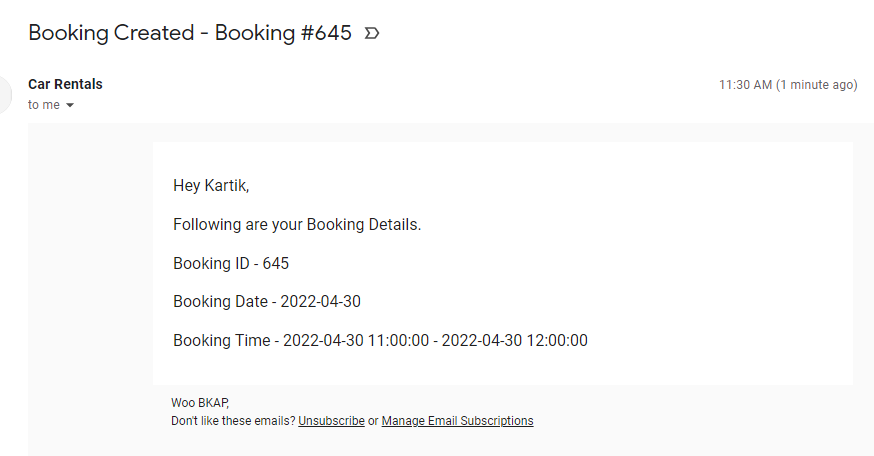
Similarly, you can send custom emails for Booking Updated, Booking Deleted, and Booking Confirmed.
Also, one can set up different Automations and Campaigns according to the Booking data available in the FluentCRM.