Let’s say that using Booking & Appointment Plugin for WooCommerce, you have set up online bookable services. You may have designed your store in the choice of your format and language.
However, you also want the appearance of your booking calendar & the booking information to match with the said design and language of your store.
To do so, we have some global-level booking settings to change the appearance of the booking calendar and booking details on the front end of your store.
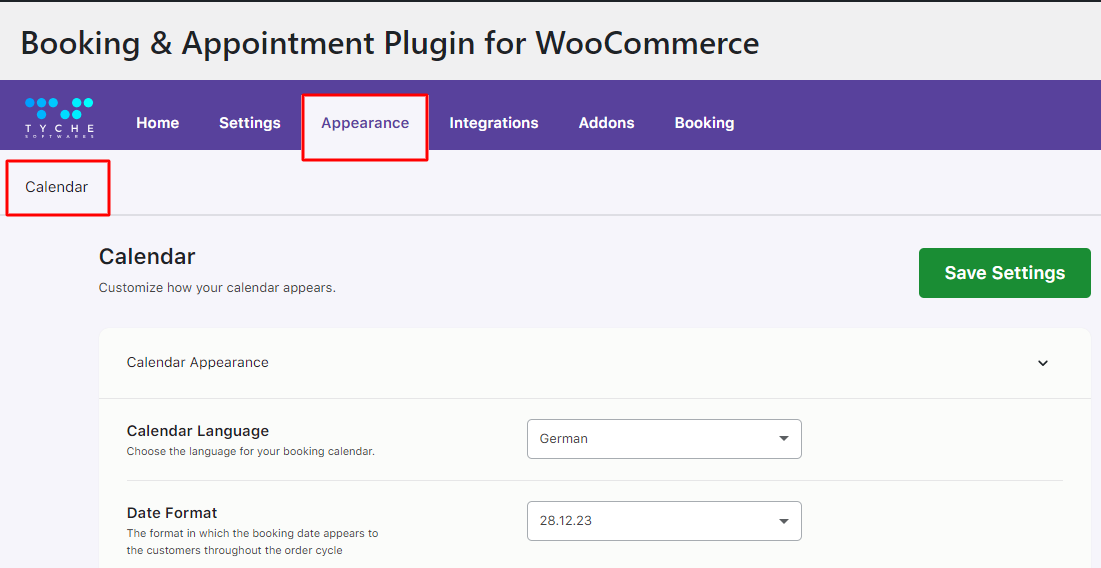
You will find this setting applicable to all the bookable services in your store. Simply go to Booking & Appointment > Appearance > Calendar.


You will find the following settings:
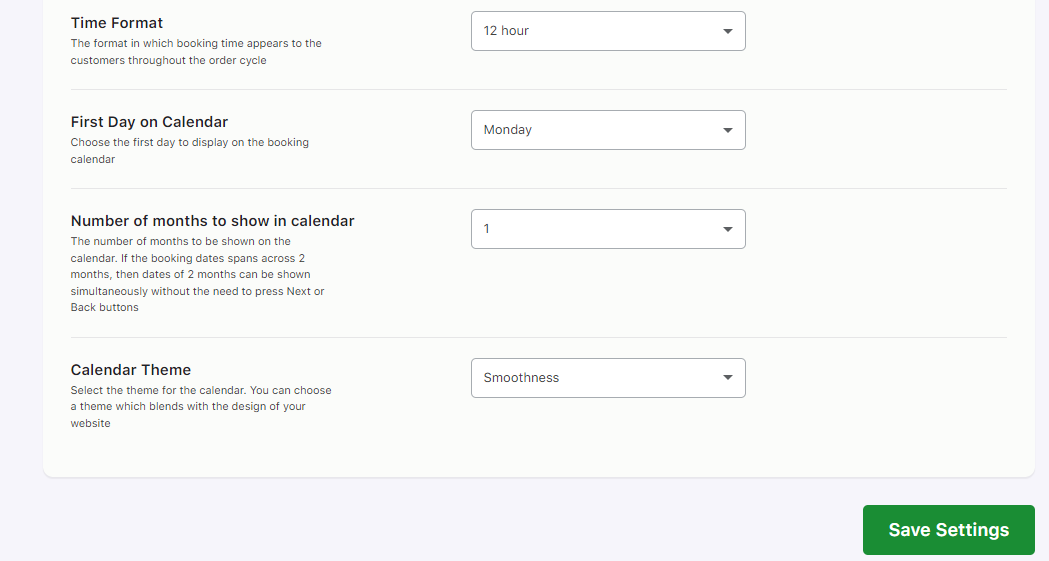
1. Language
2. Date Format
3. Time Format
4. First Day on Calendar
5. Number of months to show in the calendar
6. Calendar Theme
All the above settings are set to a default value when you install the Booking plugin on your website. You can change their values are per your business requirements easily.
Here’s a business example to understand these settings:
Let’s say that customers can easily book an online appointment for your dental clinic. Since you are located in Germany, you have set your website’s language to German. Additionally, you want to show the date & time format of the booking date and timeslot as per the standard date format followed in Germany.
The Booking & Appointment plugin has Recurring Weekday and Specific Dates booking methods to help you create this bookable service available on a single day with a timeslot. Using any one or both of these methods can create your service as per your business requirements.
For instance, you have created a “Just White Dental Clinic” service using the Recurring Weekdays booking method.
The customer can book an appointment on any day from Monday to Friday.
Available timeslots on these days are 10:00 AM to 12:00 PM and 04.00 PM to 06:00 PM.
Below is the front end of the product created.
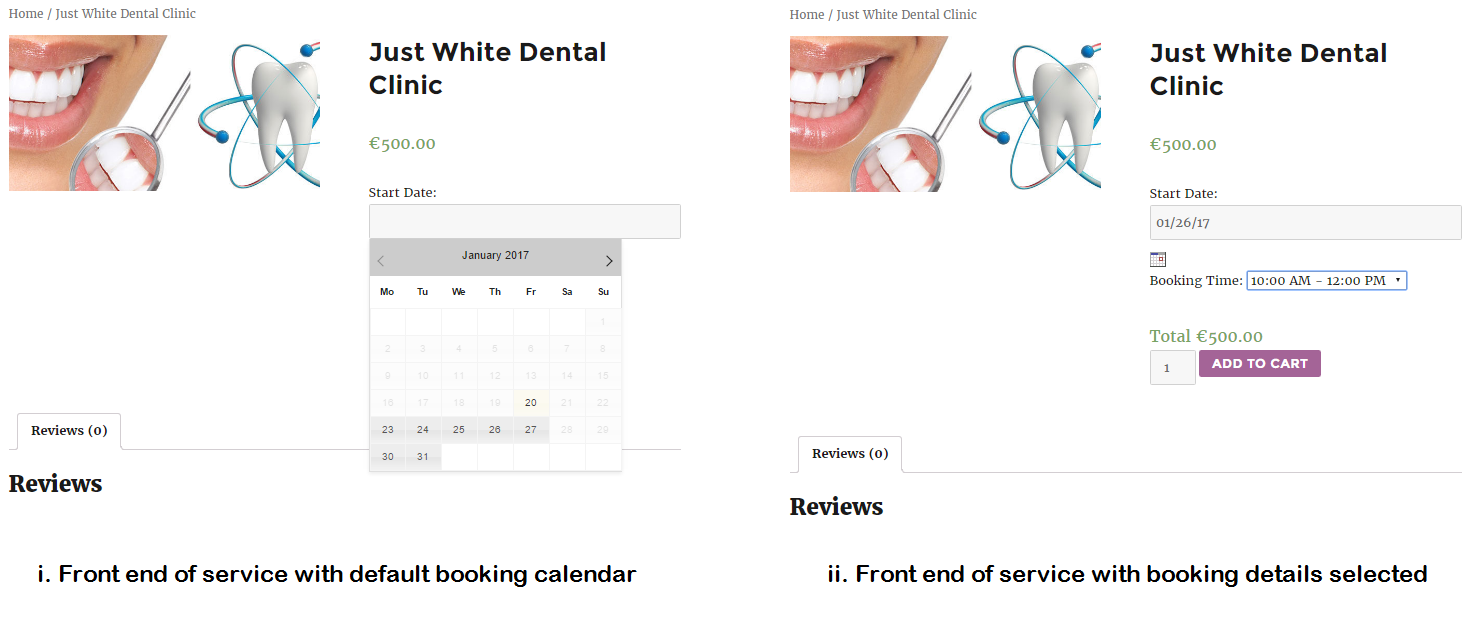
Please note that after changing the values of these settings, you will need to click on the “Save Settings” button to save the changes.
Let’s dive into them:
1. Language
There are 62 available languages from which you can choose any one language suitable for your booking calendar.
As per the example, since you are located in Germany, you would want to show the booking calendar in the German language.
From the dropdown choose “German” in the Language option.

After saving this setting, the Booking language will be changed to German as shown below:
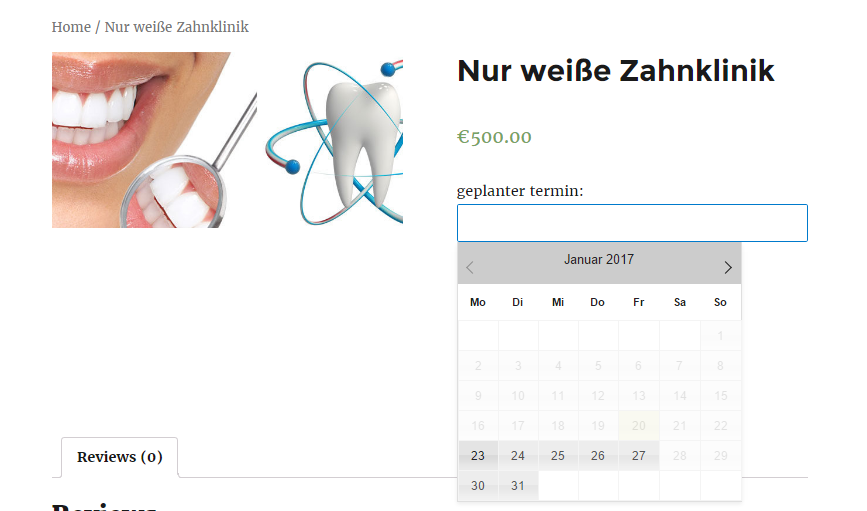
You must have noticed in the above image that, the booking label has been changed to the German language.
To do so, you will need to change all the booking labels manually in the language you require as shown in the previous documentation.
2. Date Format
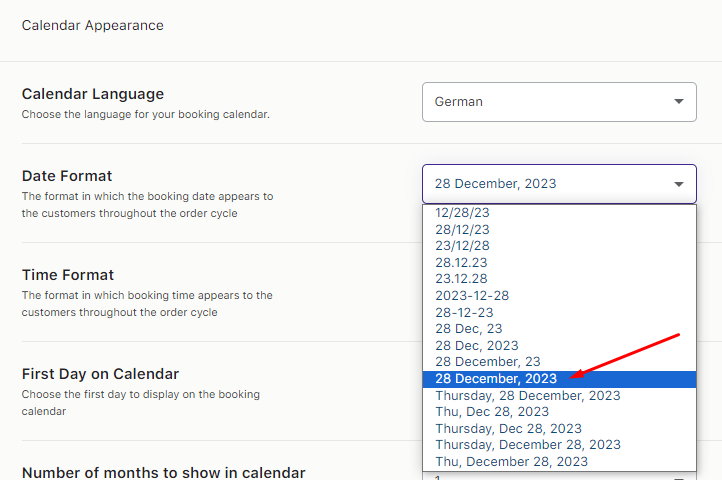
There are 16 types of date formats to display on the front end as per your requirement.
All the booking dates on your website will be displayed as per the selected date format.
Suppose you want to show a booking date in the following format: 26 January, 2017.
Go to the Date Format setting, select your format from the dropdown, and save the settings.
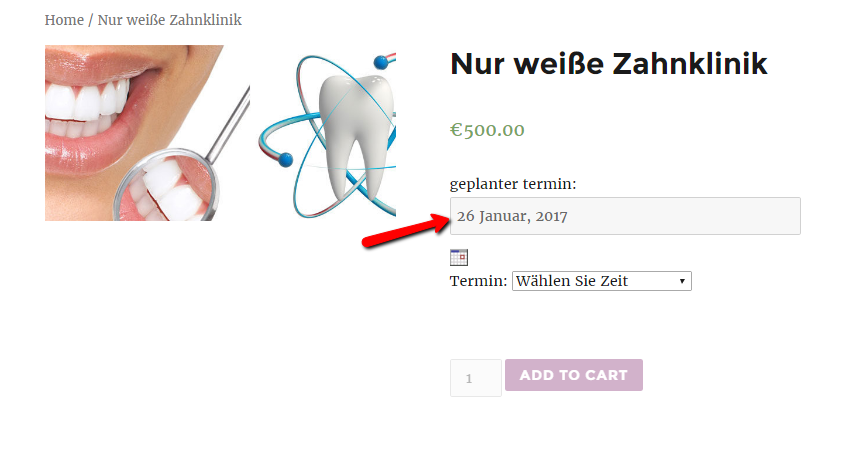
The selected booking date will be displayed as per the selected Date Format “26 Januar, 2017”.
3. Time Format
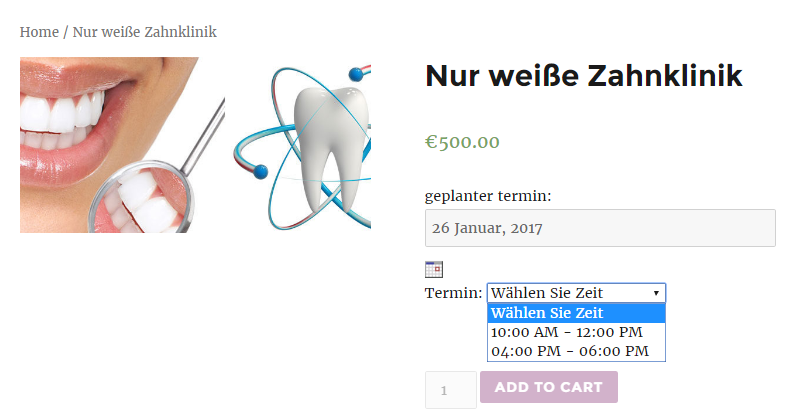
There are 2 options “12 hours” or “24 hours” a day, to set the time format in which booking time appears to the customers on the product page once the time/time slot is selected.
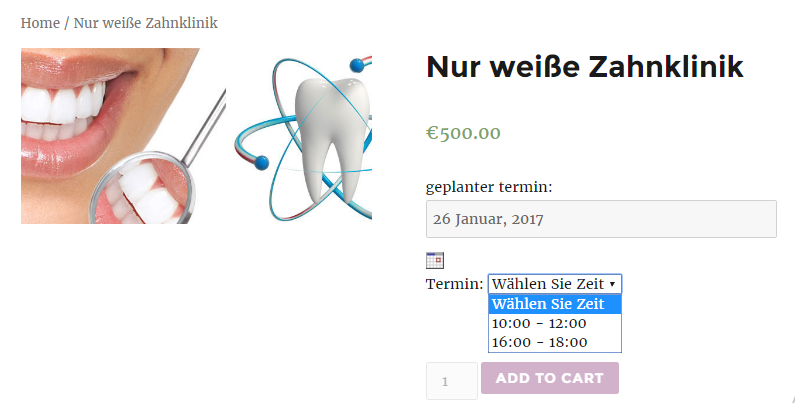
By default, it is set to 12 hours. If you want to display timeslot hours in 24-hour format then choose “24 hours” in the Time Format option.

Thus, when the customer clicks the dropdown, all the available time slots will appear as per the 24-hour format.
If the 12-hour format has been selected, then the customer will see all the available time slots in the 12-hour format.
All the booking details of the services displayed on your website whether it is on the Cart page, Checkout page, Thank you page, Email notifications, View Bookings page, or the Order Edit page, will be displayed based on the selected date and time format.
4. First Day on Calendar

The default value set to this option is “Monday” which means the starting day of the booking calendar will be Monday for all the bookable services.
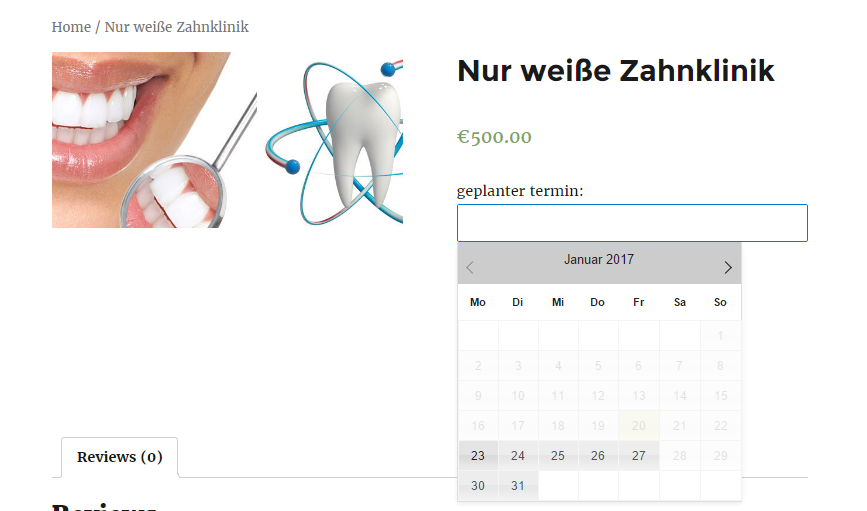
You can select any one weekday from the option and that selected day will be the starting day of the booking calendar. If you have selected “Sunday” for this option, then the calendar will appear like this:
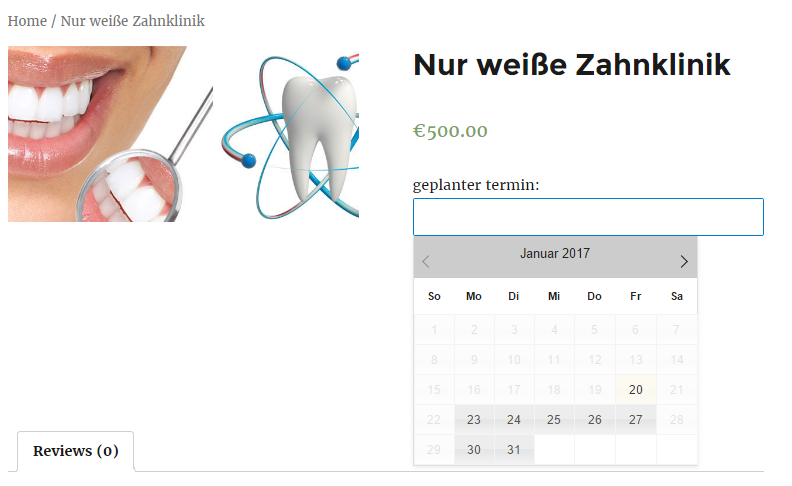
5. Number of months to show in the calendar
This is the number of months you want to show in the booking calendar.

By default, it is set to “1” as shown in the below image.
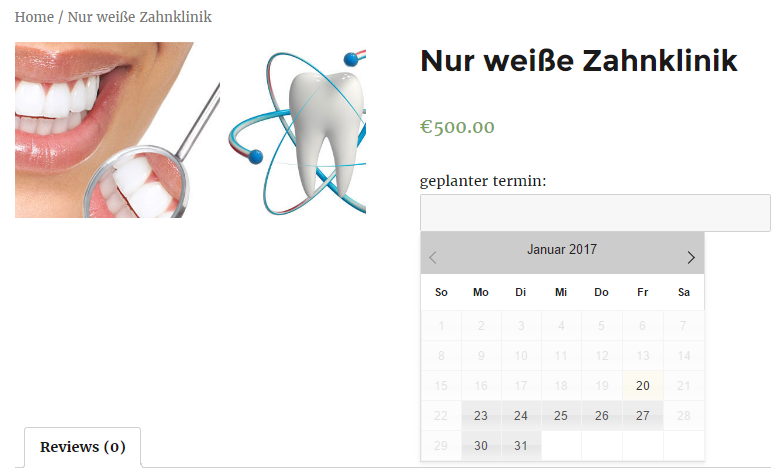
If you want to display 2 months in the booking calendar then select “2” from the drop-down.
If you will select value “2” in this option then the booking calendar will appear like in the below image.
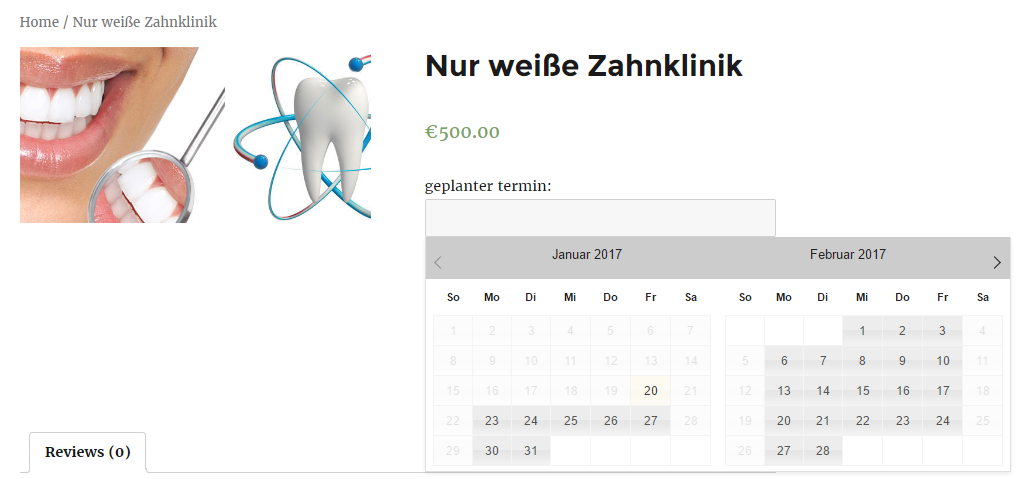
6. Calendar Theme
There are 24 available themes from which you can choose any one theme for your calendar which can match the design of your website.

By default selected theme is ‘Smoothness’ as shown below.
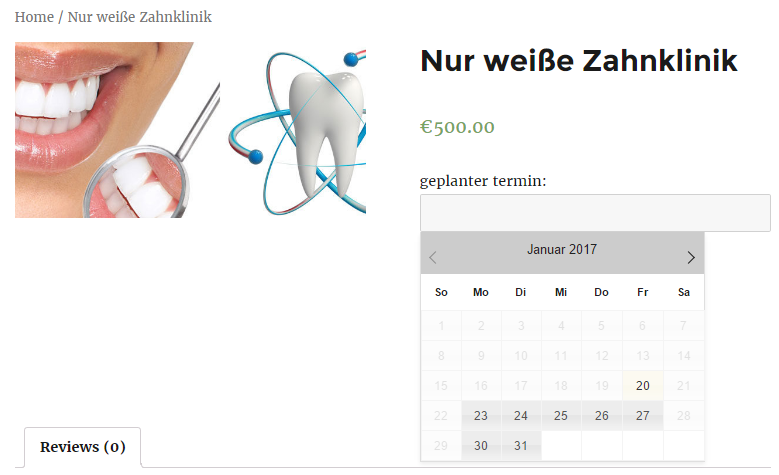
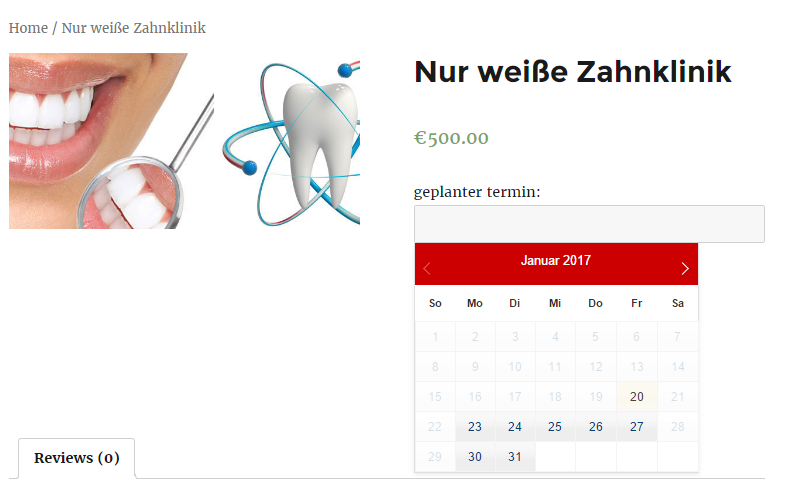
You can change the calendar theme as per your business requirements. For instance, you have selected the “Blitzer” theme:

Thus, the theme of the booking calendar will be changed to it for the customer as shown here:
Conclusion
Thus, with these settings in our Booking & Appointment Plugin for WooCommerce, storeowners can have an attractive and easily understandable appearance of their booking services. This would help the customer to find the booking availability quickly and book their bookings smoothly!
