Booking & Appointment Plugin for WooCommerce allows integration with Google Calendar via OAuth.
A. Integration via OAuth
B. WooCommerce Settings
A. Integration via OAuth
Go to the Google Developers Console. Select a project, or create a new one.

Give the Project name and click on the Create button.

Once the project is created, the Calendar API needs to be enabled. To do so, click the Enabled APIs & Services link > Enable APIs and Services.

Next, search for Google Calendar API.
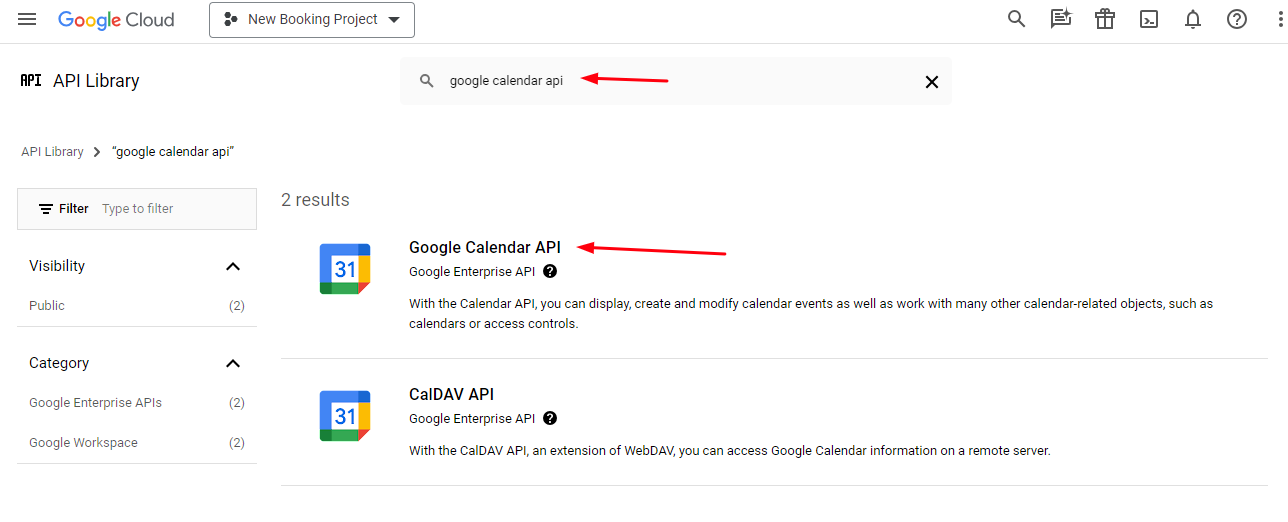
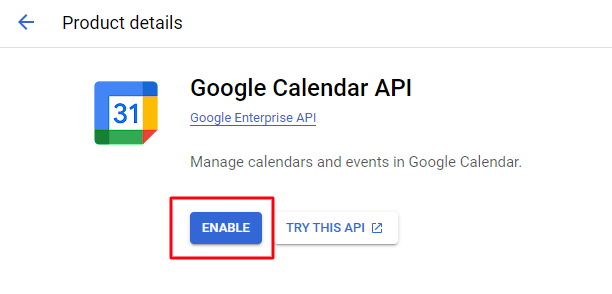
Click the ENABLE button.
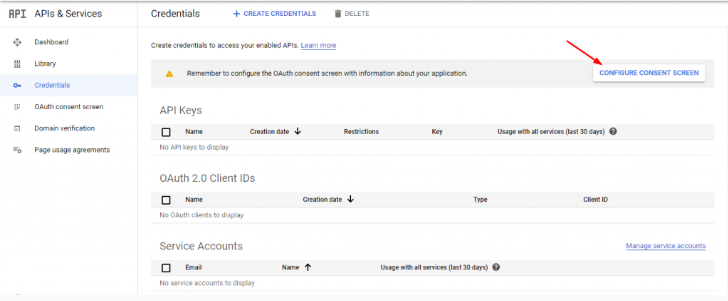
On the left, click Credentials. If this is your first time creating a client ID, you’ll be prompted to configure the consent screen.
Click the Configure consent screen.
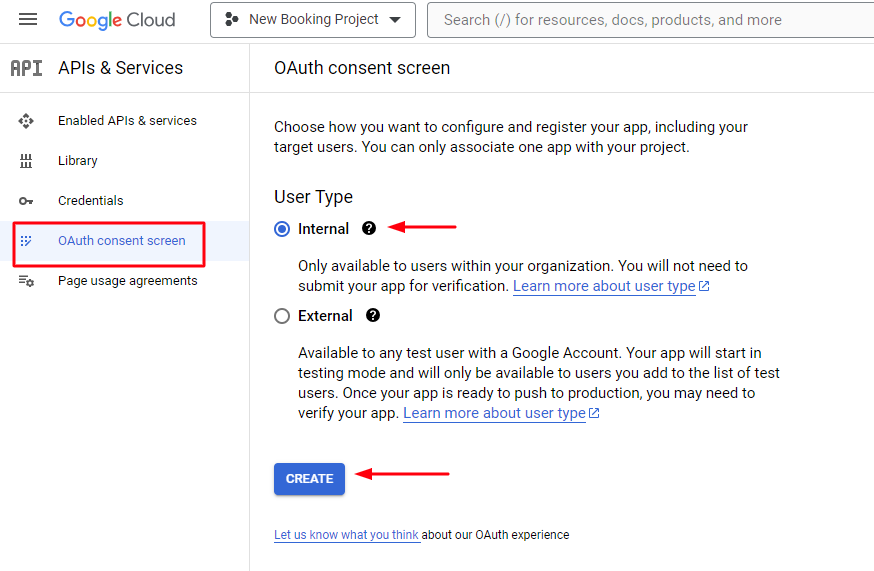
Go to the OAuth consent screen. Select User Type and click on the CREATE button.
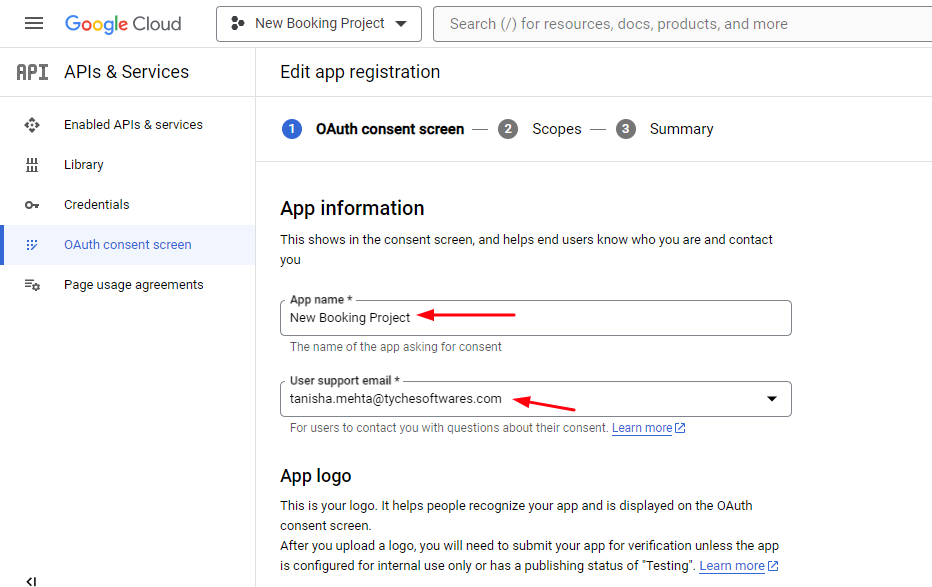
Set the Application name and add the User Support email.
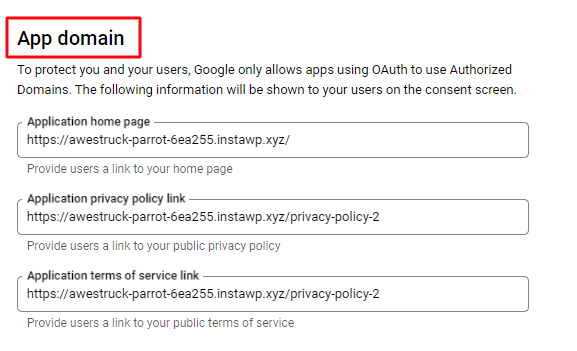
Go to the App domain section and enter the homepage and privacy policy page of your WooCommerce store.
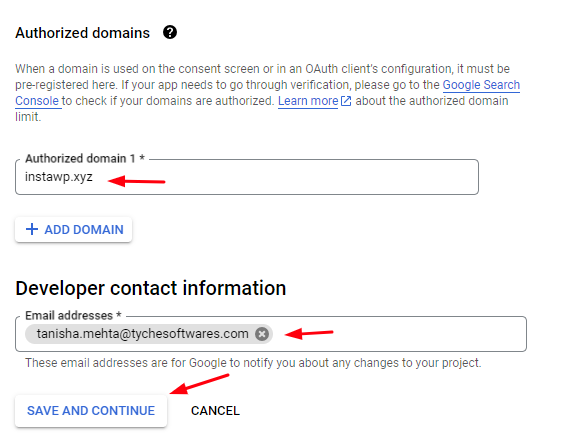
 Scroll down provide the authorized domains and give the Developer contact information. Click Save and Continue.
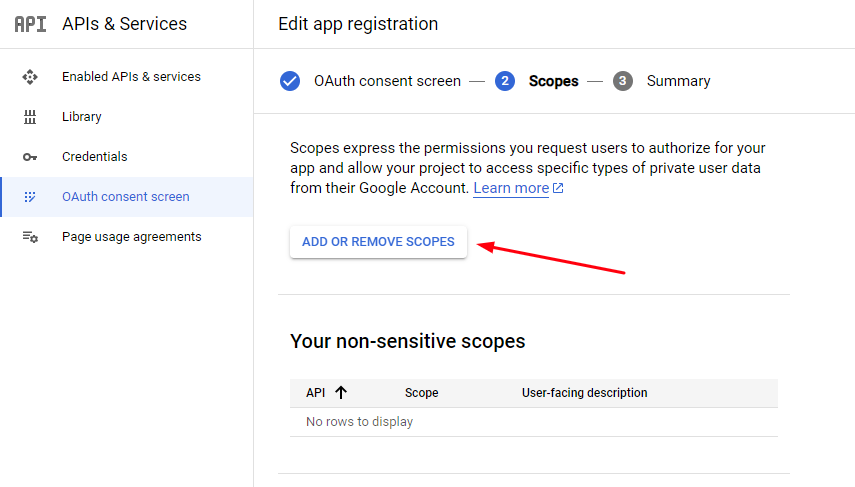
You will be taken to the Scopes section now. Click the Add or Remove Scopes button.
In the search box, type ‘Google Calendar’ so that you can find the option ‘See, edit, share, and permanently delete all the calendars you can access using Google Calendar’.
Select that option and choose this API. Click the Update button.
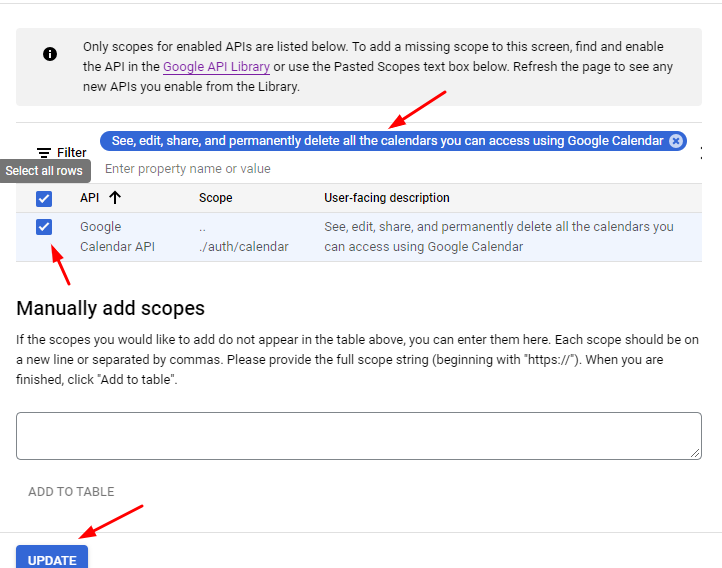
Click the Save and Continue button to proceed forward.
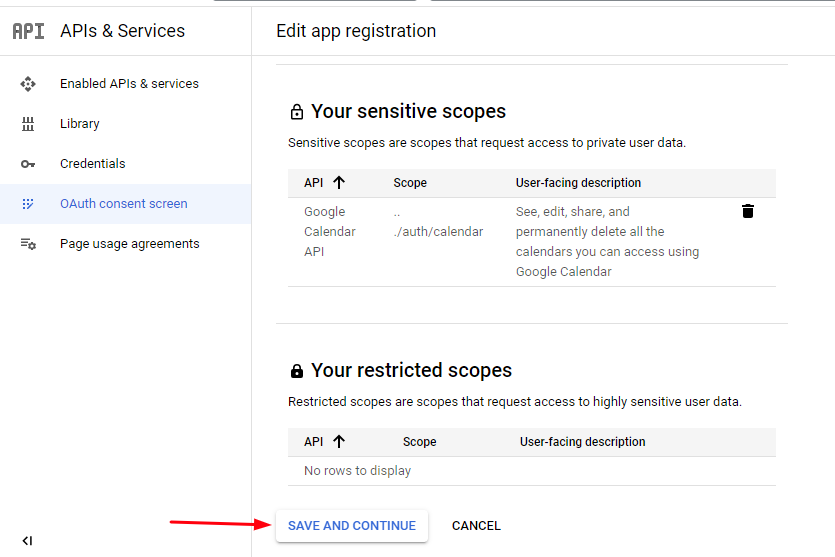
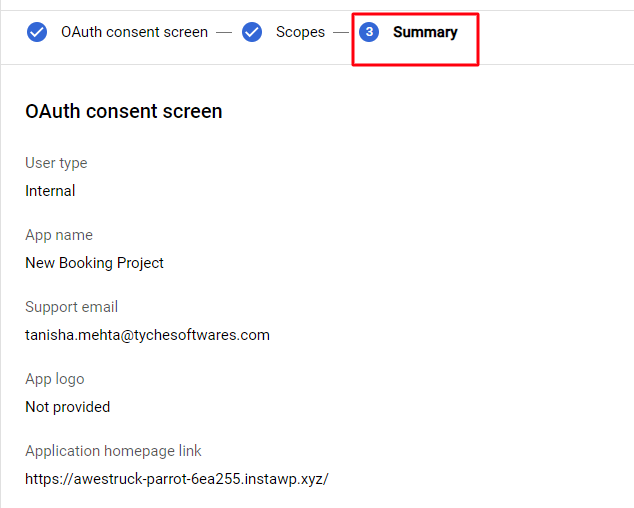
You will get a summary of what has been done so far.
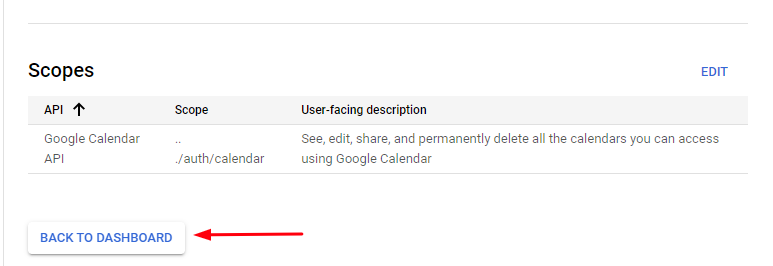
Check for any errors and then proceed forward by clicking the ‘Back to dashboard’ button.
Now, go to the Credentials tab, and click Create credentials.
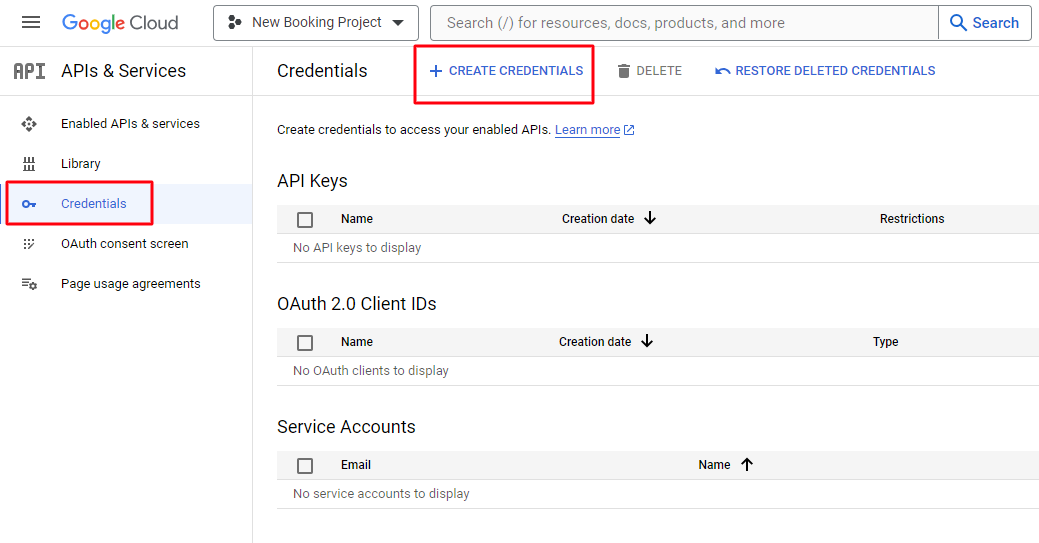
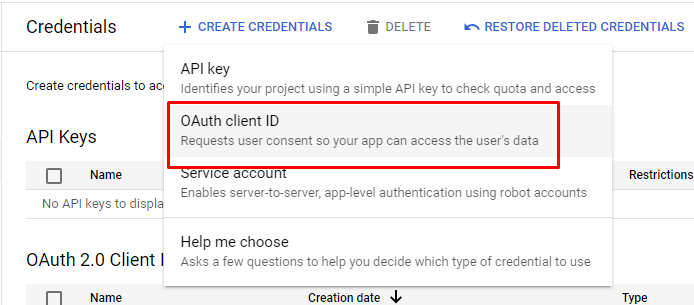
Then select OAuth client ID.
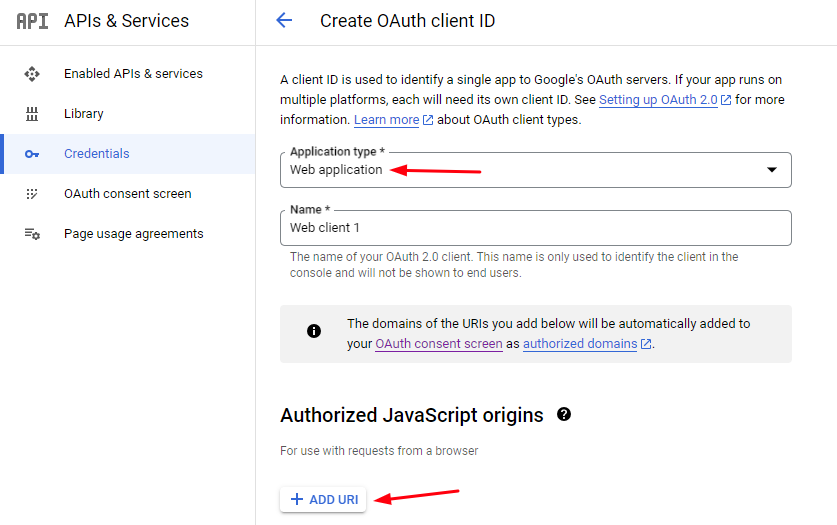
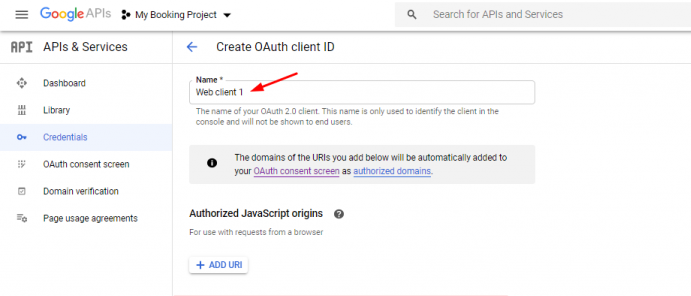
Select Web application under Application type and provide the necessary information to create your project’s credentials.
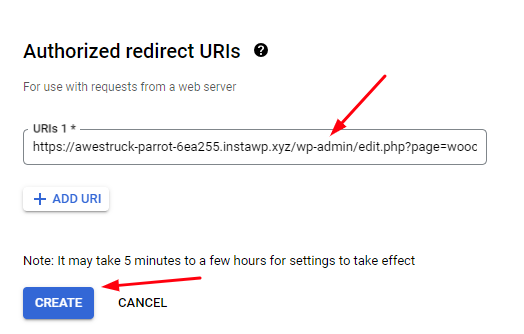
For Authorized redirect URIs enter the Redirect URI and then click Create.
To find out the Authorized redirect URIs, there are two ways:
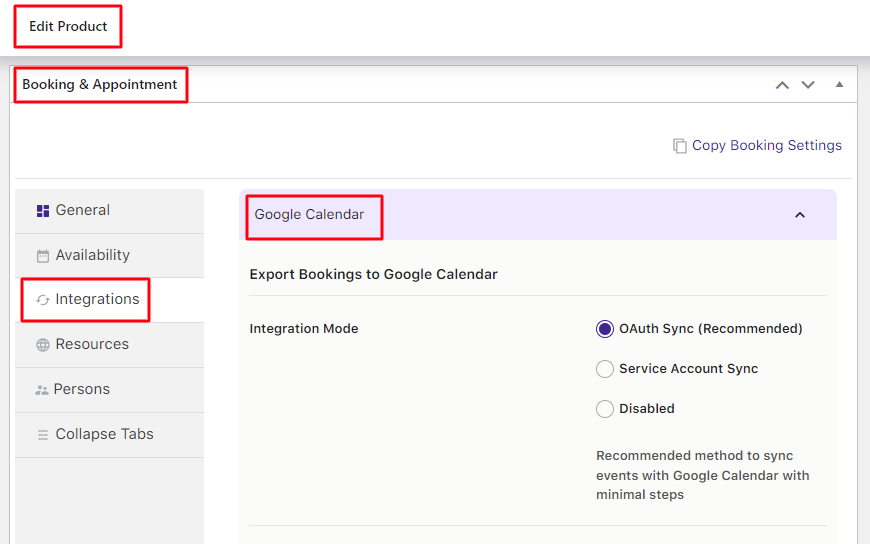
If you are trying to set it up at a global level then you have to use Redirect URI available on Booking & Appointment > Integrations > Google Calendar Sync > Admin Calendar Sync Setting section.

If you set it up at the product level, you have to use Redirect URI available on Edit Product > Booking Meta box > Integrations > Google Calendar Sync tab > Redirect URL.
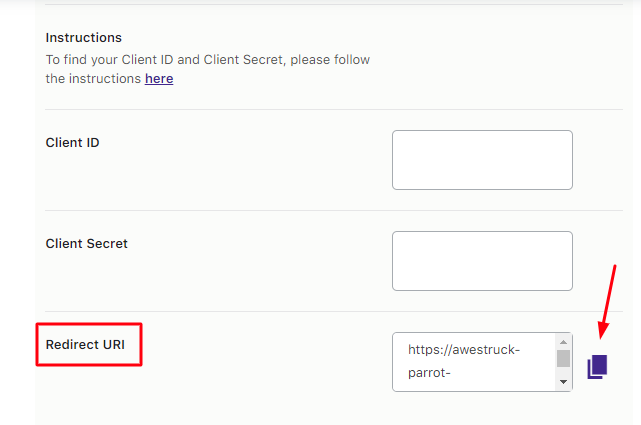
Paste the link and click Create.
You’ll see your Client ID and Client secret in the dialog box that appears next.
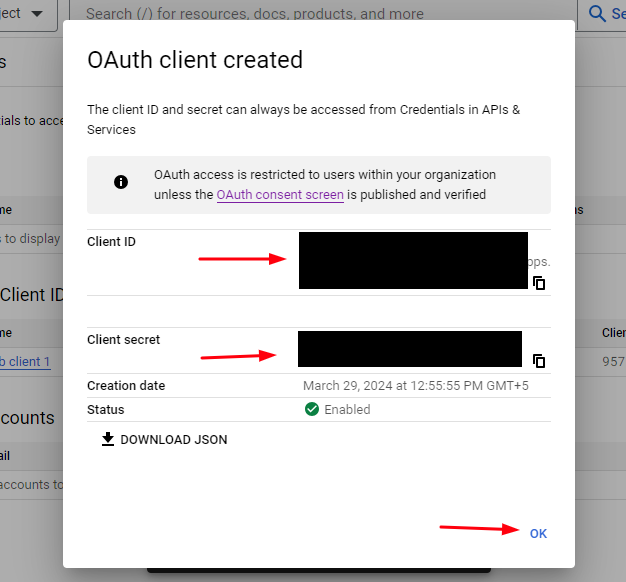
Use them in the Client ID and Client Secret fields that can be found under the Booking & Appointment > Integrations > Google Calendar Sync > Admin Calendar Sync Setting section. Make sure you copy and save them somewhere safe.
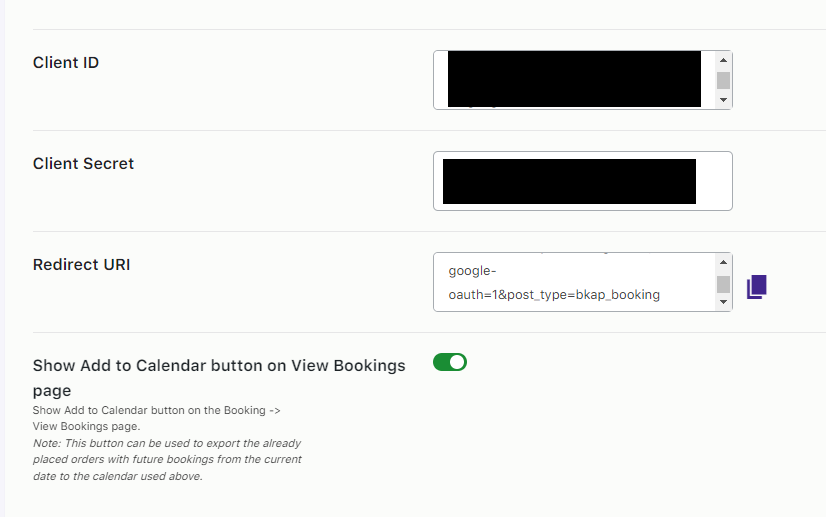
Once the information is entered, click the Save Settings button. The Connect to Google Calendar button will displayed if the connection is successful.
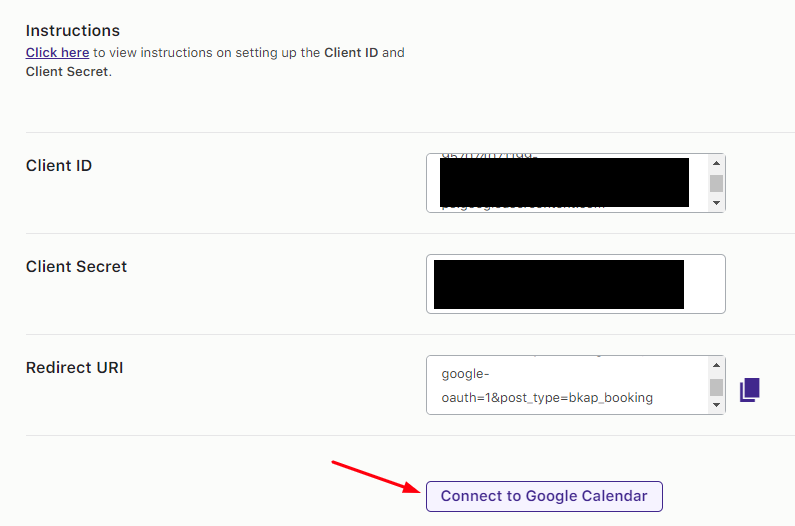
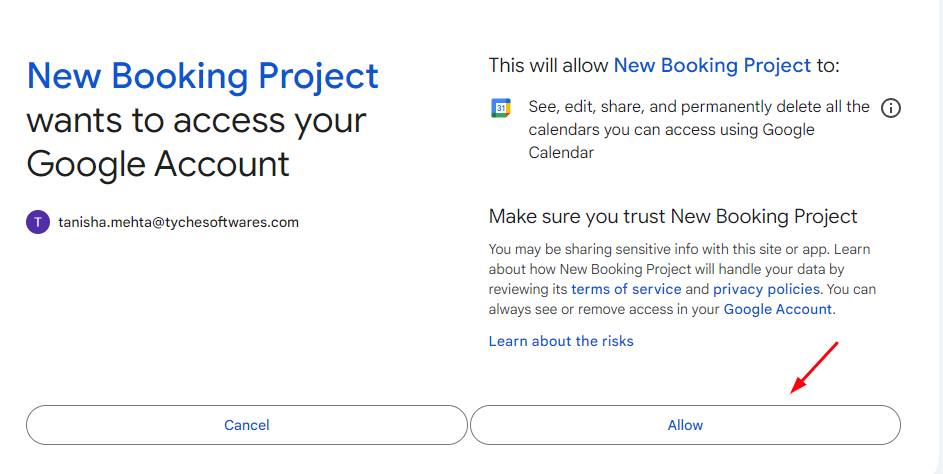
Next, click the Connect to Google Calendar button. It will ask your Gmail account to integrate with Google Calendar. Click the Allow button.
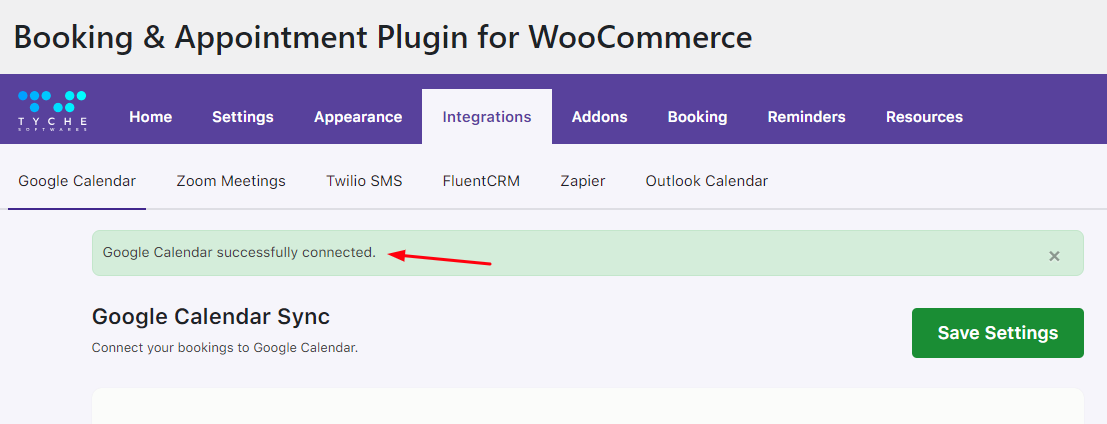
Once done, a message of successful integration will be displayed.
The plugin will export the bookings to the calendar as soon as an order is placed.
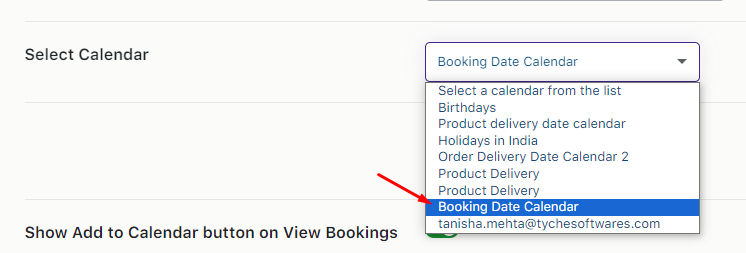
You simply need to select the calendar where you want the bookings to be added:
B. WooCommerce Settings
You will find the following settings when you go to the Google Calendar Sync settings in your WooCommerce store.
Go to Dashboard > Booking & Appointment > Integrations > Google Calendar.
1. General Settings Dropdown
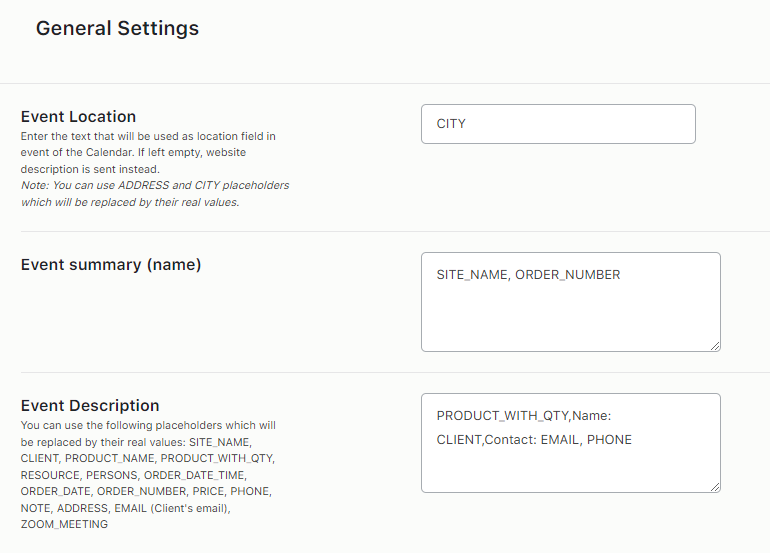
In this section, you can customize the names of the Event Location, Event Summary, and Event Description here.
a) Event Location
This text will be used to display the location of the event that will be created in the Google Calendar.You can use ADDRESS and CITY placeholders which will be replaced by their real values.
b) Event Summary
This text will give you a summary of the booking made by the customer. You can add different placeholders to help with the summary, however, by default, you will have the Site Name and Order Number included.
c) Event Description
This text will add a description of the event. You can add all the additional details of the booking here. For instance, Product Name, Quantity, Email, Phone, etc.You can use the following placeholders which will be replaced by their real values: SITE_NAME, CLIENT, PRODUCT_NAME, PRODUCT_WITH_QTY, RESOURCE, PERSONS, ORDER_DATE_TIME, ORDER_DATE, ORDER_NUMBER, PRICE, PHONE, NOTE, ADDRESS, EMAIL (Client’s email), ZOOM_MEETING
2. Customer Add to Calendar button Settings Dropdown
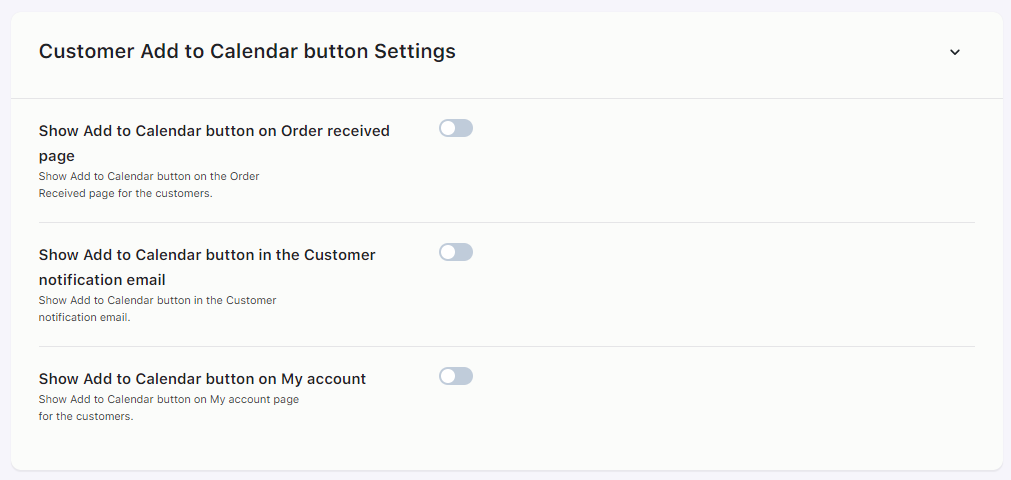
You will find the following settings here:
a) Show the Add to Calendar button on the Order Received page
Enabling this setting will show the Add to Calendar button on the customer’s Order Received Page.
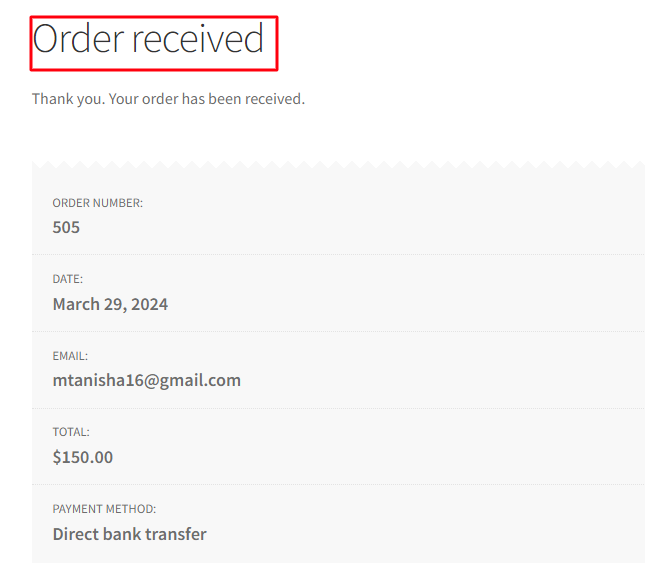
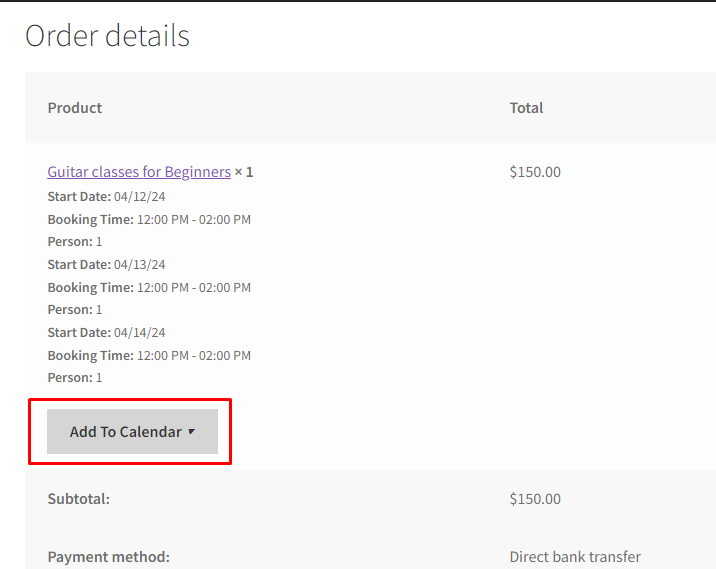
Once the customer clicks the button, they decide on which calendar they wish to add the event. Let’s say they go with the ‘Add to Google Calendar’
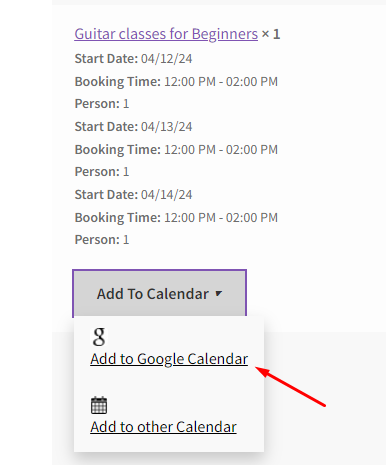
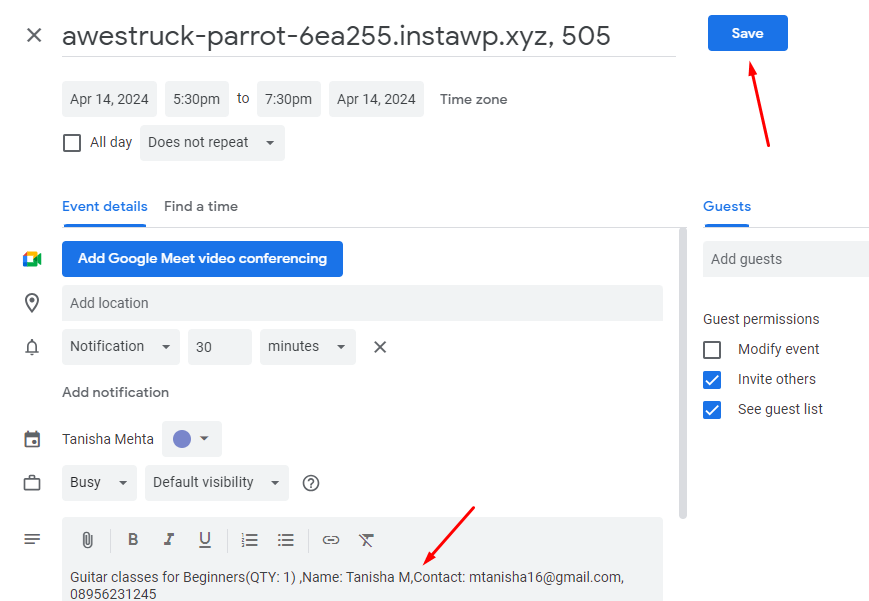
They will see the details of the event. They can click the ‘Save’ button to add it to their Google calendar.
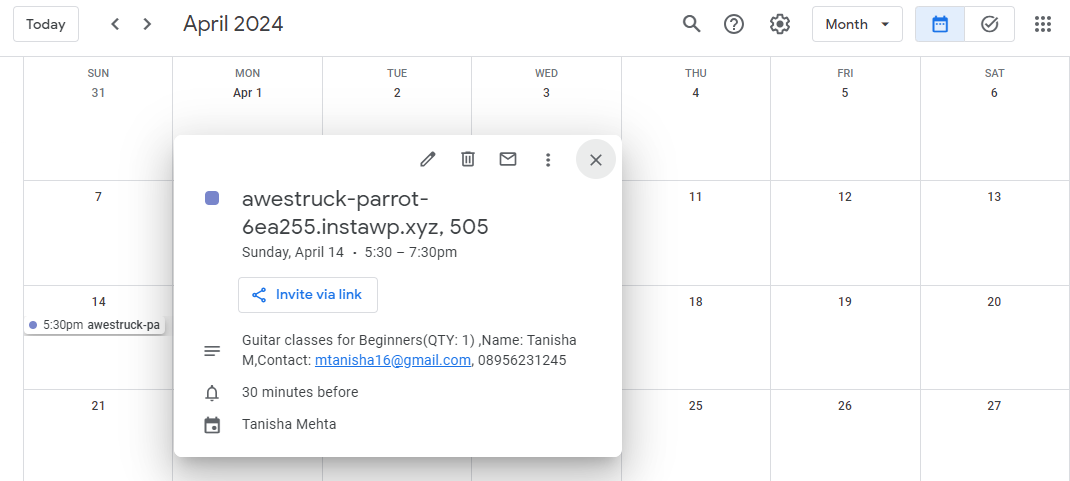
Once added, the event will look like this in their calendar:
b) Show the Add to Calendar button in the Customer notification email
Enabling this setting will show the Add to Calendar button in the customer’s notification email.
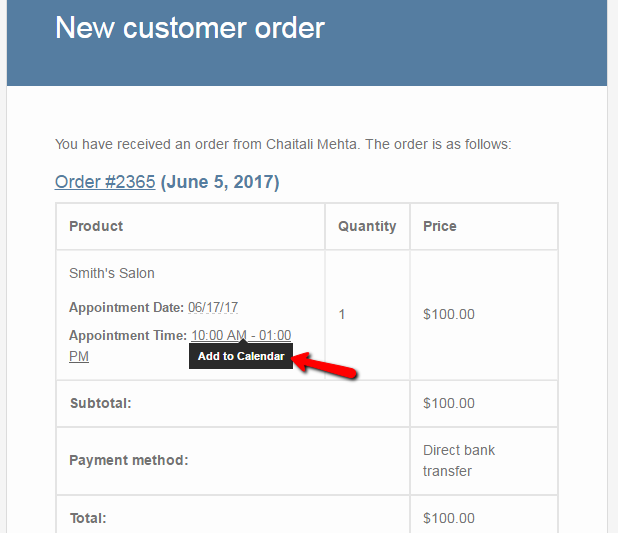
c) Show the Add to Calendar button on My Account
Enabling this setting will show the Add to Calendar button on the customer’s My Account Page > Bookings.
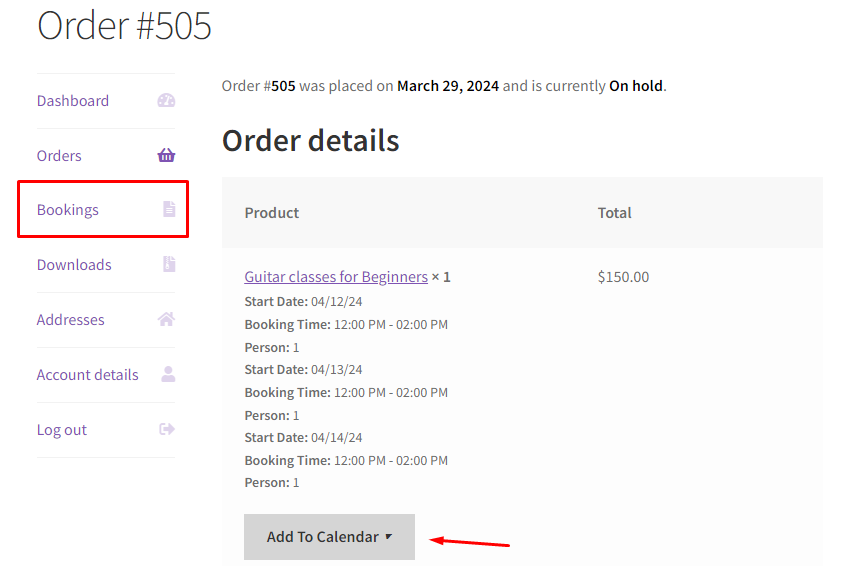
By default, all of these settings will be disabled.
3. Admin Calendar Sync Settings Dropdown
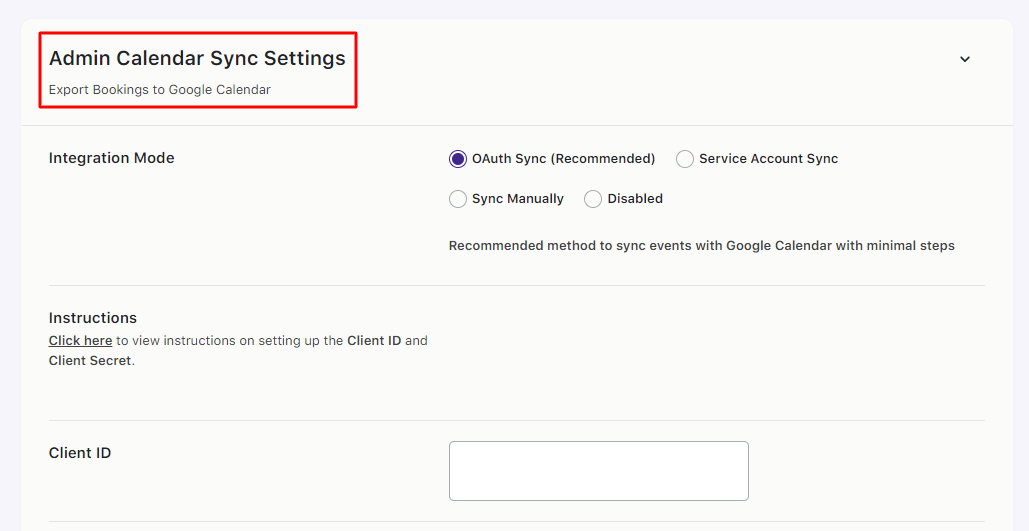
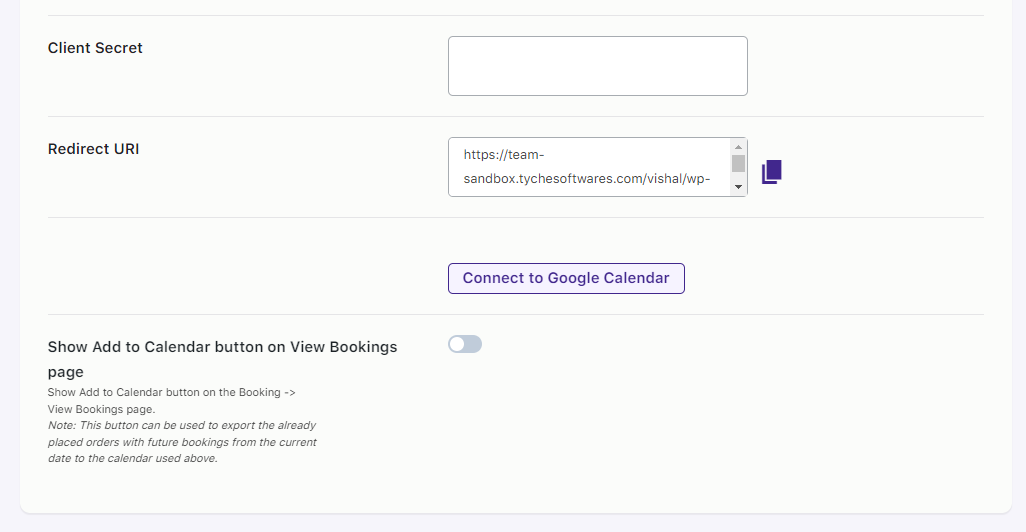
You will find the following settings here:
a) Integration Mode
You can decide the mode of integration here. The integration modes include:
i) OAuth Sync: It is recommended to use OAuth Sync as explained earlier.
ii) Service Account Sync: This is a more traditional method to sync events to Google Calendar. It will require more steps to configure. However, the end result is the same as OAuth Sync.
iii) Sync Manually: This will add an “Add to Calendar” button in Emails received on new bookings and the Order Received page. Events will then be synced manually with the click of the button.
iv) Disabled: This will disable the integration.
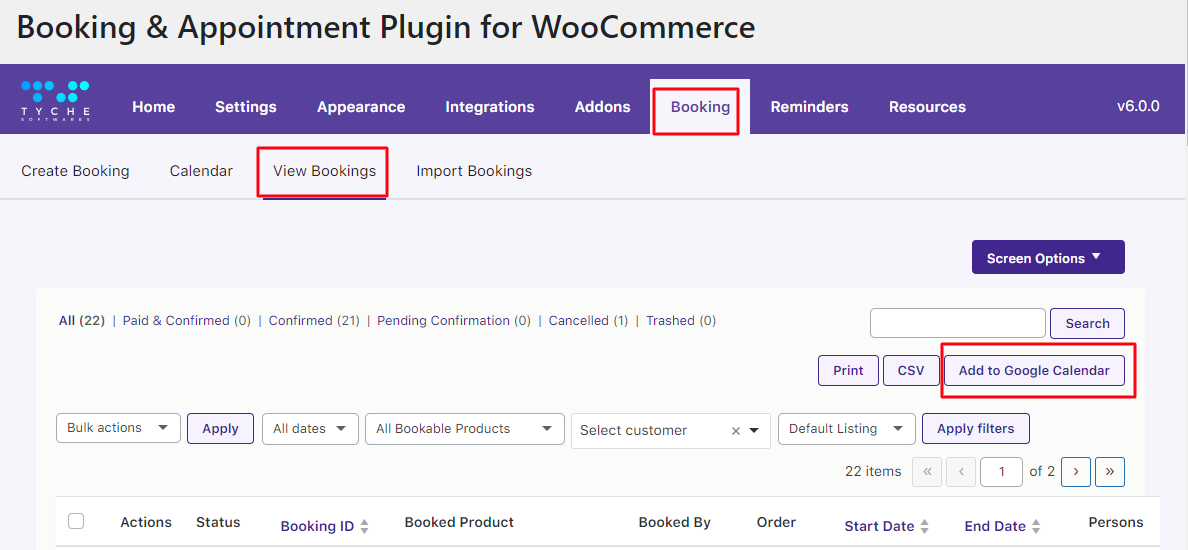
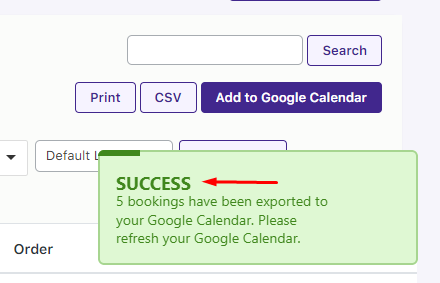
b) Show the Add to Calendar button on the View Bookings page
Enabling this setting will show the Add to Calendar button on the View Booking page.
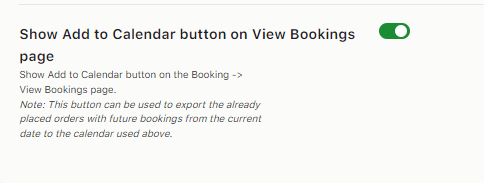
By default, this setting will be disabled.
4. Import Events dropdown
This section lets you import previous booking events using the ICS Feed URL.
Once the events have been imported, they will create a new event in your calendar based on the time and date set according to their booking.
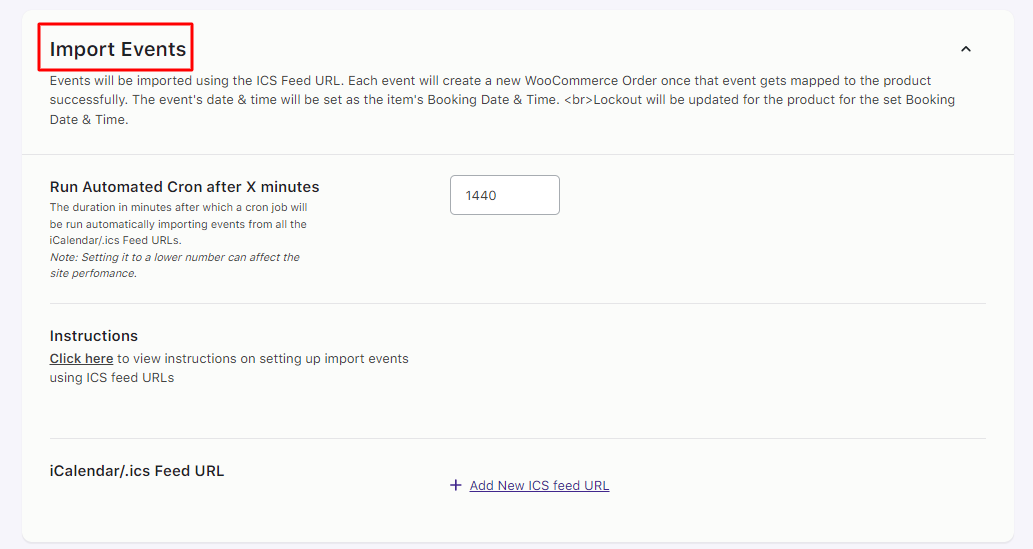
a) Run Automated Cron after X minutes
This will decide the time after which a cron will be run automatically to import events from all the iCalendar/.ICS Feed URLs.
Please note, this time will be in minutes. Additionally, setting it to a lower number can affect the site’s performance.
By default, the duration is set at 1440 minutes which is 24 hours, that is, 1 Day. You can set the run time to a number according to your needs.
b) iCalendar/.ics Feed URL
To import events, follow these instructions:
Open your Google Calendar by clicking this link: https://www.google.com/calendar/render
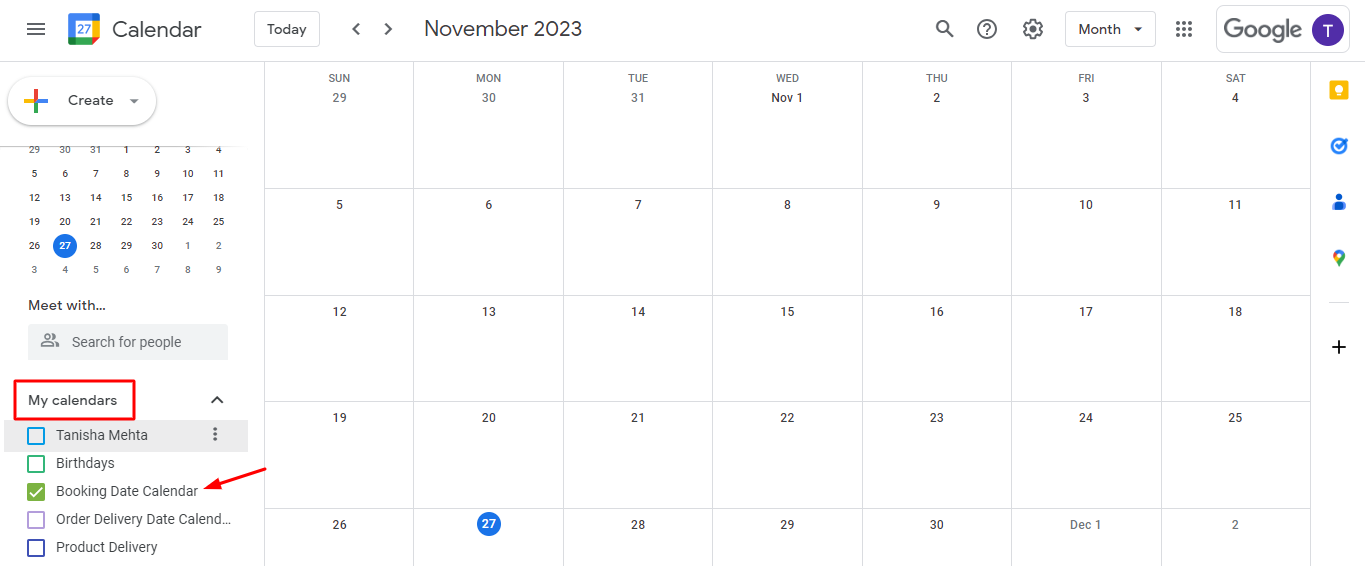
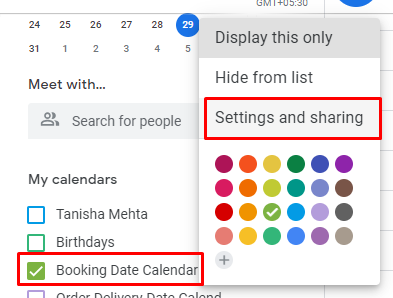
Select the calendar to be imported and click the three dots beside it. Find the Settings and Sharing option. Select it.
If your calendar is public, go to Integrate Calendar and copy the public address in the iCal format link.
If it is private, copy the Secret address in iCal format.
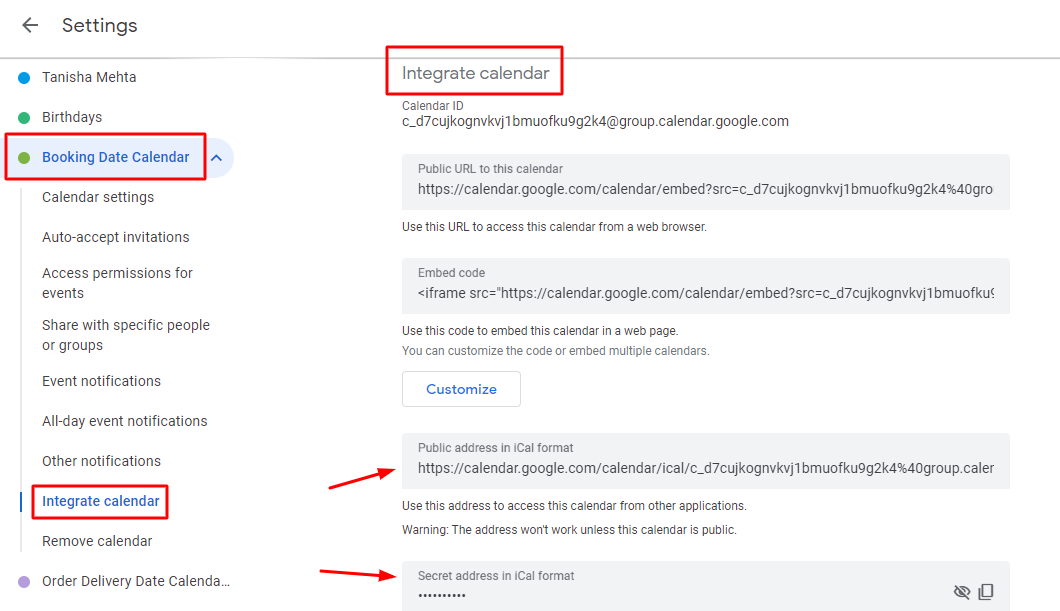
Paste this link in the text box under the iCalendar/.ics Feed URL.

Save the URL. You will receive the ‘ICS URL has been saved’ message when it is successfully done.

Click on the “Import” button to import the events from the calendar. You will see the Importing taking place:

Once it is successful, you will see the following message:

Similarly, you can import multiple calendars using ICS feeds. Add them using the Add New ICS Feed URL button.
To see the various Imported Bookings (Google Events), go to the Booking > Import Bookings tab.
You can add a Product to the Google Event and under the Actions column, you can even Map this event.
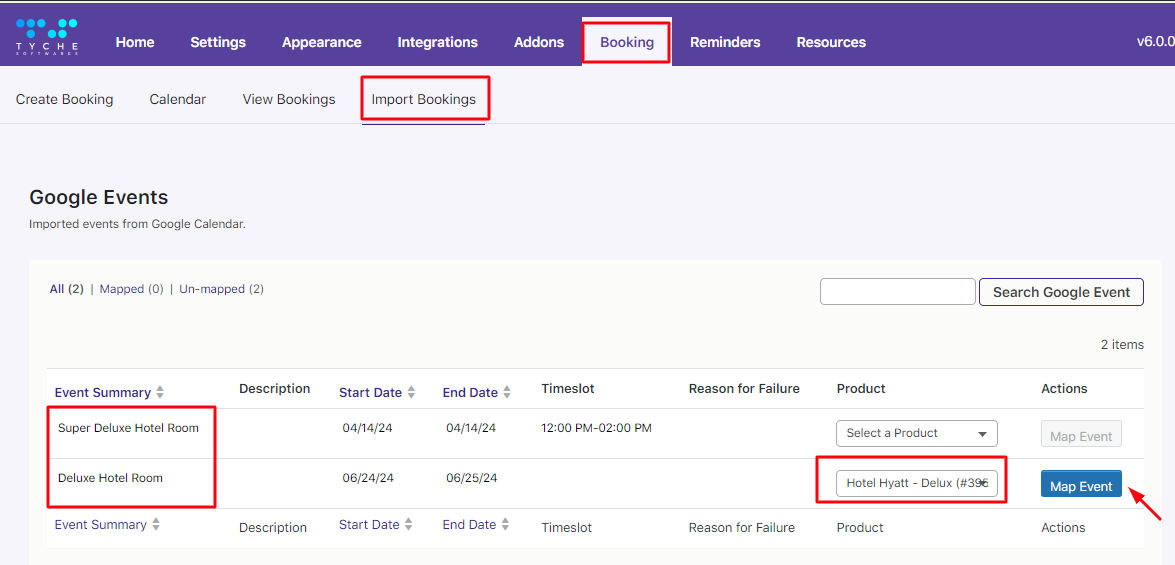
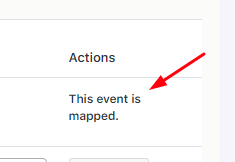
Once Mapping the event is successful, you will see the following message:
Phew! You have successfully integrated the Booking & Appointment plugin for WooCommerce with Google Calendar!