The Recurring Bookings addon allows customers to create recurring bookings with the help of the WooCommerce Subscriptions plugin.
1. Pre-requisites
2. Installation
3. Setting up recurring bookings with different booking types
4. Frontend Behavior
5. Reschedule bookings for a subscription
1. Pre-requisites
The Recurring Bookings addon requires the following to be installed:
2. Installation
Download the zip file and install it from the Plugins > Add New Plugin.
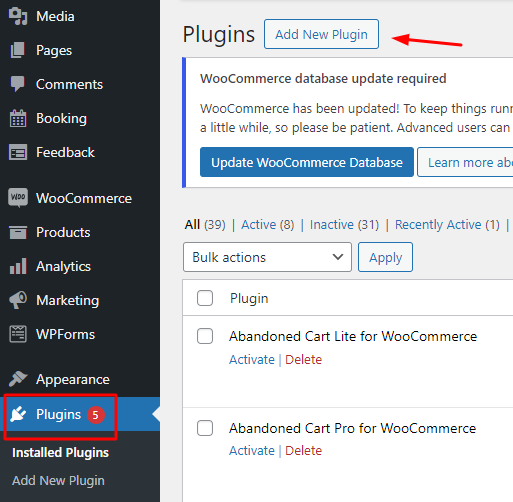
Activate the plugin in your WordPress admin area.

Go to Booking & Appointment > Addons > Recurring Bookings > Settings.
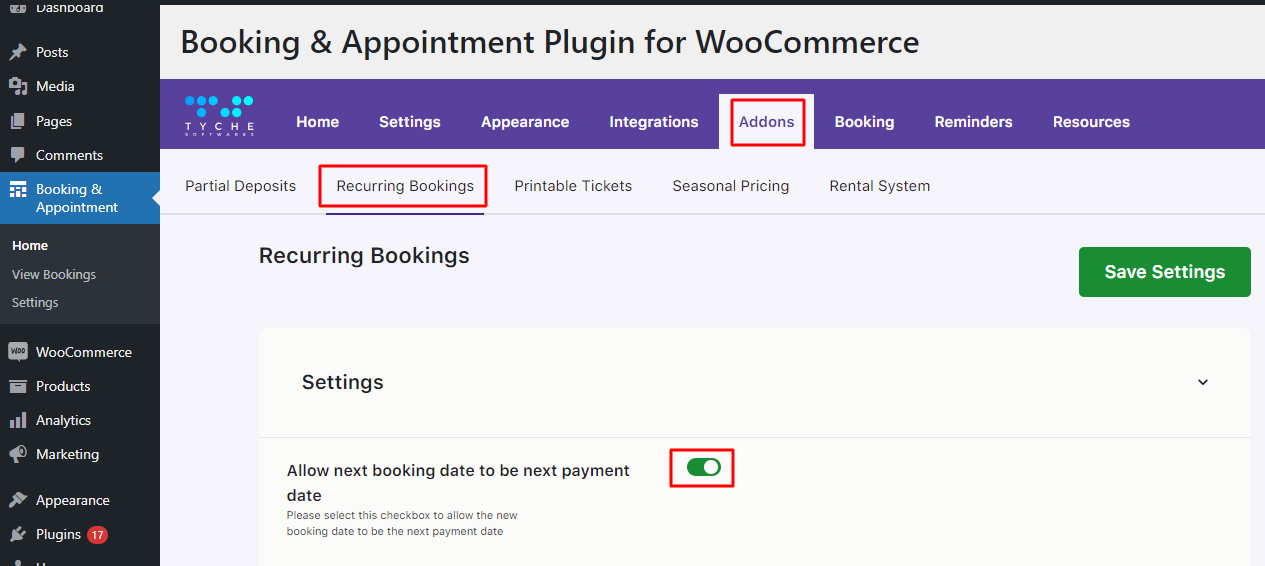
Here you can enable allowing the next booking date to be the next payment date.
3. Setting up recurring bookings with different booking types
The Booking & Appointment has different types of bookings.
These booking types can be used to create recurring bookings with your Simple Subscriptions as well as Variable Subscriptions.
Let’s consider an example of a recurring booking for the booking type Fixed Time for a simple subscription.
Let’s say that we are offering Piano lessons on an hourly basis every week.
You will have to create a Simple Subscription with the help of the WooCommerce Subscription plugin as shown below:
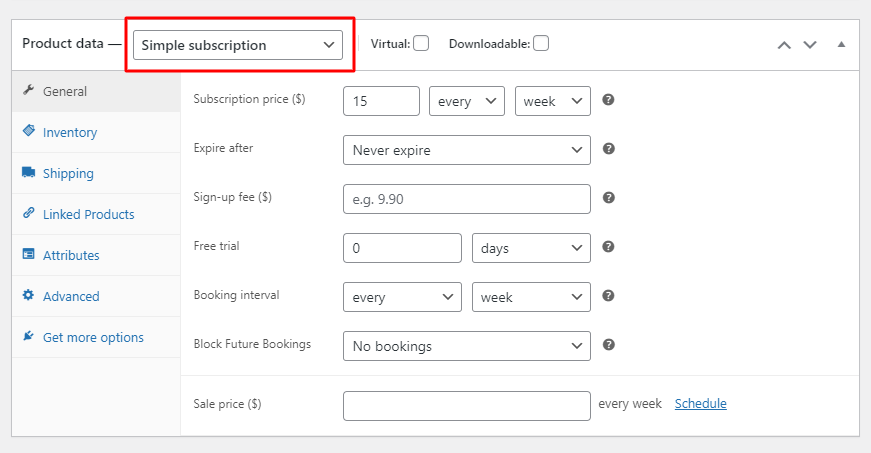
Simple Subscription
You have to ensure that your simple subscription charges a price of $15 every week & that it expires Never.
Set the Booking interval as ‘every week’. This would be different from your subscription order interval & essentially would be the interval that you would be creating for your bookings.
You can even Block any of your future bookings in the ‘Block Future Bookings’ section. For now, you can select the No bookings.
If you wish to create future bookings for subscriptions for an x number of days, then you can fill that in here.
The Booking details need to be configured based on the booking type for which you want recurring bookings.
Here you need to select the booking type as Fixed Time because you need to create fixed time slots for this product.
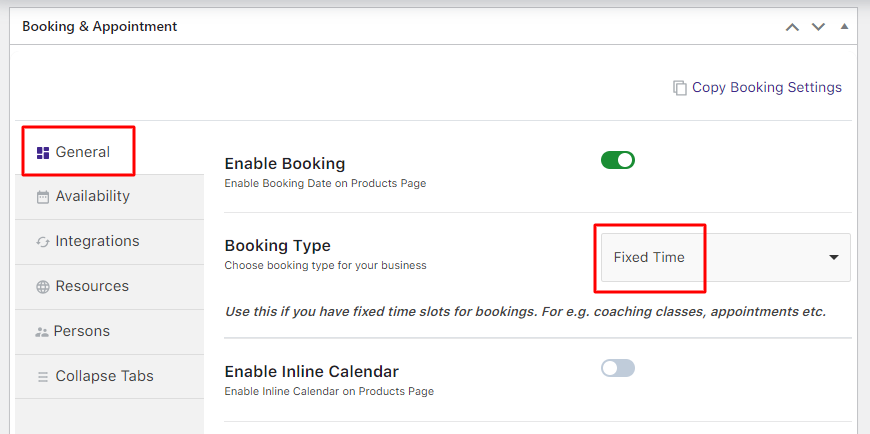
Booking Type for recurring bookings
Now you need to configure other options for your weekdays and time slots.
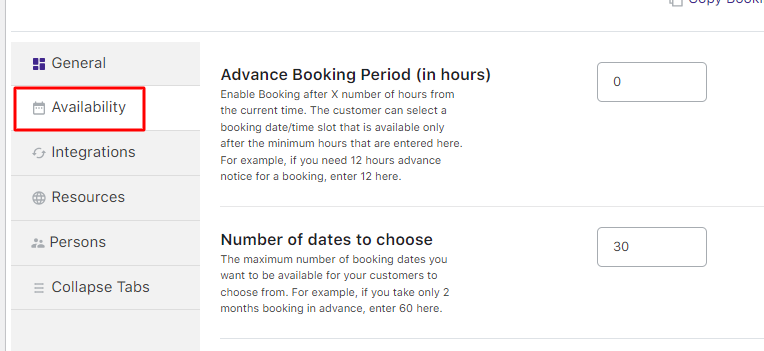
Clicking on the Availability tab gives you the option to add multiple configurations for a particular day and time slot.
Here you can set a special price of $10 for Wednesday. You can even add maximum slots for days.
In this case, let’s avoid adding any.
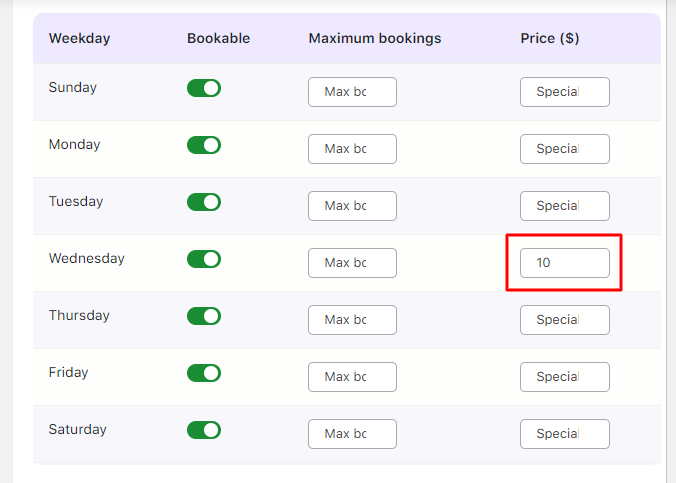
Applying special price
Now you shall be adding lockouts for the time slots you have added so that you have fixed bookings for that time slot.
Customers will not be allowed to book for that time slot once the count is reached.
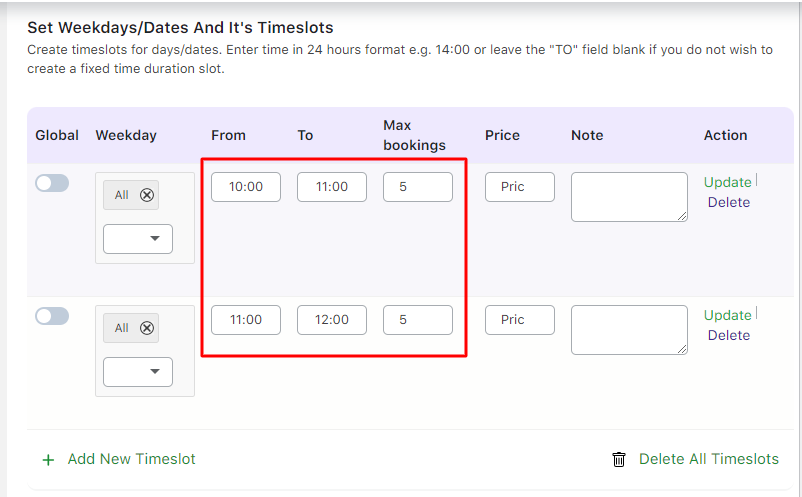
Time slots setting
As displayed above, you have 2 different time slots for all the days and you have the maximum bookings for each time slot as 5.
Once 5 bookings are made or if the quantity reaches 5 while placing the order, the time slot will not be available for further booking.
Maximum bookings count will also work with Variable Subscriptions or Simple Subscriptions with Attributes.
The piano lesson subscription is set to go and can start receiving recurring bookings.
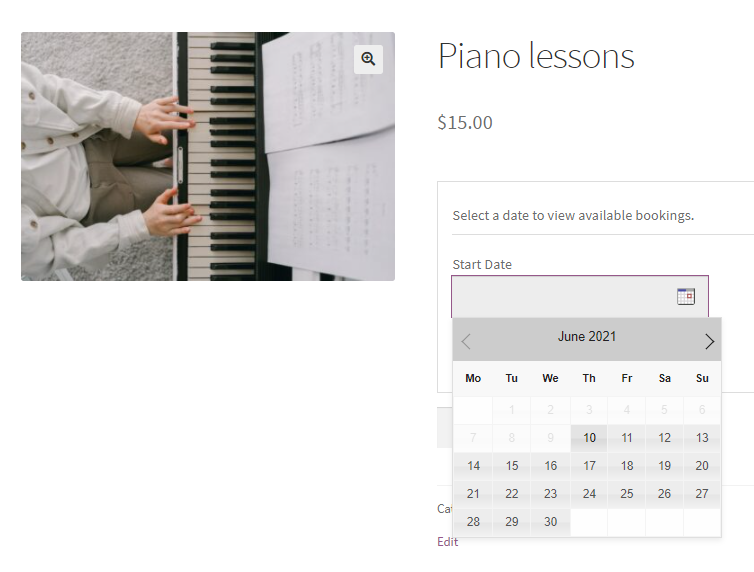
Product Page
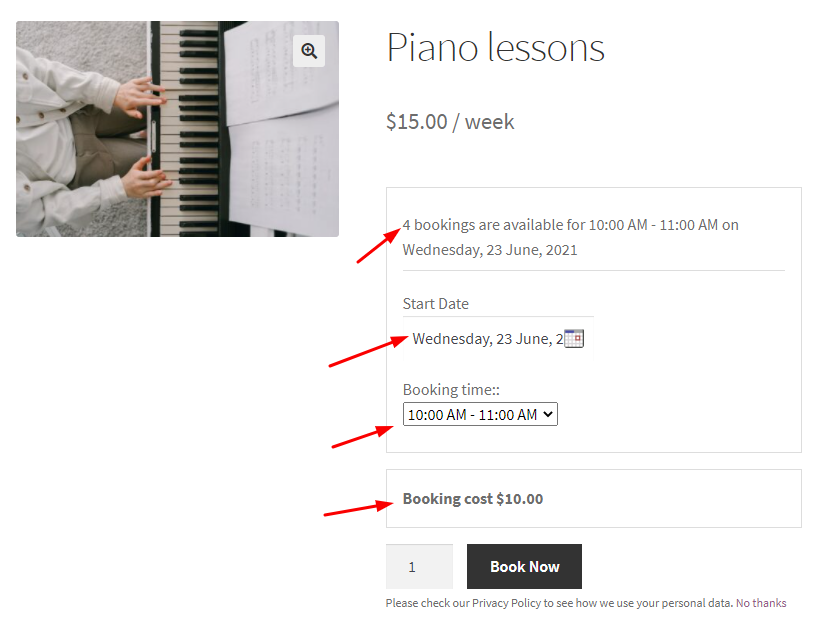
On selecting a course start date and time slot, (Note: you can change the labels from Booking & Appointment > Appearance > Labels & Messages) availability for the particular date and time will be displayed.
Also if any special price is applicable for that day, the effective price shall be displayed.
For example, you had a special price of $10 on Wednesdays. Selecting a date and time on Wednesday will have an effective price of $10.
4. Frontend Behavior
Now that the subscription is ready along with the booking details, customers can start placing orders and start with the lessons.
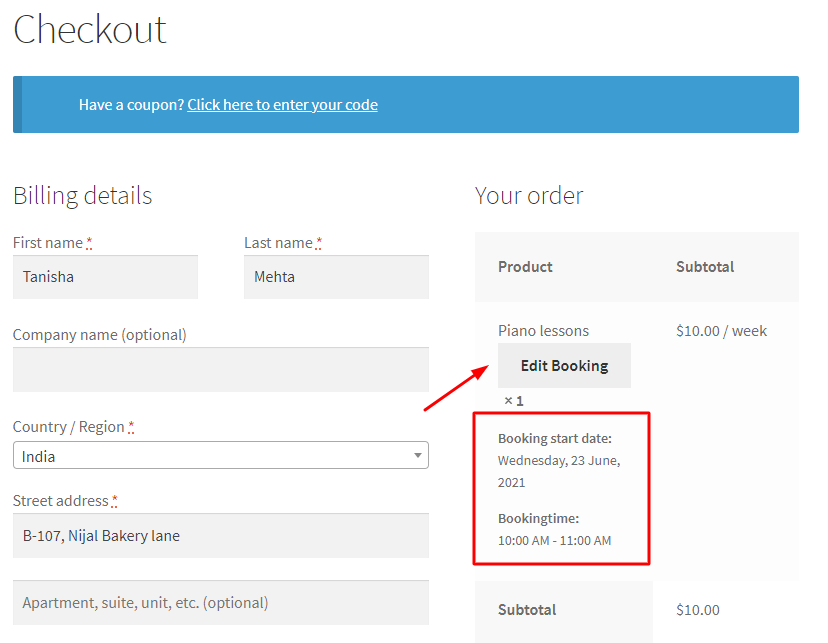
Consider an order placed for booking a slot on 23rd June 2021 from 10:00 AM to 11:00 AM.
Here’s how the customer’s Checkout Page will look like:
Checkout Page
It is important to note that if you have enabled Editing Booking (Booking & Appointment > Settings > Global > Booking Settings dropdown) then the customer will have the option of editing their bookings on the Cart Page or the Checkout Page.
This setting will be applicable for both current orders as well as renewal orders.
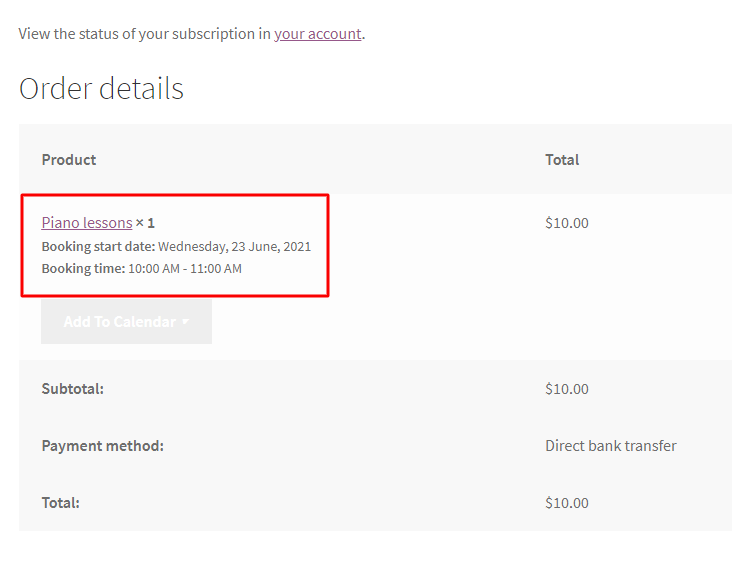
Next, here’s how the Thank You page will appear:
Order Received Page
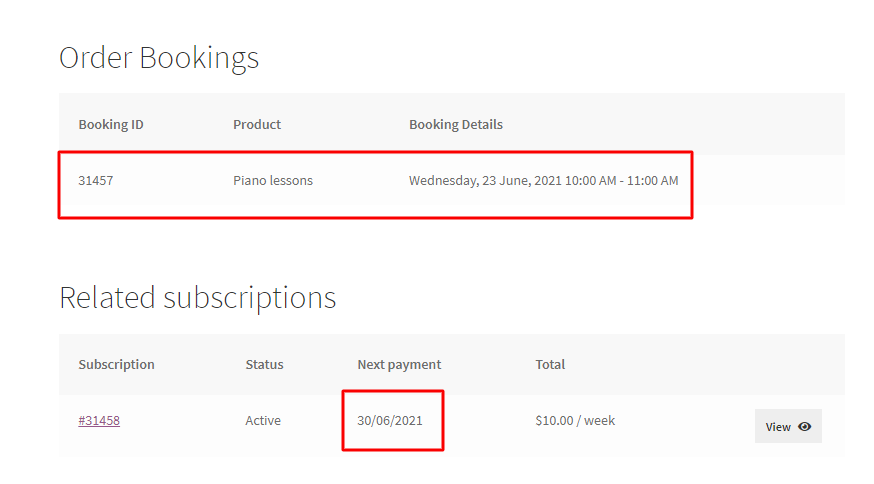
Scrolling down, you will also see the Renewal Subscription under the title ‘Related Subscriptions’ as shown below:
Related Subscriptions details
As per the WooCommerce Subscription plugin, a renewal order will be created on 30th June 2021.
This renewal order will have booking details one week after the last order booking details (since the subscription period was weekly) i.e. 30th June 2021 from 10:00 AM to 11:00 AM.
If the subscription payment is set to automatic the booking will be automatically generated and added to the completed order.
If the payment for the subscription is set to manual, customers will receive a Pay Now link in the email which will redirect to the checkout page.
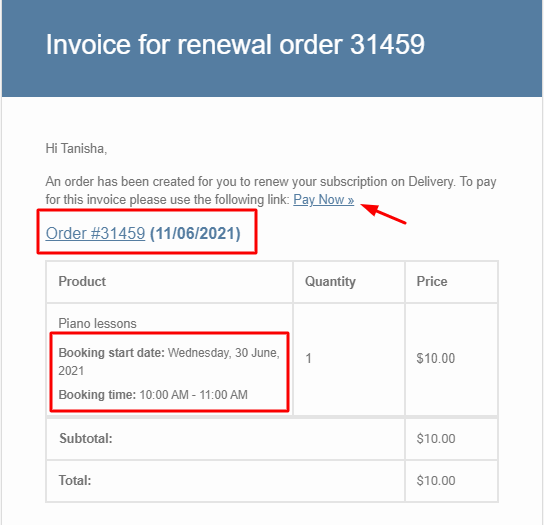
Order Invoice for the Renewal Booking Subscription
On clicking Pay Now, the customer will be redirected to the checkout page as shown below:
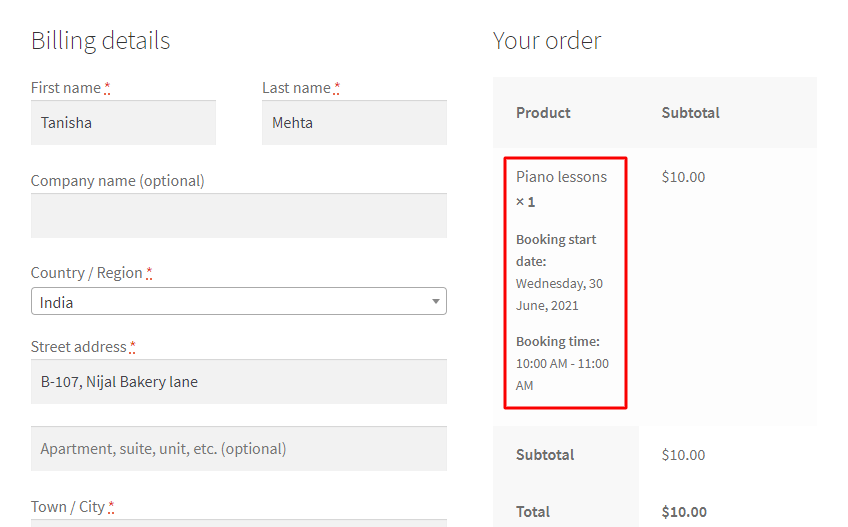
Checkout Page for the Renewal Booking Subscription
5. Reschedule bookings for a subscription
Along with the option to edit bookings for manual renewal of orders, customers can also be provided the flexibility to reschedule these bookings from the My Account > Orders page.
The shop manager can enable or disable this flexibility and also set the number of days before rescheduling can be allowed.
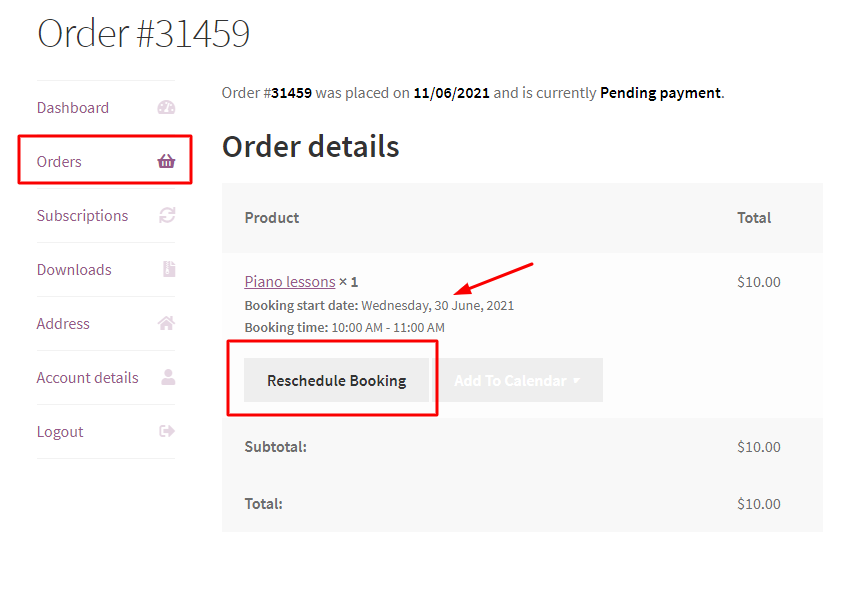
Reschedule Booking option for Renewal Booking Subscription
If you want to configure recurring bookings for other booking types then the process is similar to the one mentioned above.
However detailed steps about the other booking types can be found here.