Some Booking & Appointment Plugin for WooCommerce plugin users often wish to send WooCommerce Bookings to different Google Calendars for each Bookable product. For this, you set up Google Calendar Sync from the Product Level.
It allows you to automatically export the bookings for a WooCommerce product to Google Calendar in real time. This makes it convenient for the users to keep records of each product’s bookings in different calendars.
A. What is Google Calendar Sync?
Google Calendar Sync is an integration process that allows you to synchronize your calendars to any device like mobile, tablet, laptop, etc.
By setting Google Calendar Sync, your events will be added to the Google Calendar.
You can also set up alerts for incoming messages and upcoming events. This helps in easier and faster access to all important booking dates.
B. Setting Up Google Calendar Sync At Product Level
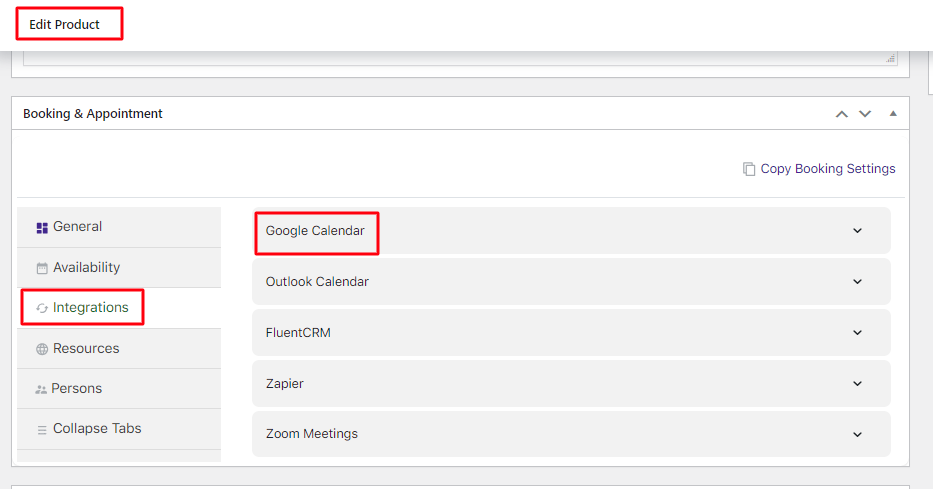
You can find the Google Calendar Sync tab under the Booking & Appointment meta box.
Go to Integrations > Google Calendar as shown below:
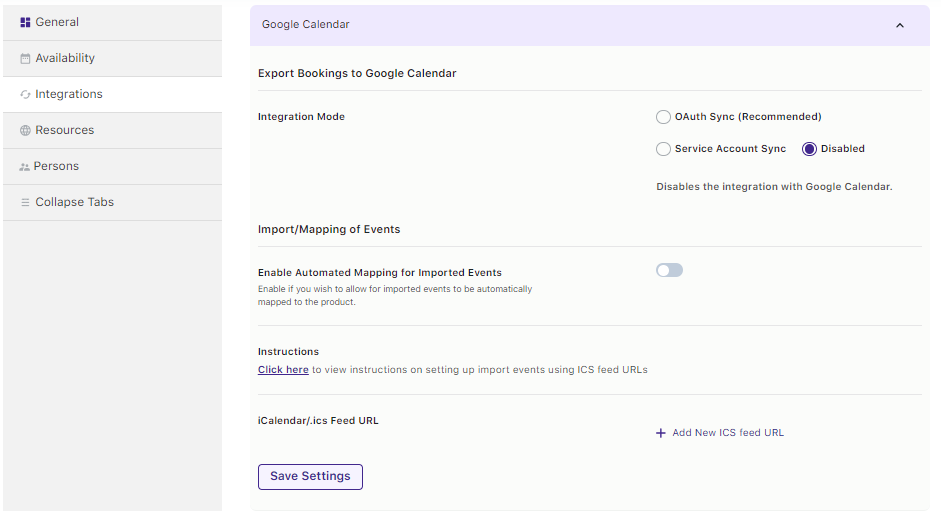
Here’s what the Google Calendar dropdown will look like:
Go to the Google Developers Console to set up a project. Log in to your Google account and create a new project by clicking on the top left side panel “Select a project” dropdown.
Click on the Create Project icon.

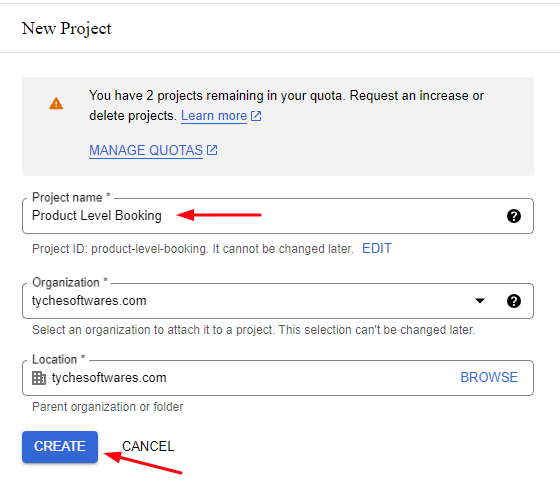
As you click on Create Project button a popup will be displayed asking for the Project Name.
Enter a Project Name of your preference. (e.g. Product Level Booking).
As you enter the name, the Project ID will be displayed automatically below the Project Name.
Click on the Create button after entering the details.
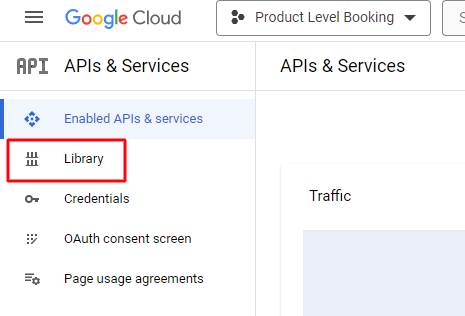
Once the project is created, go to the Library tab on the left-hand menu.
Search for Calendar API. Select it.

Click on Enable. Go to Credentials > Create credentials button.
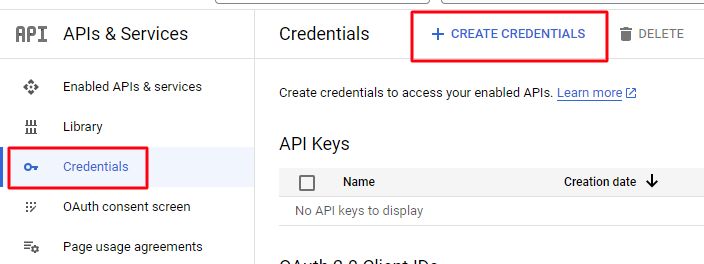
On clicking the Create credentials button, you will get different ways to create credentials.
You can go with an OAuth client ID or a Service account.
A. Integration via OAuth Sync
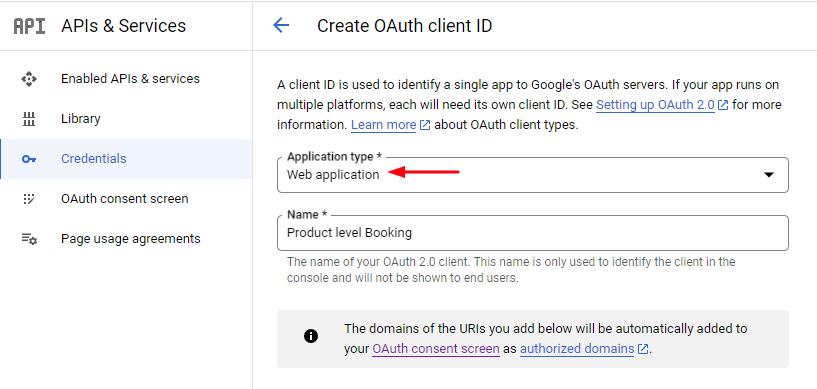
Click on OAuth Client ID in the drop-down.

You need to select the Application type as Web Application. Give it a name.
Proceed forward by adding the Authorised redirect URIs and clicking the Create button.
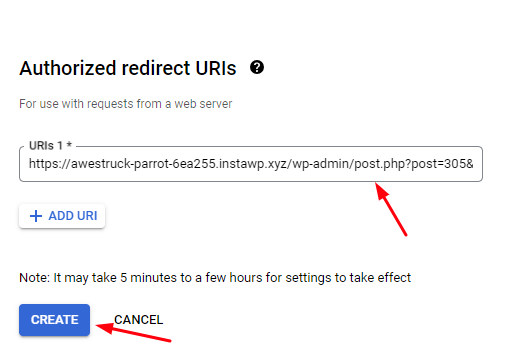
You will find the Authorized Redirect URI by going to the Edit Product Page of your product.
Go to the Booking meta box > Integrations > Google Calendar.
Select OAuth Sync under Integration Mode. Scroll down to find the Redirect URI. Copy and paste the link.
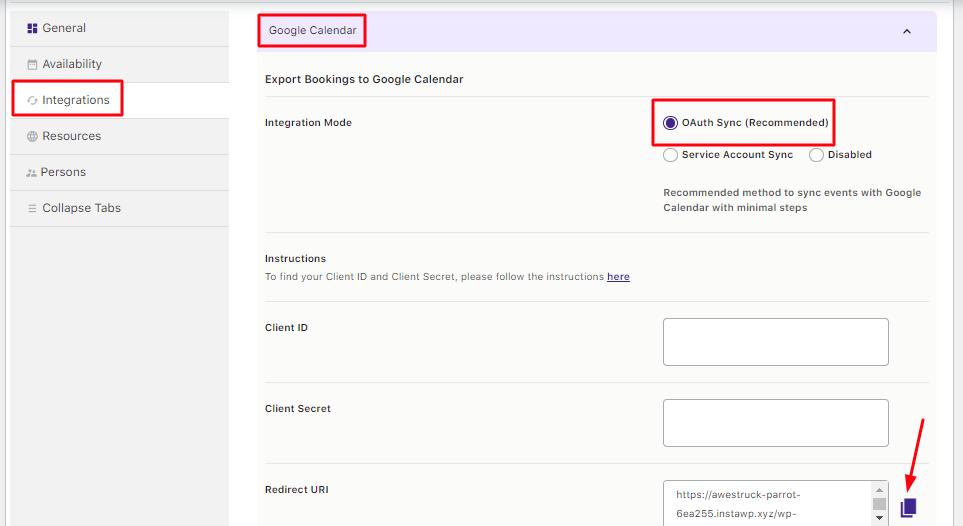
This will generate the OAuth Client and a popup will be displayed with your Client ID and Client Secret. Copy them and store them in a safe place.
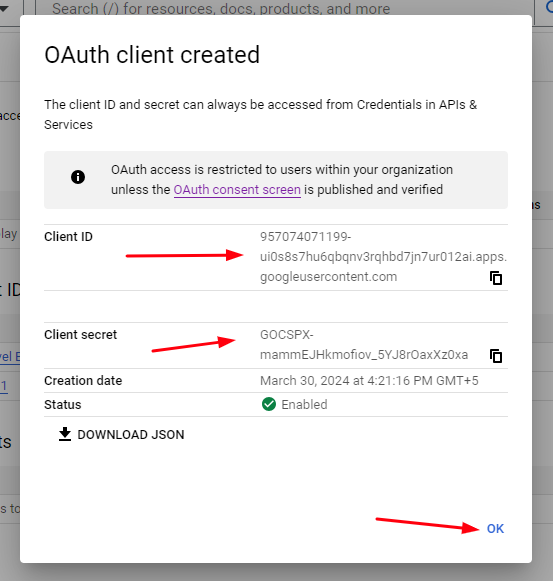
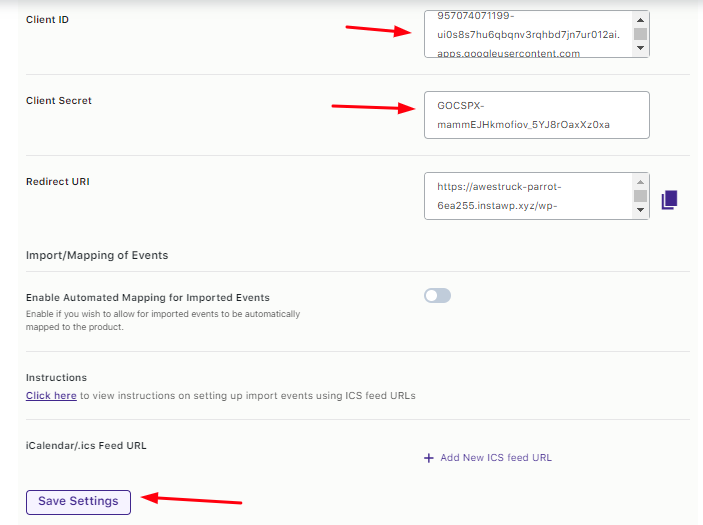
Go back to the Edit Product Page > Booking meta box > Integrations > Google Calendar.
Fill in the Client ID and Client Secret fields. Click on Save Settings.
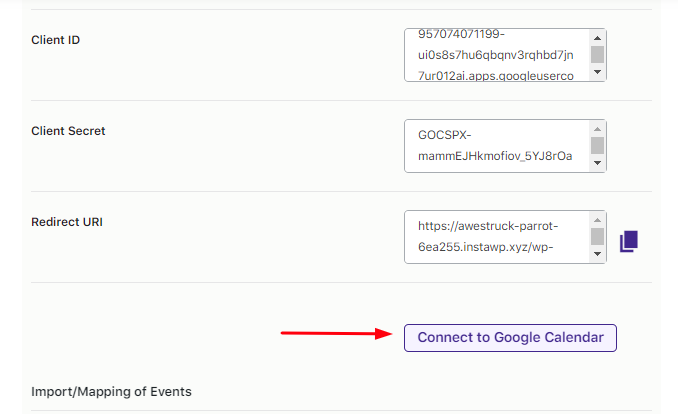
Click the Connect to Google Calendar button.
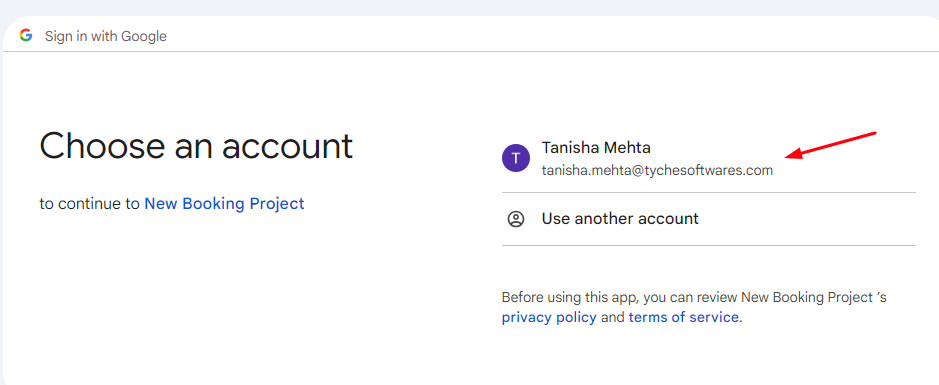
Allow the integration to take place.
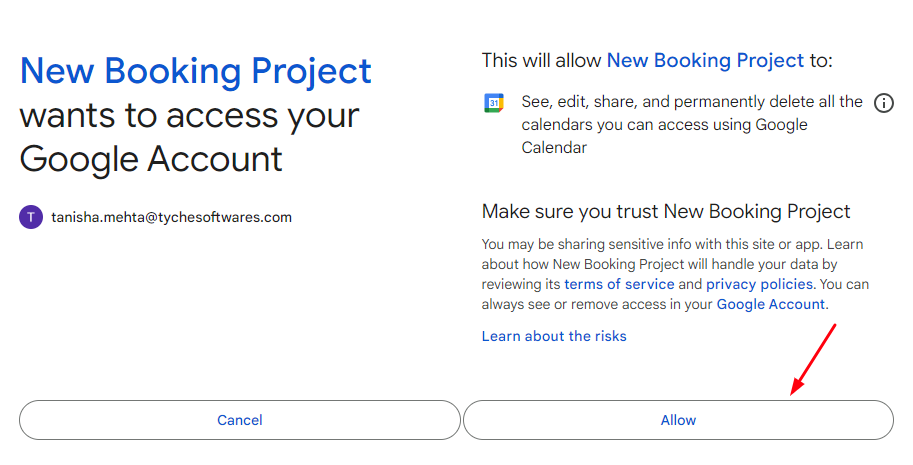
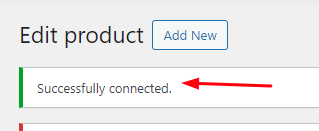
Once the integration is successful, you will see the following messages on the Edit product page:
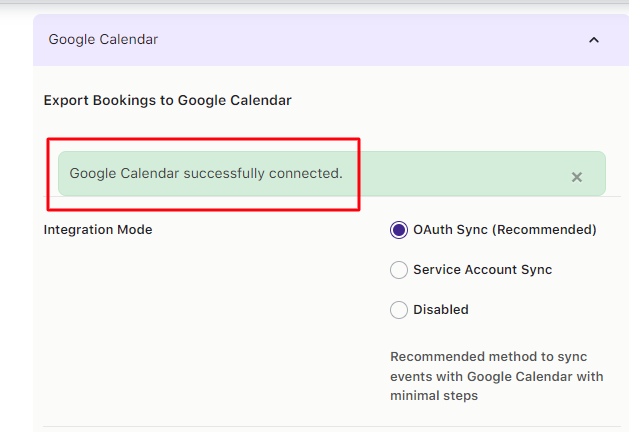
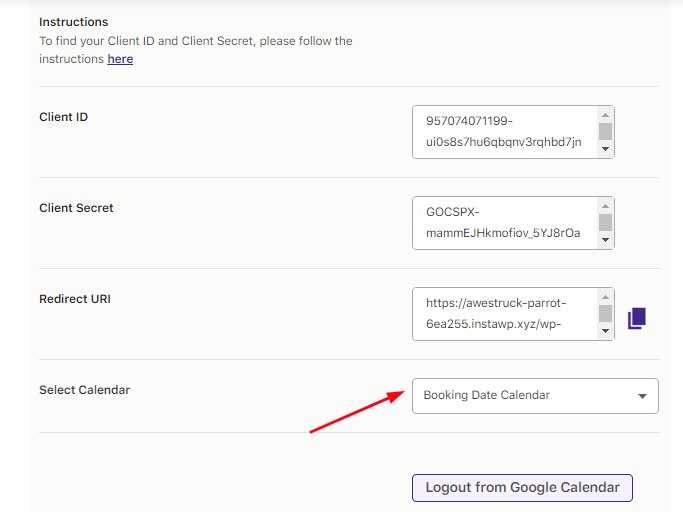
Select the Calendar where the new bookings will be added.
You can even enable automated mapping for events that will get imported.
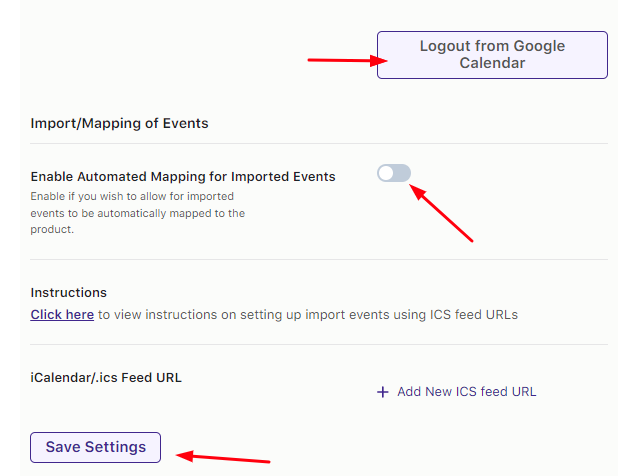
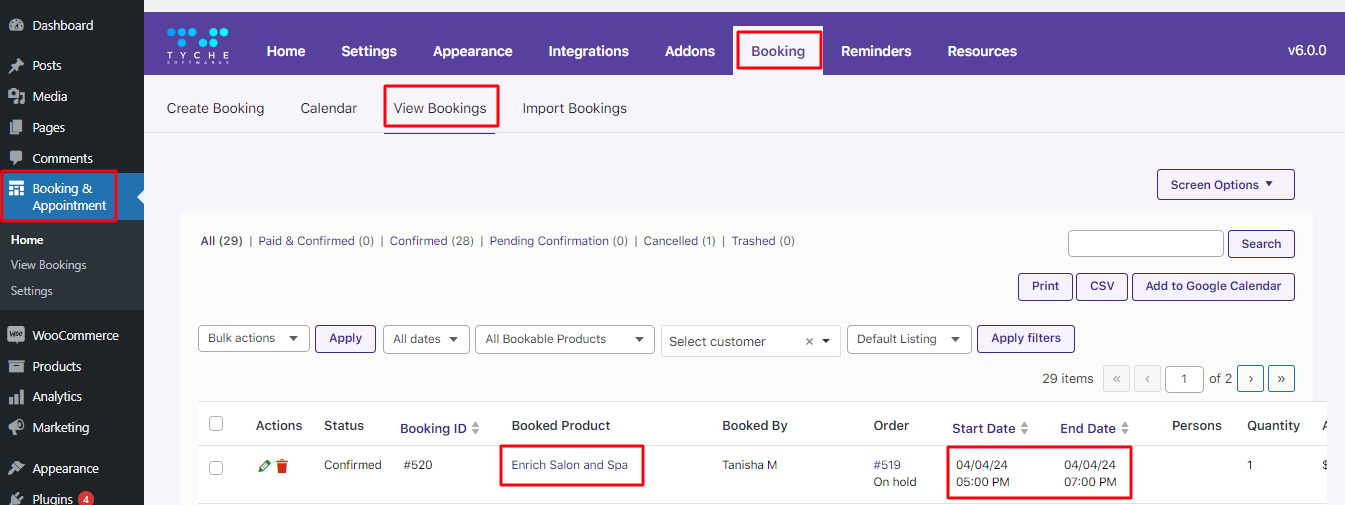
For instance, you have integrated the product ‘Enrich Salon and Spa’ with Google Calendar at the product level.
A customer places a booking for this salon. The booking date is 4th April 2024.
This booking can be seen by going to Booking & Appointment > Booking > View Booking as shown below:
This same event will get imported to your Google Calendar and will appear like this:
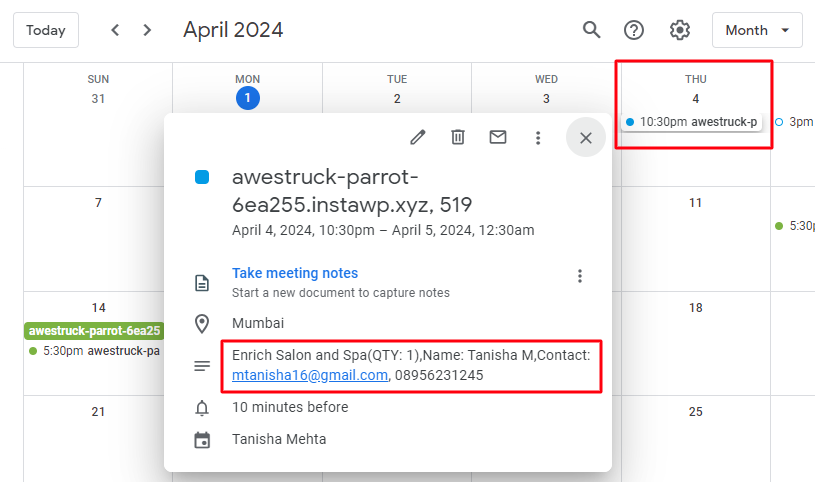
The booking event will show all the details such as Site Address, Booking ID, Booking Date, Booking Time, Name of the customer, and product name.
B. Integration via Service Account
To create a service account, click the Create Credentials > Service Account Key.

Add details such as the service account name and click the Create and Continue button.
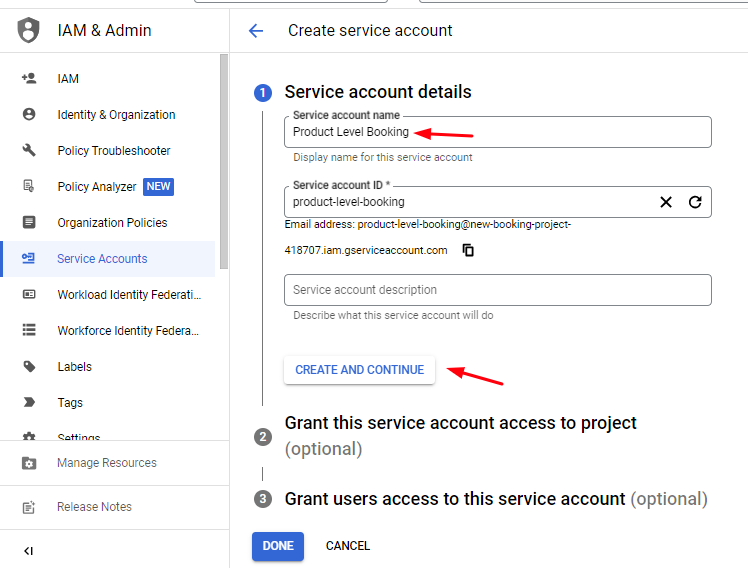
Move ahead and add a role. Select the dropdown.
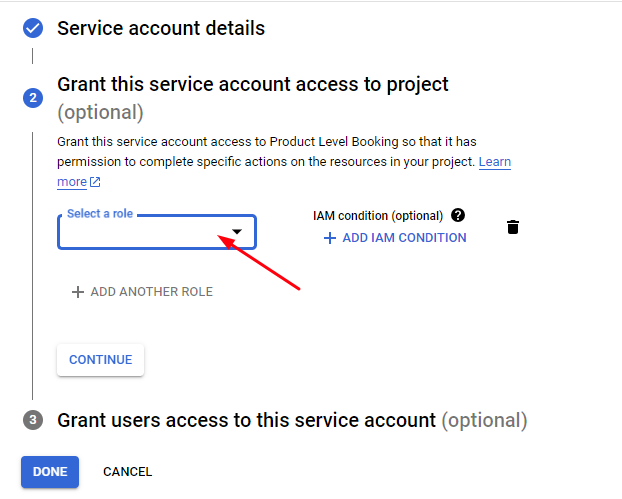
Go to Projects > Owner. Select that as your role.
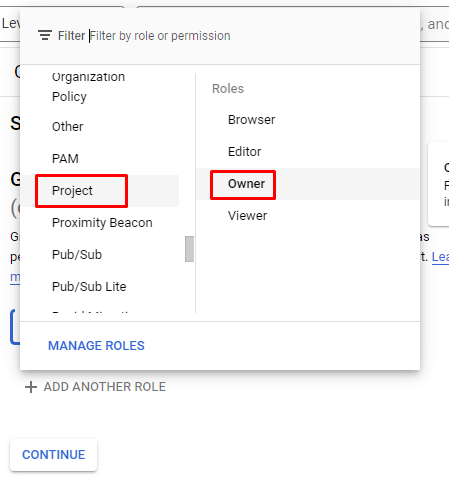
Click the Continue button.
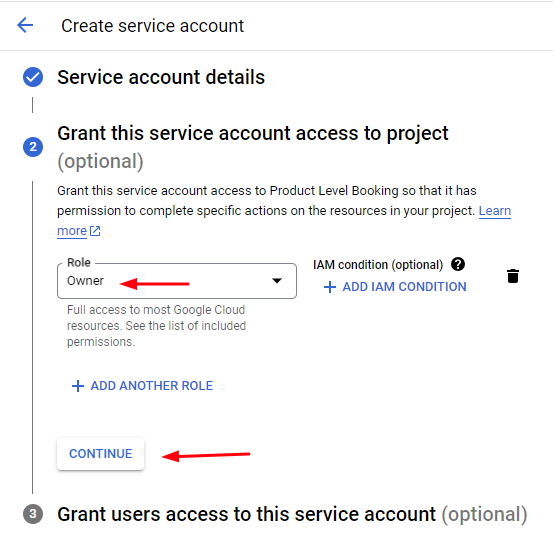
Grant users access by adding their email addresses. Once done, click the Done button.
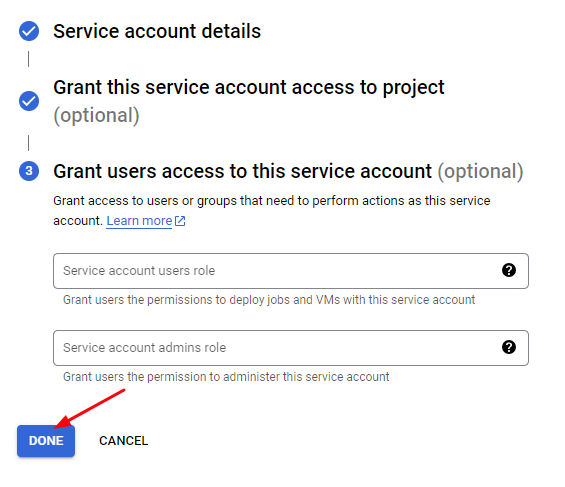
Go to the Service Accounts tab > Keys > Add Key.
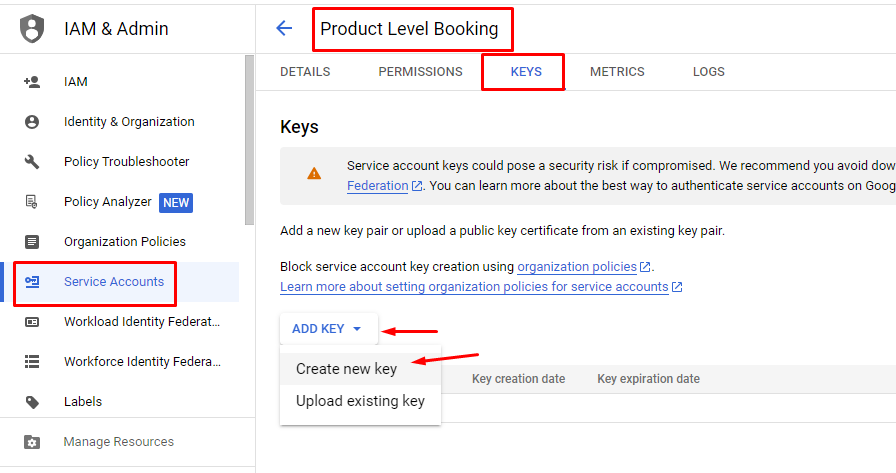
Set the Key Type to P12 and click on Create.
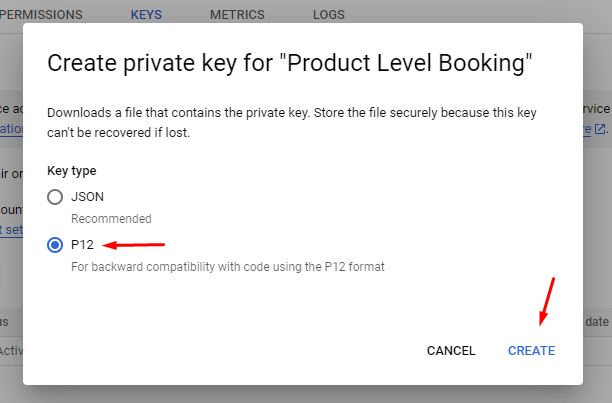
A file with extension .p12 will be downloaded and a pop-up will be displayed stating that the file has been saved on your device.

Please keep this file saved as this file needs to be uploaded to wp-content/plugins/woocommerce-booking/includes/gcal/key/ using the FTP client program.
This file is required as you will grant access to your Google Calendar account even if you are not online. So this file serves as a proof of your consent to access your Google calendar account.
Note: This file cannot be uploaded in any other way. If you do not have FTP access, ask the website admin to do it for you.
Copy the Key File Name (excluding the .p12 extension).

Then paste it into Booking > Google Calendar Sync Settings > Key File Name while creating the product.

To get the service account email address, go to Create Credentials > Manage Service Accounts. Here you will find details of Service accounts for your project as shown below.
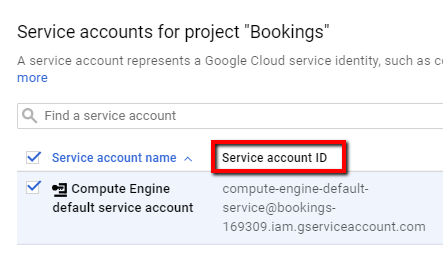
Copy the Service Account ID and save it in Booking > Google Calendar Sync Settings > Service Account Email Address field.

Open your Google Calendar by clicking this link: https://www.google.com/calendar/render.
Go to My Calendars > Create New Calendar.
Please try not to use the Primary Calendar.
Give the Calendar a name of your preference (e.g. Bookings & Appointments Details) and ensure that the Calendar Timezone matches the WordPress Timezone on your site.
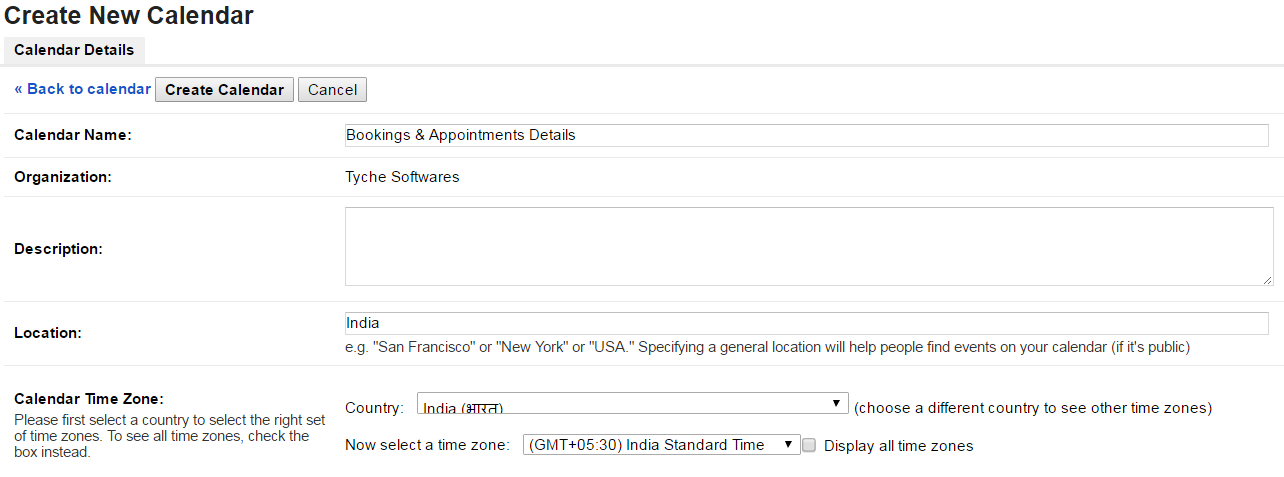
There will be a Share with specific people option below Timezone. You need to enter the email address entered in the Service Account Email Address field.
Set the “Permission Settings” to Make changes to events‘ and click Add Person. This will ensure that the application can create new events.
Lastly, click on Create Calendar.

Once the calendar is created, copy the Calendar ID from the Calendar Settings. Paste it by going to your Product’s Edit page > Booking & Appointment metabox > Google Calendar > Calendar to be used.

Since all the 3 fields have been filled, Publish your product. Then click the Test Connection link to test the connection.
If your connection is successful a message will be displayed below:

Note: If you get an error message, double-check your settings.
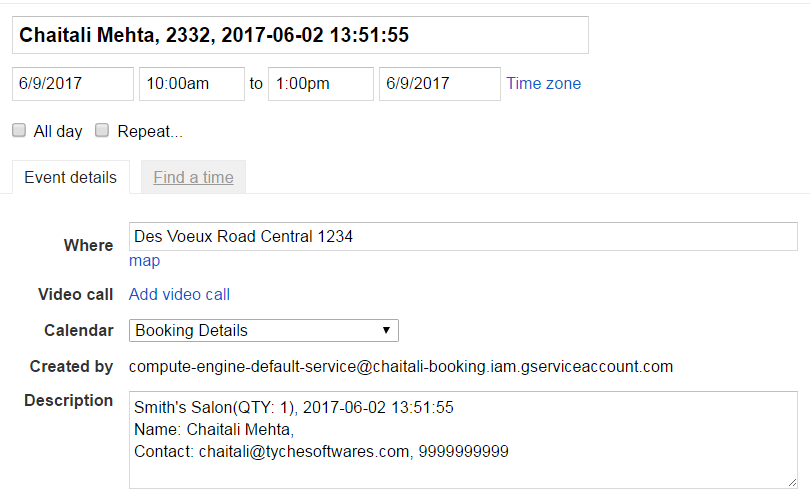
As the connection is successful it should add a current dated event in your calendar as shown below:

Once the settings are done, the plugin will export the bookings to the calendar as soon as an order is placed.

The event will contain the bookings and client details based on the merge tags inserted in Booking > Settings > Google Calendar Sync > General Settings.
In conclusion, exporting bookings automatically to Google Calendar at a product level helps the user keep records of each product booking in different calendars. It also ensures easier and faster access to all your bookings on suitable devices in different calendars.
The Booking & Appointment Plugin for WooCommerce also provides manual sync of the bookings to any other calendar using ICS files. By using ICS files we can manually export our bookings to external calendars.